
Grand Cherokee 2WD L6-4.0L VIN S (1997)
(11) Tighten the mounting screws to 2.2 N.m (20 in. lbs.).
Glove Box
GLOVE BOX
WARNING: ON VEHICLES EQUIPPED WITH AIRBAGS, REFER TO PASSIVE RESTRAINT SYSTEMS BEFORE ATTEMPTING
STEERING WHEEL, STEERING COLUMN, OR INSTRUMENT PANEL COMPONENT DIAGNOSIS OR SERVICE. FAILURE TO TAKE
THE PROPER PRECAUTIONS COULD RESULT IN ACCIDENTAL AIRBAG DEPLOYMENT AND POSSIBLE PERSONAL INJURY.
(1) Disconnect and isolate the battery negative cable.
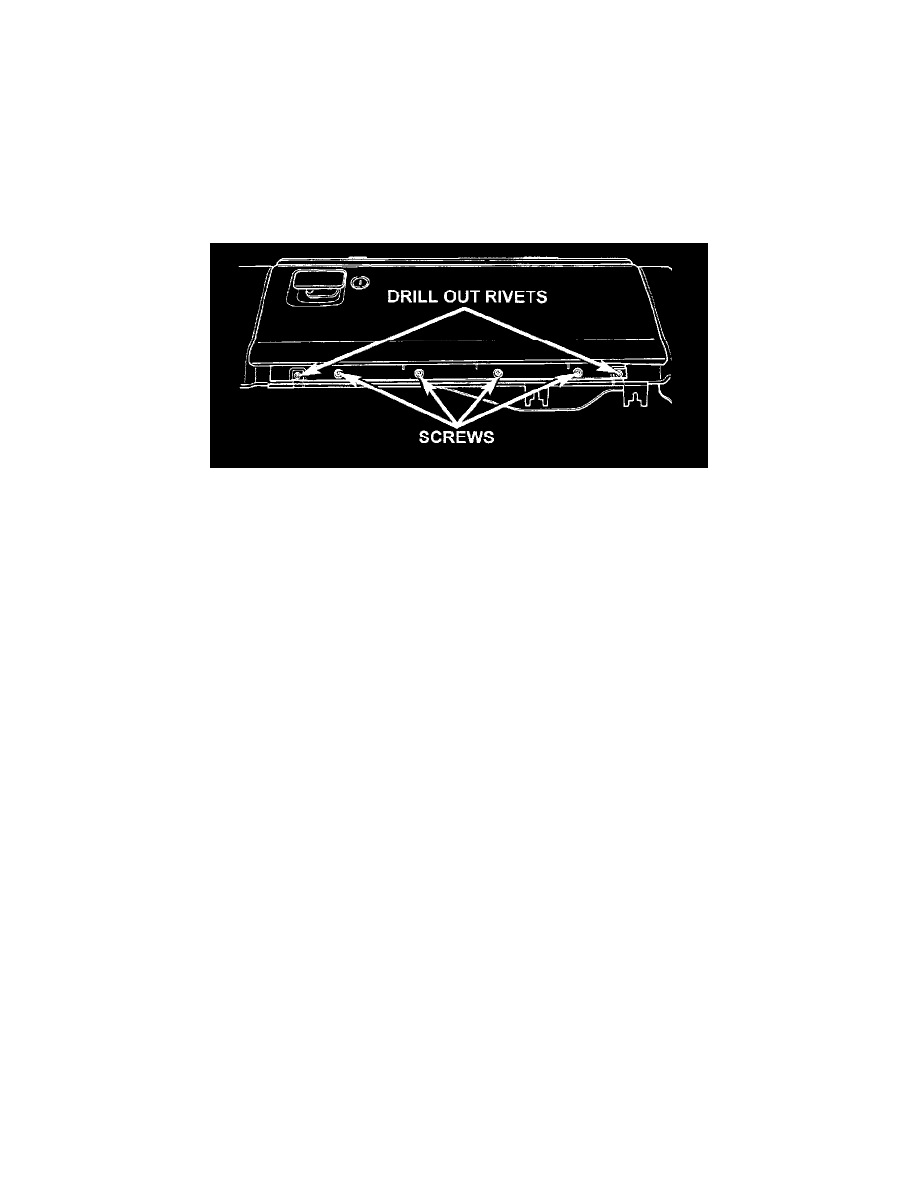
Glove Box Remove/Install
(2) Drill out the two rivets securing the glove box hinge to the lower right instrument panel module.
NOTE: The rivets are used to ease assembly during the manufacturing process, but do not require replacement following service.
(3) Remove the four screws securing the glove box hinge to the instrument panel armature.
(4) Release the glove box latch and remove the glove box from the lower right instrument panel module glove box opening.
(5) Reverse the removal procedures to install.
Glove Box Components
GLOVE BOX COMPONENTS
WARNING: ON VEHICLES EQUIPPED WITH AIRBAGS, REFER TO PASSIVE RESTRAINT SYSTEMS BEFORE ATTEMPTING
STEERING WHEEL, STEERING COLUMN, OR INSTRUMENT PANEL COMPONENT DIAGNOSIS OR SERVICE. FAILURE TO TAKE
THE PROPER PRECAUTIONS COULD RESULT IN ACCIDENTAL AIRBAG DEPLOYMENT AND POSSIBLE PERSONAL INJURY.
The glove box bezel is the only component of the glove box that can be serviced without glove box removal. All other components will require the glove
box to be removed from the lower right instrument panel module as described.
Glove Box Bezel
(1) Open the glove box.