
Grand Cherokee 2WD L6-4.0L VIN S (1997)
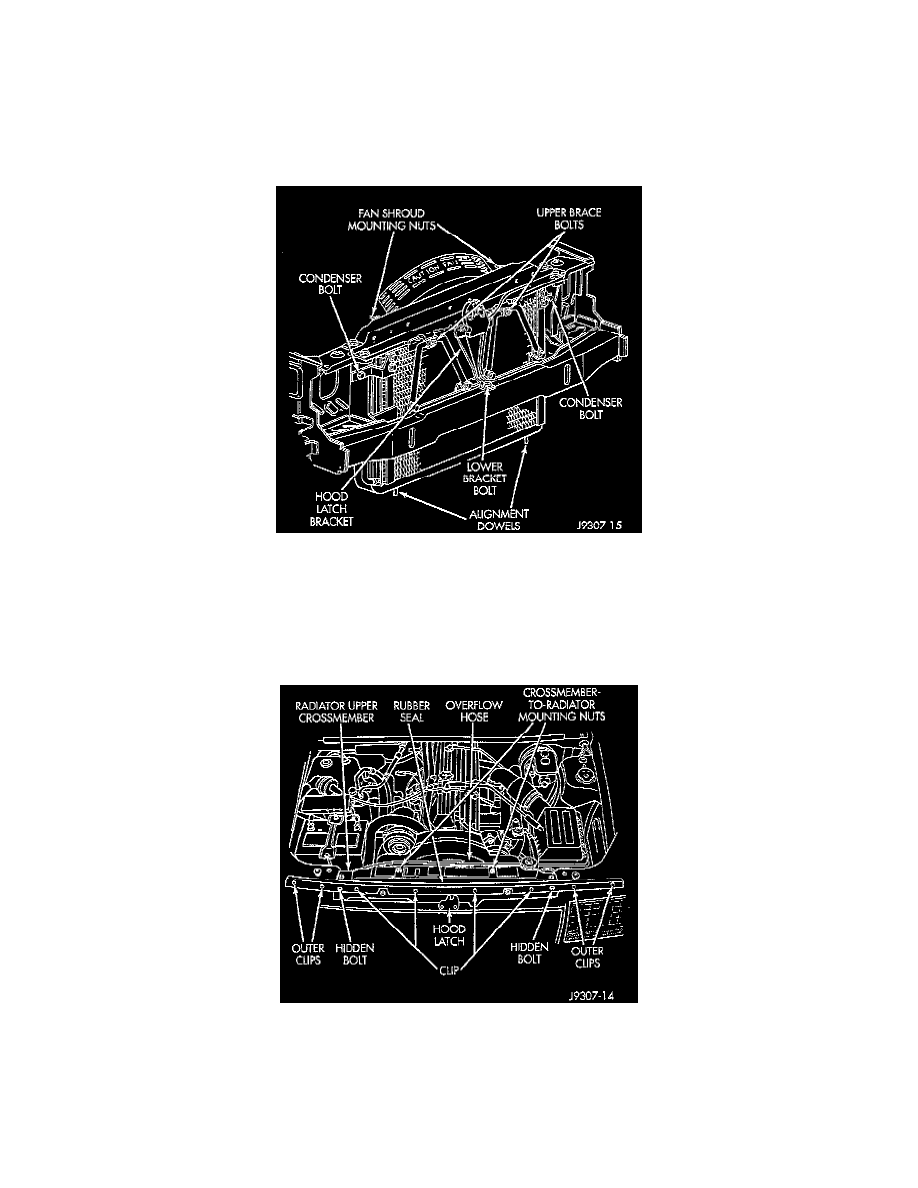
2. Not equipped with air conditioning: Gently lower the radiator into the vehicle. Guide the two radiator alignment dowels through the holes in the
rubber air seals. Continue to guide the alignment dowels into the rubber grommets located in lower radiator crossmember.
3. Connect the lower radiator hose and hose clamp to radiator.
CAUTION: The tangs on the hose clamp must be positioned straight down.
4. Connect the lower radiator hose at the water pump.
5. Connect the upper radiator hose at the radiator.
6. Equipped with air conditioning: Install the two A/C condenser- to-radiator mounting bolts. These two bolts are also used to retain the rubber air
seal to the sides of radiator.
7. Not equipped with A/C: Install the two bolts retaining the rubber air seal to sides of radiator.
8. Install coolant reserve/overflow tank hose at radiator.
9. If radiator-to-upper crossmember rubber isolators were removed from radiator, install them. Tighten mounting nuts to 3 Nm (24 - 36 inch lbs.)
torque. Position upper radiator crossmember to radiator.
10. Working through grill opening, install and tighten the hood latch support bracket-to-lower frame crossmember bolt.
11. Install the four bolts securing the radiator upper crossmember to the body.
12. Install two nuts securing the radiator to the upper radiator crossmember. Tighten nuts to 2 Nm (18 - 21 inch lbs.) torque.
13. Install the upper bolt to each radiator brace.
14. Install the grill.
15. Install the rubber seal to the four (outer) seal mounting clips on vehicle body. Press down on clips until seated.
16. Install the transmission cooler lines to radiator. Refer to Transmission and Drivetrain.
17. Position the fan assembly and fan shroud (as one unit) to the vehicle.