
Grand Cherokee 2WD L6-4.0L VIN S (1997)
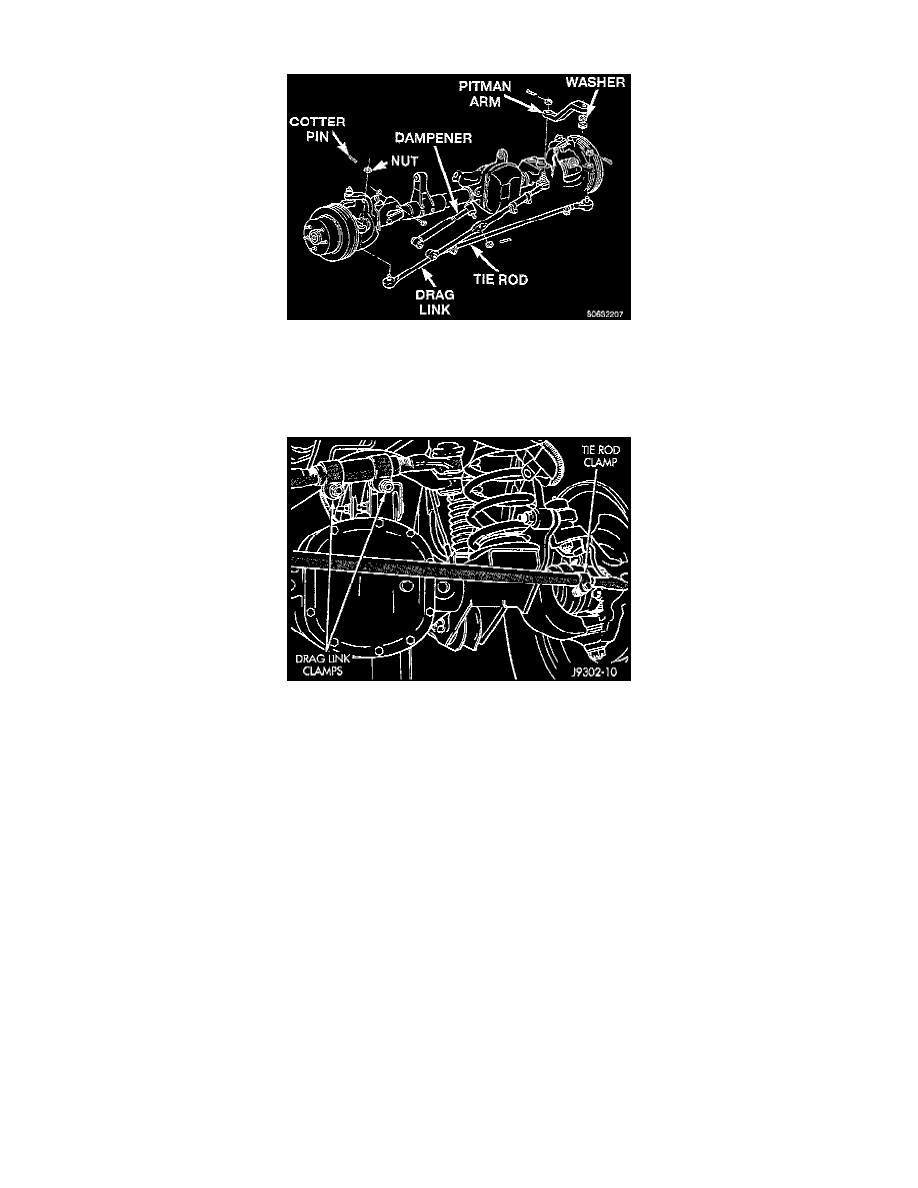
Drag Link: Service and Repair
REMOVAL
1. Remove the cotter pins and nuts at the steering knuckle and drag link.
2. Remove the steering dampener ball stud from the drag link with a puller tool.
3. Remove the drag link from the steering knuckle with a puller tool. Remove the same for tie rod and pitman arm.
4. If necessary, loosen the end clamp bolts and remove the tie rod end from the link.
INSTALLATION
1. Install the drag link adjustment sleeve and tie rod end. Position clamp bolts.
2. Position the drag link at the steering linkage. Install the drag link to the steering knuckle nut. Do the same for the tie rod and pitman arm.
3. Tighten the nut at the steering knuckle to 47 Nm (35 ft. lbs.). Tighten the pitman nut to 81 Nm (60 ft. lbs.) and tie rod ball stud nut to 47 Nm (35
ft. lbs.). Install new cotter pins and bend end 60°.
4. Install the steering dampener onto the drag link and tighten the nut to 74 Nm (55 ft. lbs.). Install a new cotter pin and bend end 60°.