
Grand Cherokee 2WD V6-3.7L (2008)
5. Install the connector locking wedge, if required, and reconnect the connector to its mating half/component.
6. Re-tape the wire harness starting at 1-1/2 inches behind the connector and 2 inches past the repair.
7. Connect battery and test all affected systems.
Wire Splicing
STANDARD PROCEDURE - WIRE SPLICING
When splicing a wire, it is important that the correct gage be used as shown in the wiring diagrams.
1. Remove one-half (1/2) inch of insulation from each wire that needs to be spliced.
2. Place a piece of adhesive lined heat shrink tubing on one side of the wire. Make sure the tubing will be long enough to cover and seal the entire
repair area.
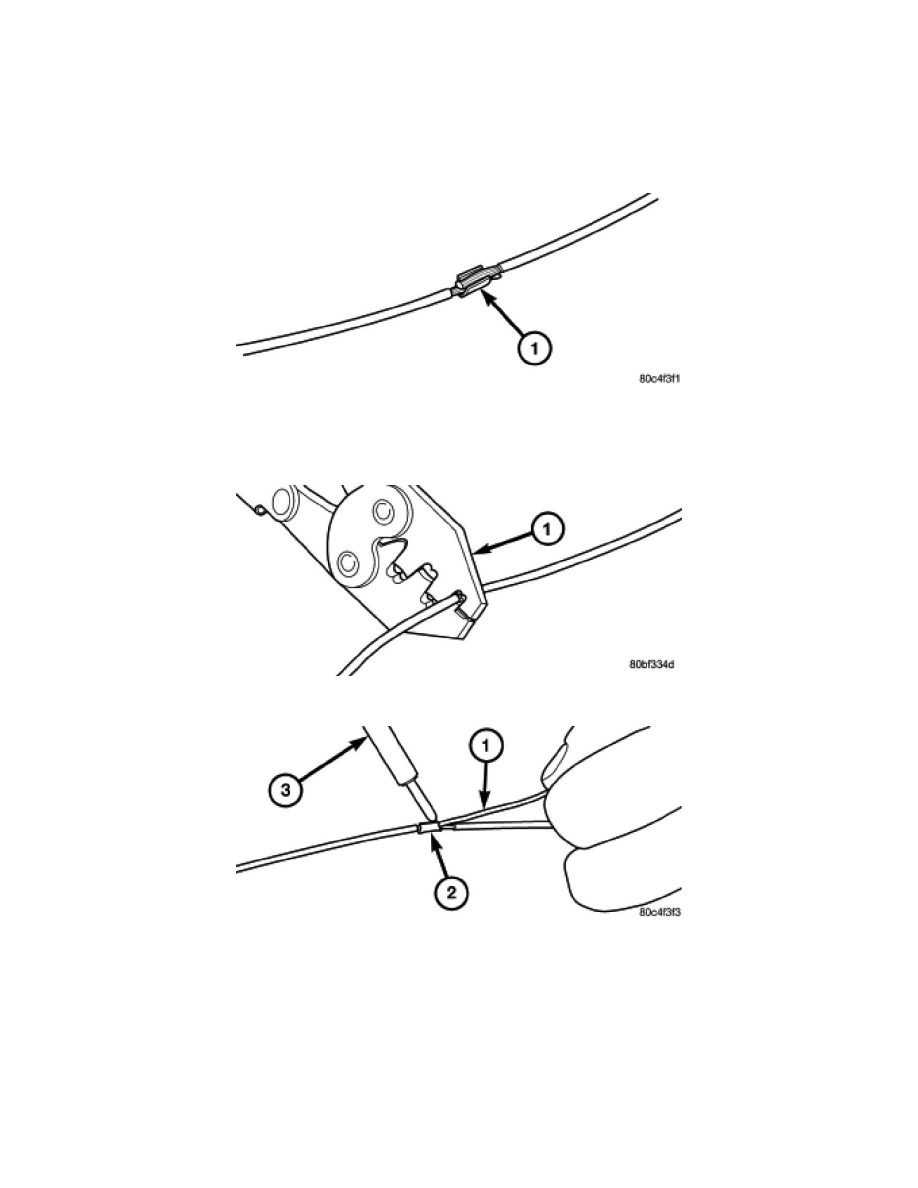
3. Place the strands of wire overlapping each other inside of the splice clip (1).
4. Using crimping tool (1), Mopar p/n 05019912AA, crimp the splice clip and wires together.
5. Solder (3) the connection (2) together using rosin core type solder (1) only.
CAUTION: DO NOT USE ACID CORE SOLDER.