
Grand Cherokee 2WD V6-3.7L (2008)
Catalytic Converter: Removal and Replacement
Catalytic Converter - Removal
3.7L ENGINE
WARNING: If torches are used when working on the exhaust system, do not allow the flame near the fuel lines.
1. Raise and support the vehicle.
2. Saturate the bolts and nuts with heat valve lubricant. Allow 5 minutes for penetration.
3. Remove transmission crossmember See: Body and Frame/Frame/Cross-Member/Service and Repair/Crossmember - Removal.
4. Disconnect and mark oxygen sensor electrical connectors.
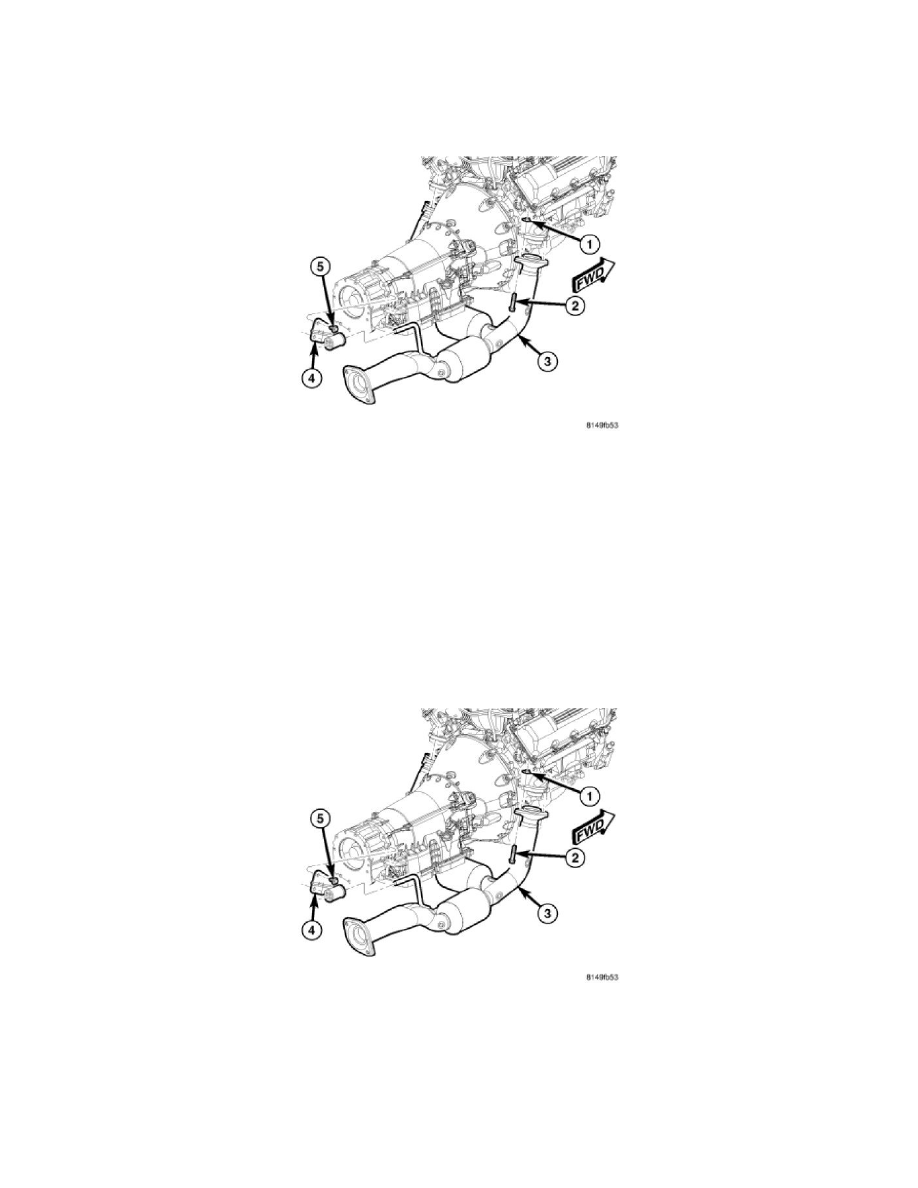
5. Remove steady rest bracket mounting bolt (5) from transmission.
6. Remove the nuts from the front exhaust pipe/catalytic converter assembly to muffler flange.
7. Remove bolts (2) and flanged nuts (1) at the exhaust manifold.
8. Remove the front exhaust pipe/catalytic converter assembly (3) from the vehicle.
9. Remove steady rest bracket (4) from front exhaust pipe/catalytic converter assembly (3).
Catalytic Converter - Installation
3.7L ENGINE
1. Position steady rest bracket (4) onto the front exhaust pipe/catalytic converter assembly (3).
2. Position the front exhaust pipe/catalytic converter assembly (3) into vehicle.
3. Install the bolts (2) and nuts (1) at the front exhaust pipe/catalytic converter assembly (3) to exhaust manifold flange. Do not tighten.
4. Install the nuts at the front exhaust pipe/catalytic converter assembly to muffler flange. Do not tighten.
5. Position the exhaust pipe for proper clearance with the frame and underbody parts. A minimum clearance of 25.4 mm (1.0 in.) is required.
6. Tighten front exhaust pipe/catalytic converter assembly to exhaust manifold bolts (2) to 26 Nm (19 in. lbs.) torque.
7. Tighten the front exhaust pipe and catalytic converter assembly to muffler flange nuts to 47 Nm (35 ft. lbs.) torque.
8. Install steady rest bracket bolts. Tighten bolts to 47 Nm (35 ft. lbs.).