
Grand Cherokee 2WD V6-3.7L (2008)
Compressor Clutch: Removal and Replacement
Removal
REMOVAL
NOTE: The compressor clutch assembly can be serviced with the refrigerant system fully-charged.
NOTE: Typical A/C compressor and clutch assembly shown in illustrations.
1. Disconnect and isolate the negative battery cable.
2. Remove the accessory drive belt See: Engine, Cooling and Exhaust/Engine/Drive Belts, Mounts, Brackets and Accessories/Drive Belt/Service and
Repair/Accessory Drive Belt - Removal.
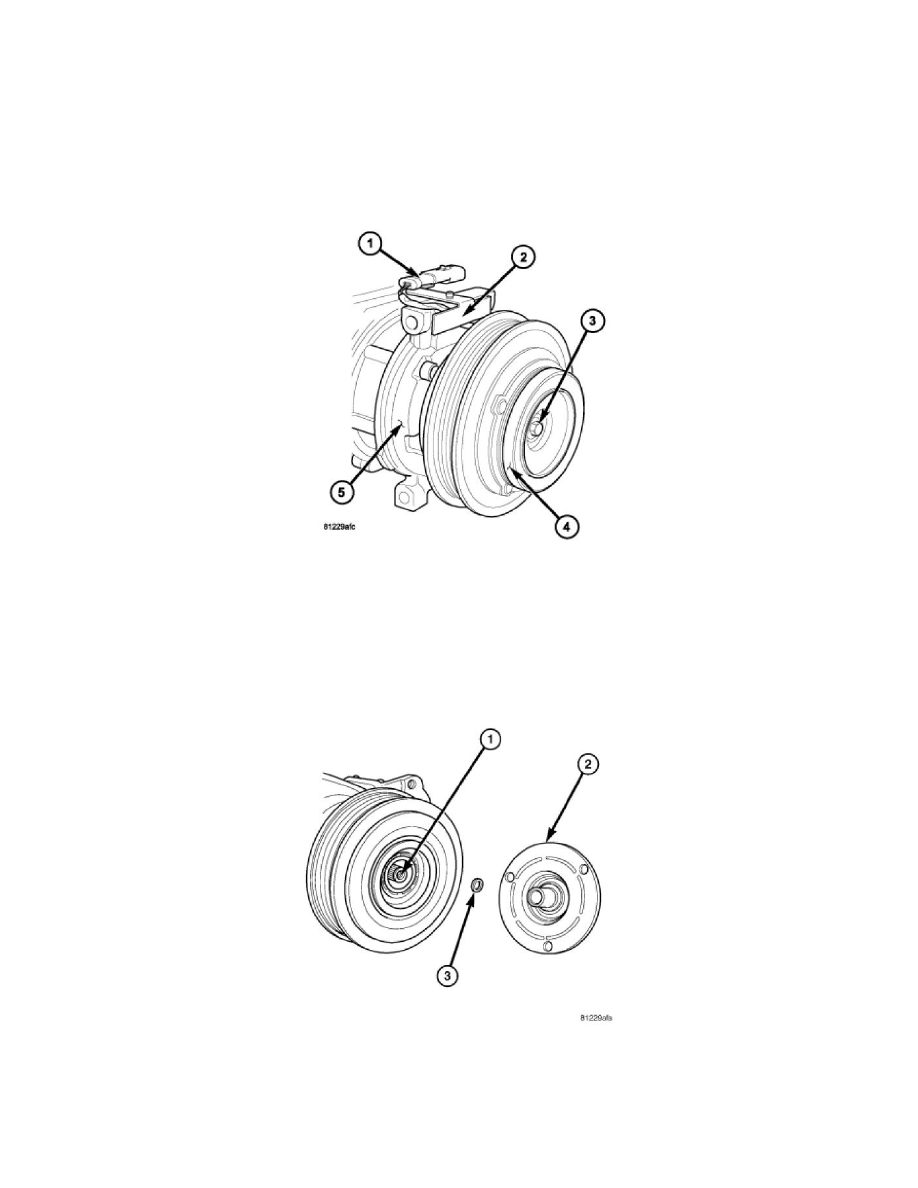
3. Disconnect the engine wire harness from the compressor clutch field coil connector (1) located on the top of the A/C compressor (5).
4. Remove the bolts that secure the A/C compressor to the engine and support the A/C compressor.
5. Carefully remove the compressor clutch field coil connector and wire lead from the connector bracket (2).
6. Remove the compressor shaft bolt (3). A band-type oil filter wrench or a strap wrench may be used to hold the clutch plate (4) from rotating during
bolt removal.
CAUTION: Do not pry between the clutch plate and the pulley and bearing assembly to remove the clutch plate from the compressor shaft as
this may damage the clutch plate.
NOTE: Use care not to lose any clutch shim(s) during removal of the clutch plate, as they may be reused during the clutch plate installation
process.