
Grand Cherokee 2WD V6-3.7L (2008)
Headlamp Alignment Sensor: Service and Repair
Installation
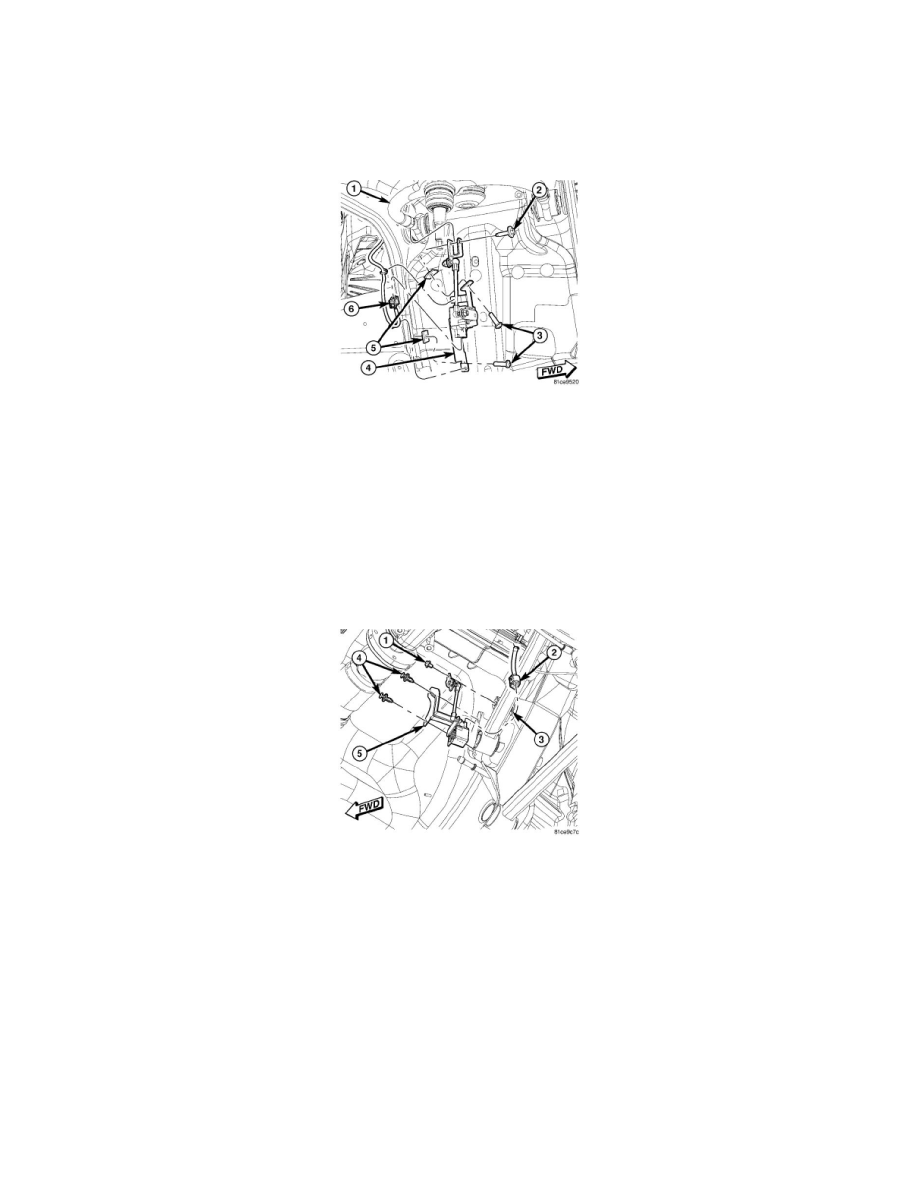
Front
FRONT
1. Check to be certain that the two plastic nuts (5) are properly installed and in good condition in the right front wheel house sheet metal.
2. Position the front axle sensor, brackets and link unit (4) into the wheel house as a unit.
3. Install and tighten the two screws (3) that secure the mounting bracket to the right front wheel house. Tighten the screws to 10.5 Nm (95 in. lbs.).
4. Install and tighten the screw (2) that secures the sensor link bracket to the right front upper control arm (1) near the rear pivot bushing. Tighten the
screw to 4 Nm (35 in. lbs.).
5. Engage the vehicle wire harness routing clips to the sensor bracket.
6. Reconnect the vehicle wire harness connector (6) to the sensor connector receptacle.
7. Lower the vehicle.
8. Reconnect the battery negative cable.
Rear
REAR
1. Position the rear axle sensor, brackets and link unit (5) to the forward pivot bracket for the rear axle right upper control arm.
2. Secure the sensor mounting bracket to the control arm pivot bracket with two plastic push-pin fasteners (4).
3. Install and tighten the screw (1) that secures the sensor link bracket to the bracket (3) on the rear axle right upper control arm. Tighten the screw to
4 Nm (35 in. lbs.).
4. Engage the vehicle wire harness routing clips to the sensor bracket.
5. Reconnect the vehicle wire harness connector (2) to the sensor connector receptacle.
6. Lower the vehicle.
7. Reconnect the battery negative cable.