
Grand Cherokee 2WD V8-318 5.2L VIN Y MFI (1994)
2.
Insert 5/32 inch or 4 mm hex wrench through hole and into adjustment screw. Loosen screw.
3.
Operate outside handle button several times under normal operating pressure releasing the button slowly the last time.
4.
Tighten adjustment screw to 3 N-m (30 in.lbs.) torque making sure not to change the position of the screw while tightening.
5.
Test the handle button and lock for proper function.
B.
Latch and Lock Rod Inspection/Replacement.
Note:
For this procedure the door trim panels must be removed.
1.
Inspect all latch and lock rods for any damage which may cause restriction or loss of travel in the releasing systems.
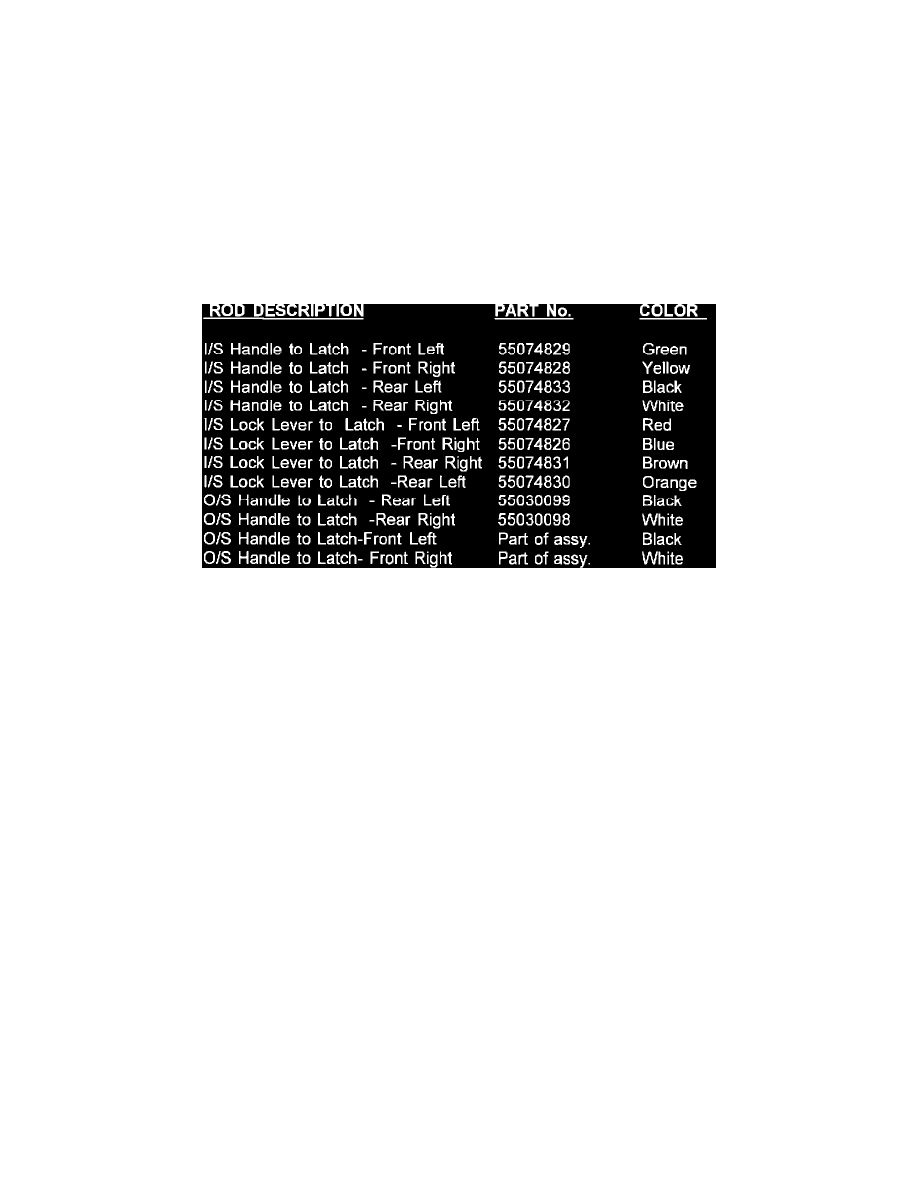
2.
Inspect rods for proper color identification (see chart). The ends of similarly shaped rods are painted.
3.
Replace any damaged rods.
4.
Test the system for proper function.
TABLE 1
C.
Electrical Connector/Switch Inspections and Possible Replacement.
1.
See 1994 Service Manual, Group 8, Section P, Pages 1-5 titled "Power Door Locks".
Note:
For this condition on the right front door, special attention should be given to the possibility of:
-
Bent pins in the 16-way connector at the left door and the 30-way connector on either front door.
-
Terminal push out in the switches on either front door.
-
Switch housing damage/separation.
CONDITION 2:
Interior door lock slide will not unlock. If this condition exists, one or more of the following procedures will be required:
A.
Inside Remote Handle Bezel Removal and Wiring Harness Inspection.
Note:
This condition will occur mainly on the front doors due to the increased length of the harness at these locations as compared to the rear doors.