
Grand Cherokee 2WD V8-318 5.2L VIN Y MFI (1994)
1.
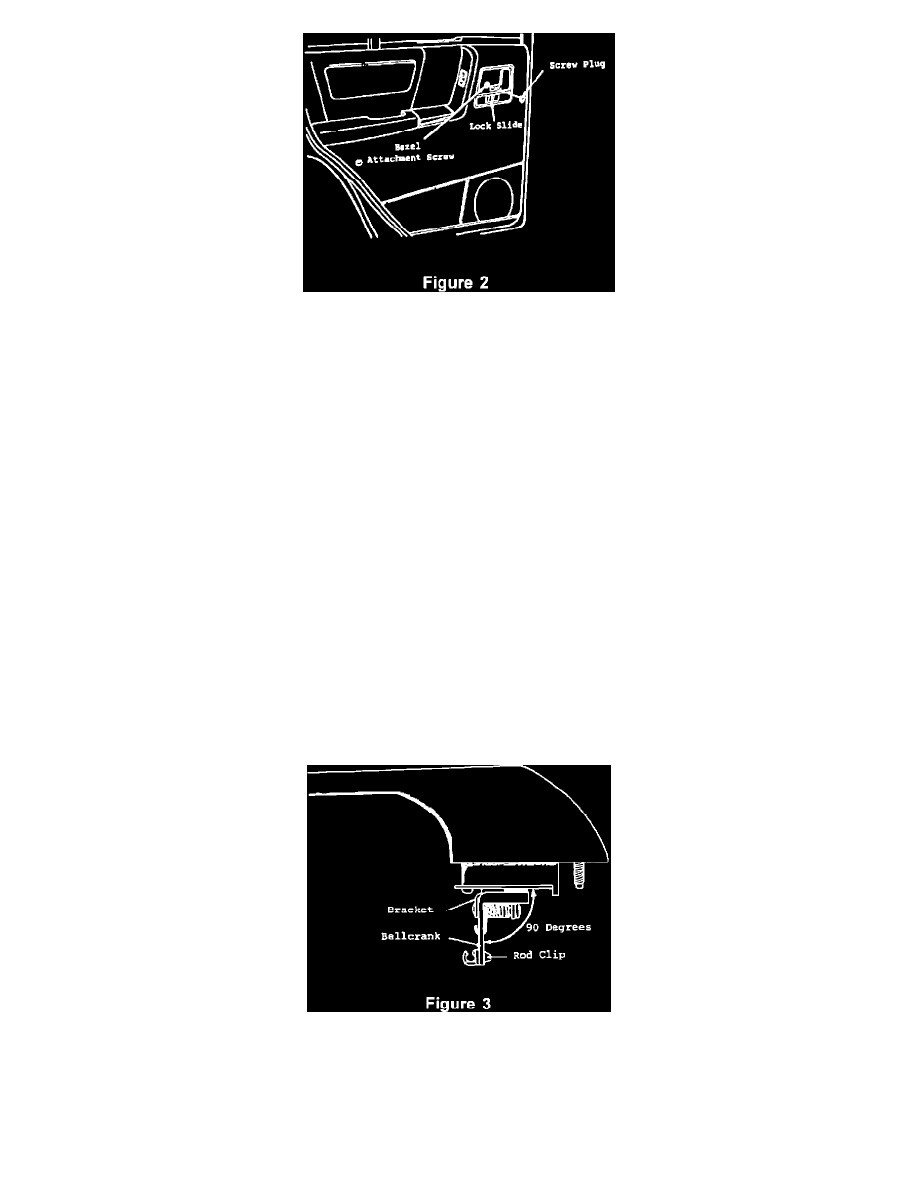
Remove bezel attachment screw plug using a small, thin blade instrument and remove screw (Figure 2).
2.
Remove the bezel by pulling out on the handle and sliding bezel out and up.
3.
Inspect routing of wiring harness from switch panel on door trim making sure it does not lay across the face plate of the lock slide.
4.
Reposition harness in proper location.
5.
Replace bezel, screw, and screw plug.
6.
Test the lock slide lever for proper function before closing door.
B.
Outside Handle-to-Latch Rod Adjustment. (See Condition 1-A above for detailed procedure.)
Note:
In order to perform this procedure under this condition, it will first be necessary to remove the interior door trim panel, disconnect the outside
handle-to-latch rod at the latch to relieve tension, and open the door using the inside remote handle.
CONDITION 3:
Rear door will not open using the outside handle. If this condition exists, the following procedure will be required:
A.
Outside Handle-to-Latch Rod Adjustment. (See Condition 1-A above for detailed procedure).
B.
Latch and Lock Rod Inspection/Replacement. (See Condition 1-B above for detailed procedure then refer to Condition 3-C below).
C.
Outside Handle Bellcrank Inspection. This should be done during the latch and lock rod inspection procedure above.
1.
Inspect that the angle at which the bellcrank attachment arm departs from its base is 90 degrees. If not, there may be interference between
the outside of the bellcrank arm and the inside of the bracket near the pin (Figure 3), or this could cause the door latch's outside handle
release lever to bind during latch adjustment.
2.
If Necessary, replace outside handle following the procedure described in the 1994 Service Manual, Group 23, Page 20.
CONDITION 4: