
Grand Cherokee 2WD V8-318 5.2L VIN Y MFI (1994)
Drive Belt: Service and Repair
NOTE: The belt routing schematics are published from the latest information available at the time of publication. If anything differs between these
schematics and the Belt Routing Label, use the schematics on Belt Routing Label. This label is located in the engine compartment.
NOTE: The accessory drive components are operated by a single, crankshaft driven, serpentine drive belt. An automatic belt tensioner is used to
maintain correct belt tension at all times.
CAUTION: Do not attempt to check belt tension with a belt tension gauge on vehicles equipped with an automatic belt tensioner.
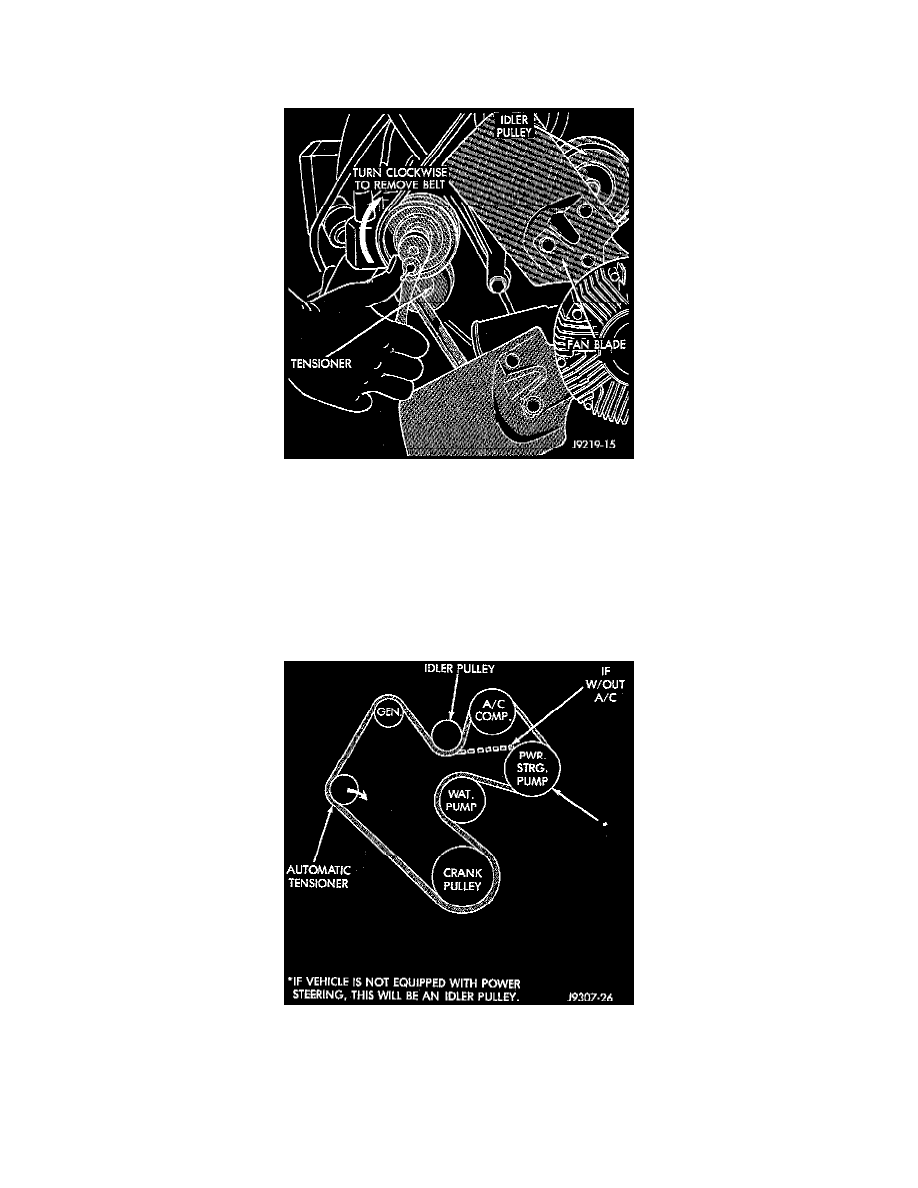
REMOVAL
1. Attach a socket/wrench to pulley mounting bolt of automatic tensioner.
2. Rotate tensioner assembly clockwise (as viewed from front) until tension has been relieved from belt.
3. Remove belt from idler pulley first.
4. Remove belt from vehicle.
CAUTION: When installing serpentine accessory drive belt, belt must be routed correctly. If not, engine may overheat due to water pump rotating in
wrong direction. Refer to illustration for correct engine belt routing. The correct belt with correct length must be used.
NOTE: The following belt routing schematics are published from the latest information available at the time of publication. If anything differs between
these schematics and the Belt Routing Label, use the schematics on Belt Routing Label. This label is located in the engine compartment.
INSTALLATION