
Grand Cherokee 2WD V8-318 5.2L VIN Y MFI (1994)
(3) Remove 3-4 quick fill valve, spring and plug.
(4) Remove 3-4 shift valve and spring.
(5) Remove converter clutch valve, spring and plug.
(6) Remove converter clutch timing valve, retainer and valve spring.
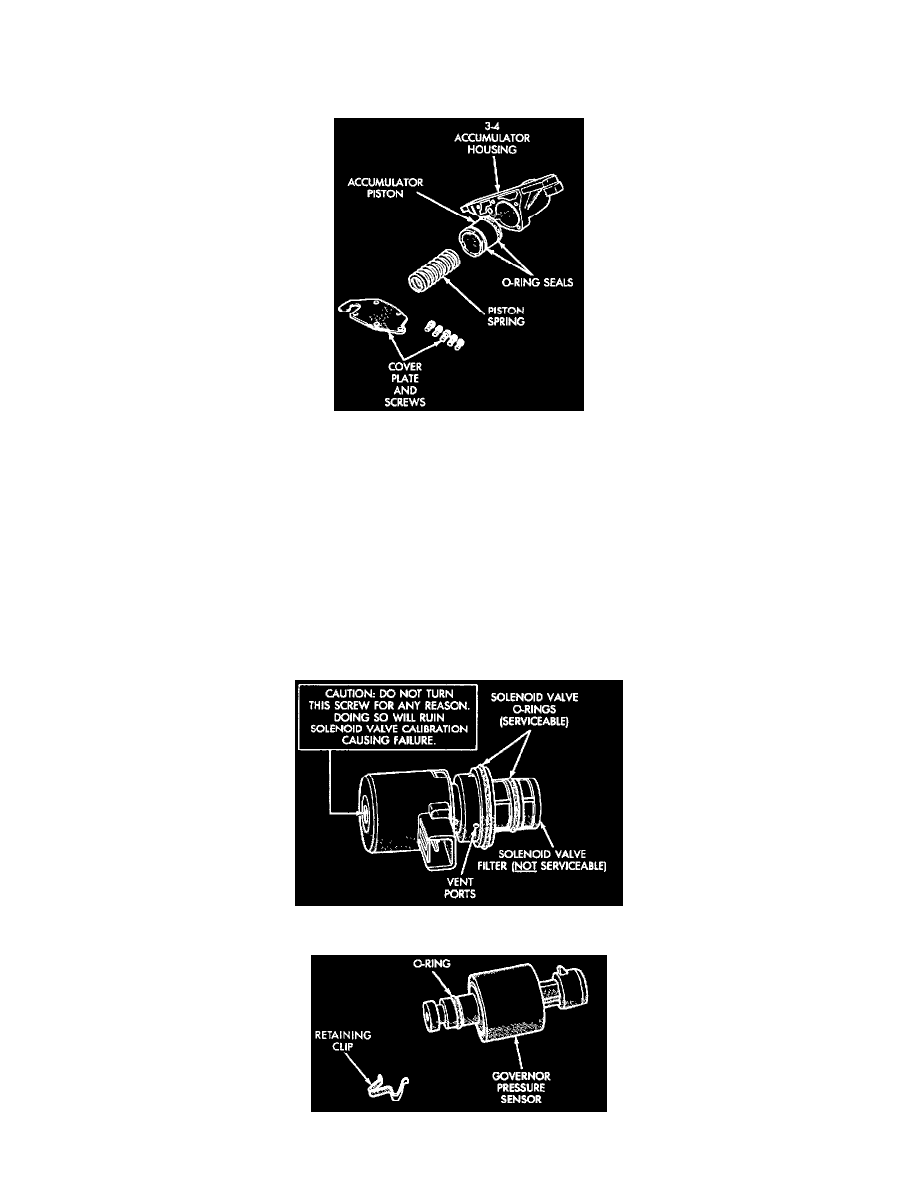
Fig.125 3-4 Accumulator Housing Components
3-4 ACCUMULATOR HOUSING DISASSEMBLY (FIG.125)
(1) Remove end plate from housing.
(2) Remove piston spring.
(3) Remove piston. Remove and discard piston seals.
VALVE BODY CLEANING AND INSPECTION
Clean the valve housings, valves, plugs, springs, and separator plates with a standard parts cleaning solution only. Do not use gasoline, kerosene, or
any type of caustic solution.
Do not immerse any of the electrical components in cleaning solution. Clean the governor solenoid and sensor and the dual solenoid and harness
assembly by wiping them off with dry shop towels only.
Dry the parts with compressed air. Make sure all passages are clean and free from obstructions. Do not use rags or shop towels to dry or wipe off
valve body components. Lint from these materials will adhere to the valve body components. Lint will interfere with valve operation and may
clog filters and fluid passages.
Fig. 126 Governor Pressure Solenoid Valve 0-Ring And Vent Location
Fig. 127 Governor Pressure Sensor 0-Ring Location