
Grand Cherokee 2WD V8-4.7L VIN J (2004)
Ambient Light Sensor: Service and Repair
Rain Sensor Module
RAIN SENSOR MODULE
WARNING: ON VEHICLES EQUIPPED WITH AIRBAGS, DISABLE THE SUPPLEMENTAL RESTRAINT SYSTEM BEFORE
ATTEMPTING ANY STEERING WHEEL, STEERING COLUMN, DRIVER AIRBAG, PASSENGER AIRBAG, SIDE CURTAIN
AIRBAG, FRONT IMPACT SENSOR, SIDE IMPACT SENSOR, OR INSTRUMENT PANEL COMPONENT DIAGNOSIS OR SERVICE.
DISCONNECT AND ISOLATE THE BATTERY NEGATIVE (GROUND) CABLE, THEN WAIT TWO MINUTES FOR THE SYSTEM
CAPACITOR TO DISCHARGE BEFORE PERFORMING FURTHER DIAGNOSIS OR SERVICE. THIS IS THE ONLY SURE WAY TO
DISABLE THE SUPPLEMENTAL RESTRAINT SYSTEM. FAILURE TO TAKE THE PROPER PRECAUTIONS COULD RESULT IN
ACCIDENTAL AIRBAG DEPLOYMENT AND POSSIBLE PERSONAL INJURY.
REMOVAL
1. Disconnect and isolate the battery negative cable.
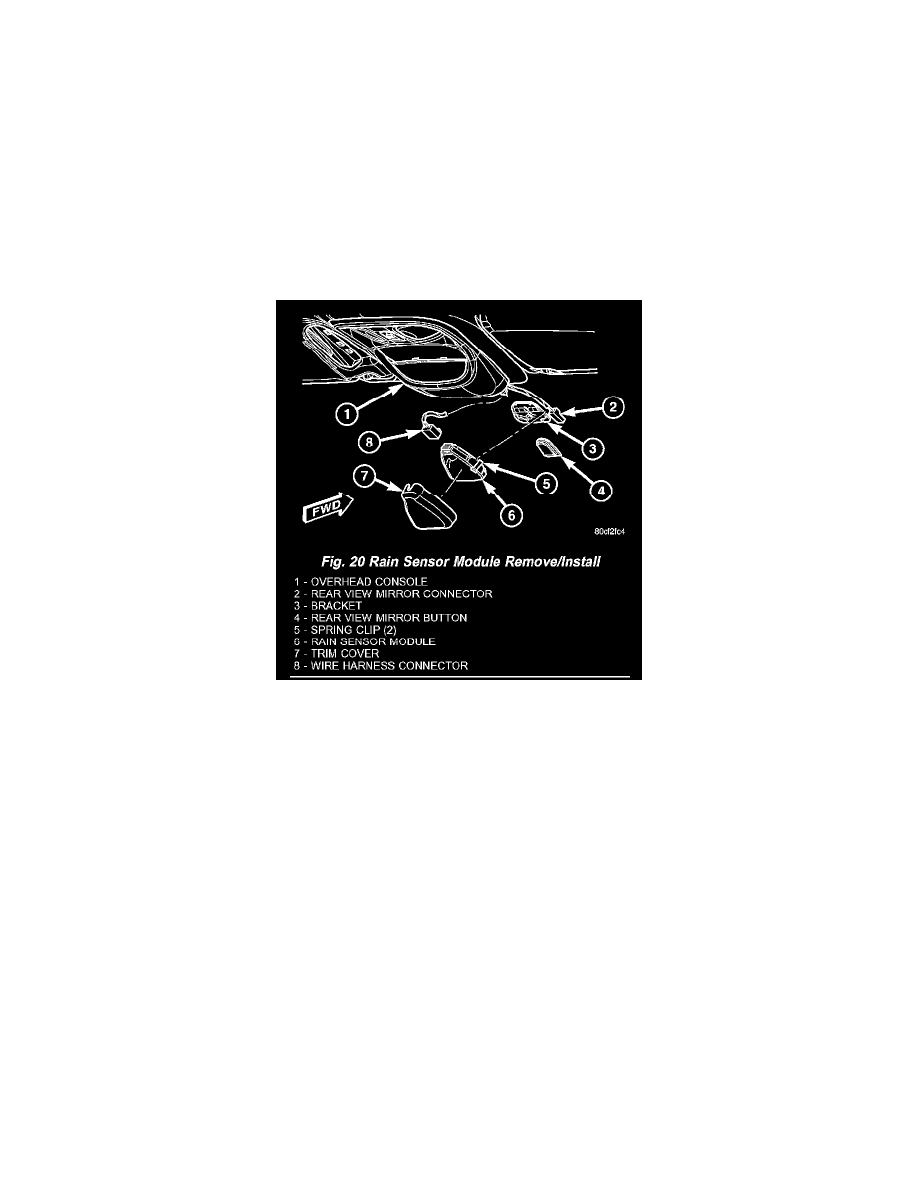
Fig. 20 Rain Sensor Module Remove/Install
2. Adjust the inside rear view mirror on the windshield downward far enough to access the lower edge of the Rain Sensor Module (RSM) trim cover.
3. Using a small thin-bladed screwdriver inserted into the notch at the bottom of trim cover, gently pry the trim cover away from the windshield glass
until it unsnaps from the RSM.
4. Using a small thin-bladed screwdriver, gently pry the spring clips on each side of the RSM away from the bracket on the windshield.
5. Pull the RSM away from the bracket on the windshield far enough to access and disconnect the overhead wire harness connector for the module
from the module connector receptacle.
6. Remove the RSM from above the inside rear view mirror.
INSTALLATION
1. Position the Rain Sensor Module (RSM) above the inside rear view mirror.
2. Reconnect the overhead wire harness connector for the RSM to the module connector receptacle.
3. Position the RSM to the bracket on the windshield above the inside rear view mirror.
4. Using hand pressure, press the spring clips on each side of the RSM until they snap over the bracket on the windshield.
NOTE: The spring clips on the RSM will become deformed after numerous (about ten) removal and installation cycles. If the spring clips become
deformed, the RSM must be replaced with a new unit.
5. Align and engage the top of the trim cover over the top of the RSM.
6. Using hand pressure, press the bottom of the trim cover toward the windshield glass until it snaps over the bottom of the RSM.
7. Reconnect the battery negative cable.