
Grand Cherokee 2WD V8-4.7L VIN J (2004)
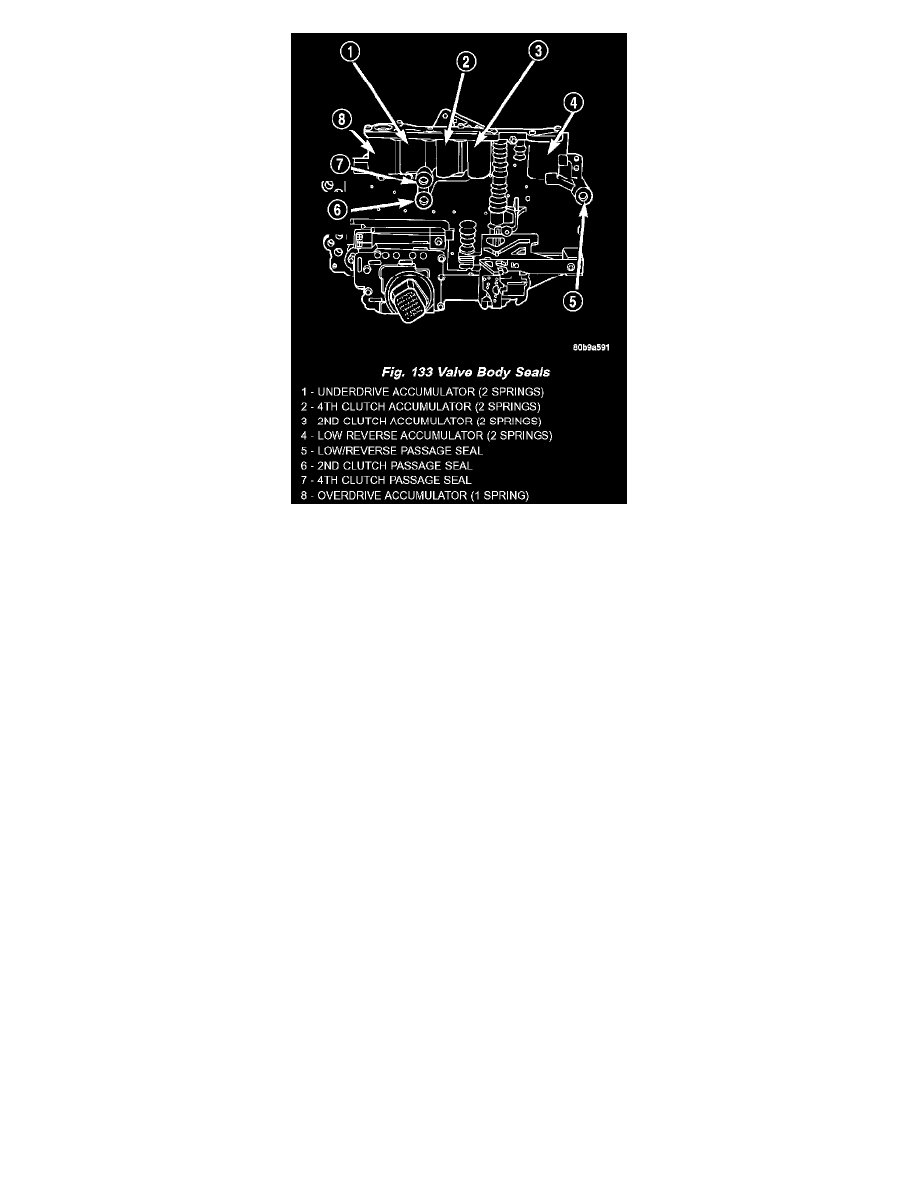
Inspect all the fluid seals on the valve body (Fig. 133). Replace any seals that are cracked, distorted, or damaged in any way. These seals pass fluid
pressure directly to the clutches. Any pressure leak at these points, may cause transmission performance problems.
ASSEMBLY
1. Lubricate valves, springs, and the housing valve bores with clean transmission fluid.
2. Install solenoid switch valve, manual valve, and the low/reverse switch valve into the valve body.
3. Install the retainers to hold each valve into the valve body.
4. Install the valve body check balls into their proper locations.
5. Position the transfer plate onto the valve body.
6. Install the screws to hold the transfer plate to the valve body. Tighten the screws to 5.6 Nm (50 in. lbs.).
7. Install the accumulator pistons and springs into the valve body in the location from which they were removed. Note that all accumulators except
the overdrive have two springs. The overdrive accumulator piston has only one spring.
8. Position the accumulator cover onto the valve body.
9. Install the screws to hold the accumulator cover onto the valve body. Tighten the screws to 4.5 Nm (40 in. lbs.).
10. Install the TRS selector plate onto the valve body and the manual valve.
11. Install the solenoid and pressure switch assembly onto the valve body.
12. Install the screws to hold the solenoid and pressure switch assembly onto the valve body. Tighten the screws to 5.7 Nm (50 in. lbs.). Tighten the
screws adjacent to the arrows cast into the bottom of the transfer plate first.
13. Position the detent spring onto the valve body.
14. Install the screw to hold the detent spring onto the valve body. Tighten the screw to 4.5 Nm (40 in. lbs.).
15. Install new clutch passage seals onto the valve body, if necessary
INSTALLATION
1. Check condition of seals on valve body and the solenoid and pressure switch assembly. Replace seals if cut or worn.
2. Place TRS selector plate in the PARK position.
3. Place the transmission in the PARK position.
4. Lubricate seal on the solenoid and pressure switch assembly connector with petroleum jelly.
5. Position valve body in transmission and align the manual lever on the valve body to the pin on the transmission manual shift lever.
6. Seat valve body in case and install one or two bolts to hold valve body in place.
7. Tighten valve body bolts alternately and evenly to 12 Nm (105 in. lbs.) torque.
8. Install a new primary oil filter seal in the oil pump inlet bore. Seat the seal in the bore with the butt end of a hammer, or other suitable tool.
CAUTION: The primary oil filter seal MUST be fully installed flush against the oil pump body. DO NOT install the seal onto the filter neck and
attempt to install the filter and seal as an assembly. Damage to the transmission will result.
9. Place replacement filter in position on valve body and into the oil pump.
10. Install screw to hold filter to valve body. Tighten screw to 4.5 Nm (40 in. lbs.) torque.