
Grand Cherokee 2WD V8-4.7L VIN N (2000)
Remote Switch: Service and Repair
WARNING: ON VEHICLES EQUIPPED WITH AIRBAGS, REFER TO AIR BAGS AND SEAT BELTS/AIR BAGS BEFORE
ATTEMPTING ANY STEERING WHEEL, STEERING COLUMN, OR INSTRUMENT PANEL COMPONENT DIAGNOSIS OR SERVICE.
FAILURE TO TAKE THE PROPER PRECAUTIONS COULD RESULT IN ACCIDENTAL AIRBAG DEPLOYMENT AND POSSIBLE
PERSONAL INJURY.
REMOVAL
1. Disconnect and isolate the battery negative cable.
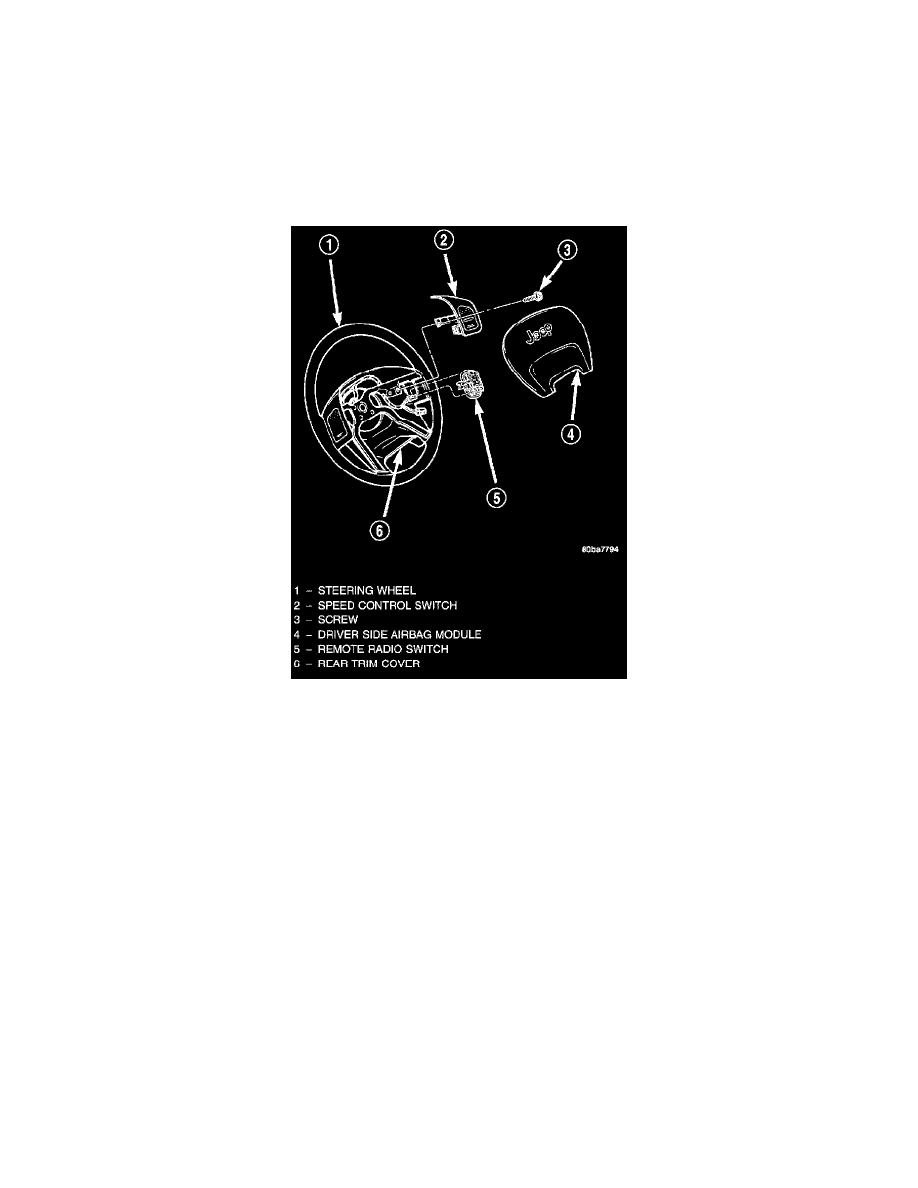
2. Remove the driver side airbag module from the steering wheel.
3. Remove the speed control switch located on the same side of the steering wheel as the remote radio switch that is being serviced.
Remote Radio Switches Remove/Install
4. Disconnect the steering wheel wire harness connector from the connector receptacle of the remote radio switch.
5. From the inside of the steering wheel rear trim cover, press firmly and evenly outward on the back of the switch to disengage the four snap features
that secure the switch to the inside of the mounting hole.
6. From the outside of the steering wheel rear trim cover, remove the remote radio switch from the trim cover mounting hole.
INSTALLATION
1. Position the remote radio switch to the mounting hole on the outside of the steering wheel rear trim cover. Be certain that the connector receptacle
is oriented toward the bottom of the switch and pointed toward the center of the steering wheel.
2. Press firmly and evenly on the remote radio switch until each of the switch snap features is fully engaged in the mounting hole of the steering
wheel rear trim cover.
3. Reconnect the steering wheel wire harness connector to the connector receptacle of the remote radio switch.
4. Install the speed control switch onto the steering wheel.
5. Install the driver side airbag module onto the steering wheel.
6. Reconnect the battery negative cable.