
Grand Cherokee 2WD V8-4.7L VIN N (2000)
Repair Procedure
NOTE:
WHEN PERFORMING THE REPAIR, USE THE PROCEDURE BELOW ALONG WITH THE APPROPRIATE SERVICE MANUAL.
1.
Prior to raising vehicle, shift transfer case into neutral.
2.
Open the hood.
3.
Raise the vehicle on a hoist.
4.
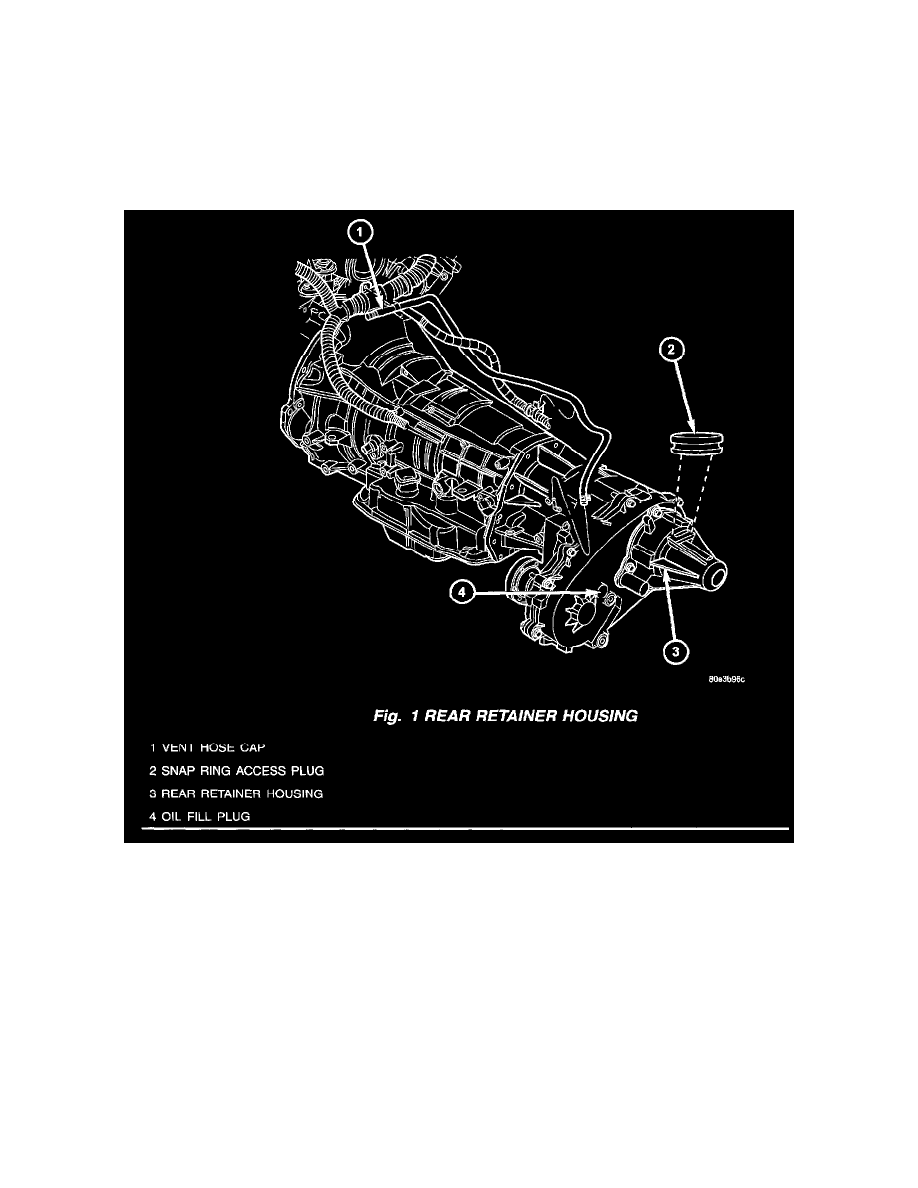
The vent hose is located above the transmission housing near the back of the engine. It is trapped under the dipstick tube mounting bracket. From
below, pull the hose out from under the bracket and down to a workable area on the passenger side of the transfer case (Fig. 1).
5.
Cut off the end of the hose just below the vent cap housing and remove the band clamp from the cut end of the hose.
6.
Insert the new Jiggle Cap vent (PN J5352955) into the end of the hose.
7.
Re-aline the vent hose with the dipstick tube housing and tie wrap it to the dipstick tube just below the dipstick tube mounting bracket.
If seepage has occurred between the rear retainer housing and the transfer case, proceed with step 8. If not, go to step 19.
8.
Drain the transfer case.
9.
Mark the propeller shaft and the rear of the transfer case rear retainer housing for alignment purposes.
10.
Remove the four propeller shaft bolts.