
Grand Cherokee 2WD V8-4.7L VIN P Flex Fuel (2007)
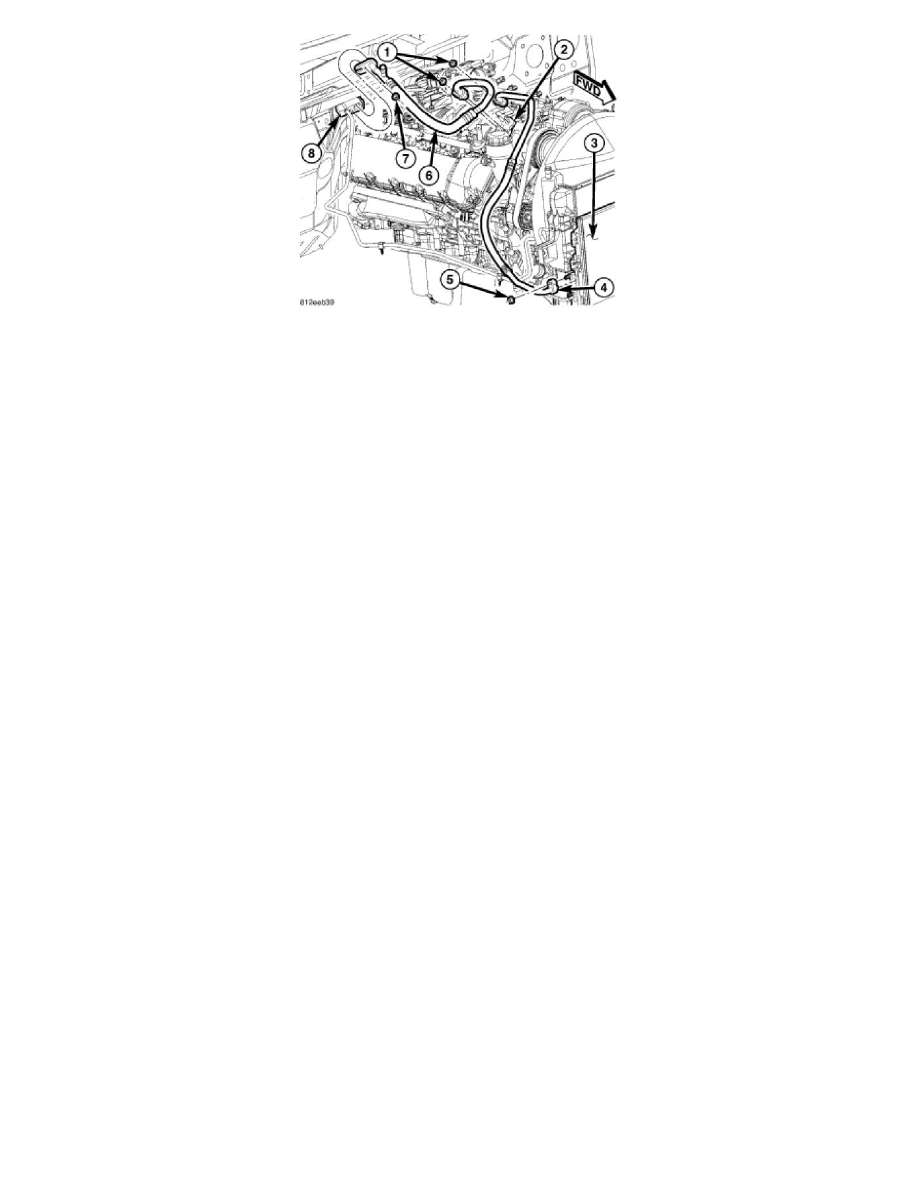
NOTE: LHD model shown. RHD model similar.
1. Position the A/C discharge line (4) into the engine compartment.
2. Remove the tape or plugs from the discharge line fittings and the A/C compressor (2) and A/C condenser (3).
3. Lubricate new dual-plane seals with clean refrigerant oil and install them onto the A/C discharge line. Use only the specified seals as they are made
of a special material for the R-134a system. Use only refrigerant oil of the type recommended for the A/C compressor in the vehicle.
4. Install the A/C discharge line onto the A/C compressor.
5. Install the nut (1) that secures the A/C discharge line to the A/C compressor. Tighten the nut to 20 Nm (15 ft. lbs.).
6. Install the A/C discharge line onto the A/C condenser.
7. Install the nut (5) that secures the A/C discharge line to the A/C condenser. Tighten the nut to 20 Nm (15 ft. lbs.).
8. Install the air cleaner housing, air intake tube and the resonator.
9. Install the grille.
10. Reconnect the negative battery cable.
11. Evacuate the refrigerant system.
12. Adjust the refrigerant oil level.
13. Charge the refrigerant system.