
Grand Cherokee 2WD V8-4.7L VIN P Flex Fuel (2007)
1. Check to be certain that the two U-nuts for the side curtain airbag inflator bracket and the six box nuts for the airbag channel are properly installed
in the inner roof rail and that they are in good condition.
2. Position the side curtain airbag into the vehicle as a unit.
3. Engage the integral hooks on the side curtain airbag inflator mounting bracket into the locating holes in the inner roof side rail near the D-pillar.
4. Install and tighten the two screws that secure the inflator mounting bracket to the U-nuts in the inner roof side rail. Tighten the screws to 6 Nm (50
in. lbs.).
NOTE: Be certain that the airbag cushion is not twisted during installation. If a colored stripe (red for right side bag, blue for left side bag) is
visible on the cushion, the bag is twisted and must be untwisted before it is secured to the roof side rail.
5. Engage the two plastic push-in fasteners that secure the airbag cushion channel to the roof side rail at the top of the C-pillar.
6. Engage the two plastic push-in fasteners that secure the channel to the roof side rail at the top of the B-pillar.
7. Install and tighten the six screws that secure the airbag channel to the box nuts in the inner roof side rail. Tighten the screws to 6 Nm (50 in. lbs.).
8. Engage the hook on the end of the side curtain airbag front tether into the slot in the inner A-pillar.
9. Engage the two plastic retainers that secure the side curtain airbag front tether to the inner A-pillar.
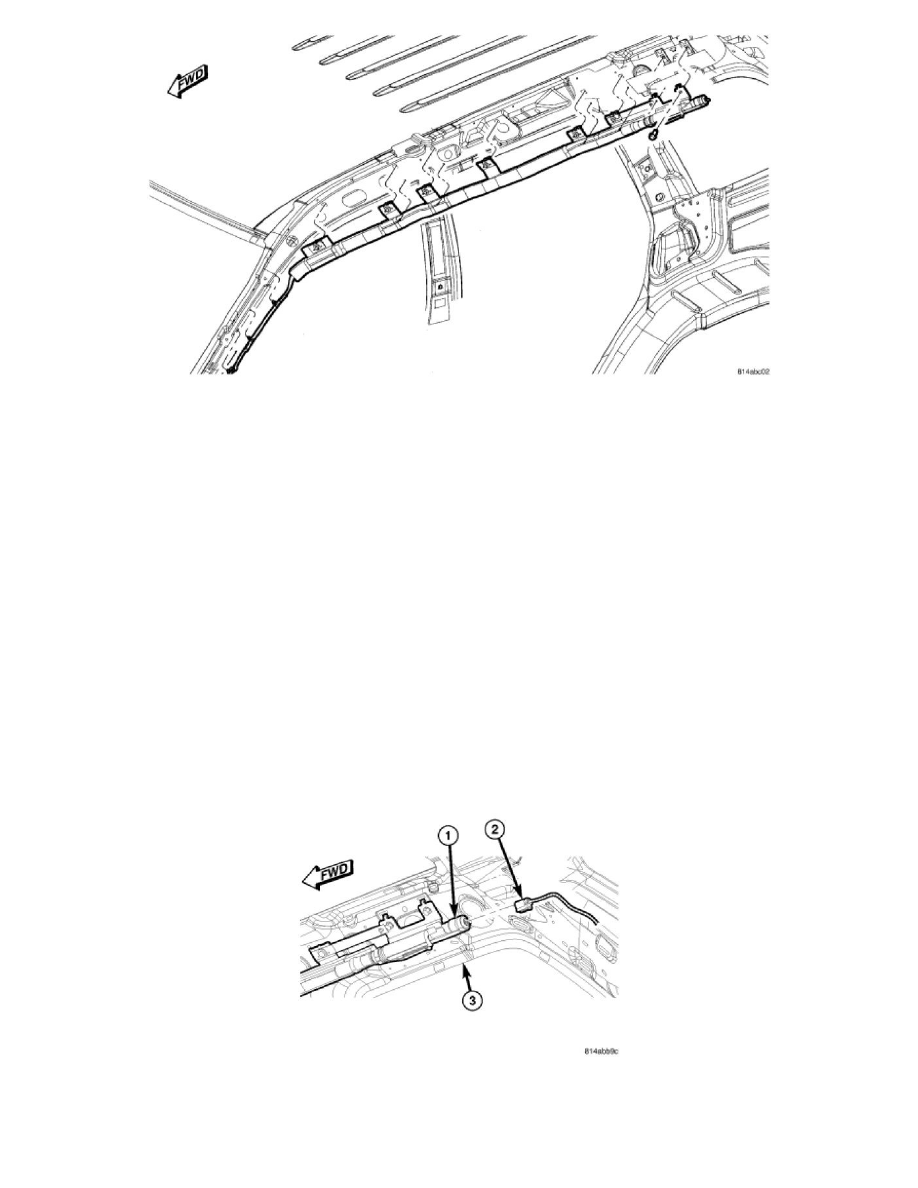
10. Reconnect the body wire harness connector (2) for the side curtain airbag to the connector receptacle at the back of the inflator (1) on the roof side
rail (3).
11. Reinstall the headliner into the vehicle.