
Grand Cherokee 2WD V8-5.2L VIN Y (1998)
Oil Pan: Service and Repair
Removal and Installation
REMOVAL
1. Disconnect the negative cable from the battery.
2. Raise the vehicle.
3. Remove the oil pan drain plug and drain the engine oil.
4. Remove the oil filter.
5. Remove the starter.
6. If equipped with an oil level sensor, disconnect the sensor.
7. Position the cooler lines out of the way.
8. Disconnect the oxygen sensor.
9. Remove exhaust pipe.
10. Remove the oil pan bolts. Carefully slide the oil pan and gasket to the rear. If equipped with an oil level sensor, take care not to damage the sensor.
INSTALLATION
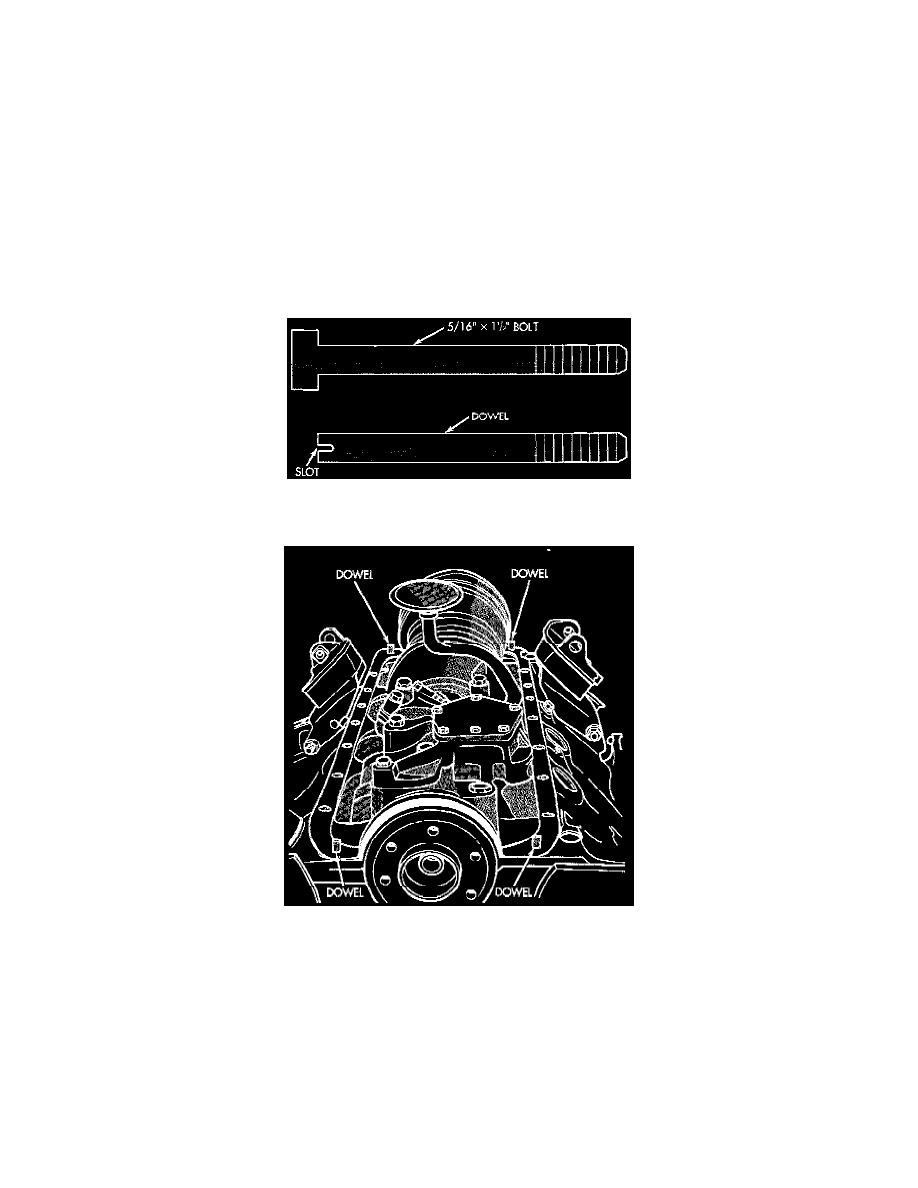
1. Fabricate 4 alignment dowels from 5/16 x 1 1/2 inch bolts. Cut the head off the bolts and cut a slot into the top of the dowel. This will allow easier
installation purl removal with screwdriver.
2. Install the dowels in the cylinder block.
3. Apply small amount of Mopar(R) Silicone Rubber Adhesive Sealant, or equivalent in the corner of the cap and the cylinder block.
4. Slide the one-piece gasket over the dowels and onto the block.
5. Position the oil pan over the dowels and onto the gasket. If equipped with an oil level sensor, take care not to damage the sensor.
6. Install the oil pan bolts. Tighten the bolts to 24 Nm (215 inch lbs.) torque.
7. Remove the dowels. Install the remaining oil pan bolts. Tighten these bolts to 24 Nm (215 inch lbs.) torque.
8. Install the drain plug. Tighten drain plug to 34 Nm (25 ft. lbs.) torque.
9. Install exhaust pipe.
10. Connect the oxygen sensor.
11. Install the oil filter.
12. If equipped with an oil level sensor, connect the sensor.
13. Install the starter.
14. Move the cooler lines back into position.