
Grand Cherokee 2WD V8-5.7L VIN 2 (2005)
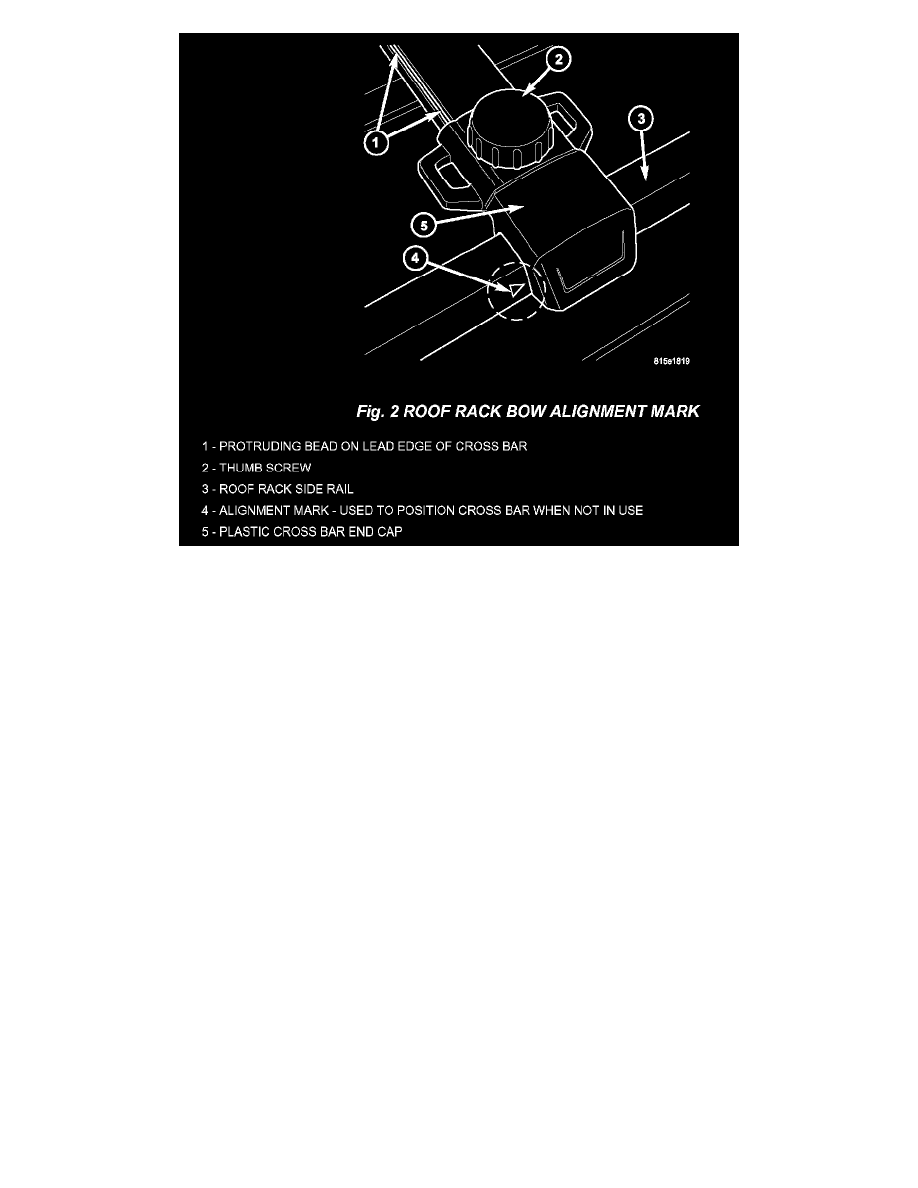
If a cross bar is installed backwards, then an air turbulence or a wind whistle-like sound may occur even if the cross bar is properly positioned to the side
rails. Cross bars are normally installed by the dealer during pre-delivery or later on by the customer. The leading edge of a correctly installed cross bar
has a protruding bead running along the top edge of the bar. Each cross bar has an arrow stamped on its bottom surface that should point toward the front
of the vehicle when the cross bar is correctly assembled to the roof rack. Be sure to review the instructions supplied with the roof rack cross bar kit when
installing each cross bar (Fig. 2).
If a cross bar has been installed backwards then perform the following steps to correct:
1.
Loosen thumb screws (four in total) on both cross bars.
2.
Slide front and rear cross bars to the rear of the roof rack. This is the widest spacing between the roof rack side rails.
3.
Place a protective cloth under each plastic end cap of the cross bar to protect the vehicle painted surface.
4.
For the cross bar that is installed backwards, fully remove the thumb screw at each plastic end cap of the cross bar. The thumb screw may be a
little tight near the end of its threads.
5.
With the thumb screw removed, one end of the catch bracket (metal strap) on the bottom of each cross bar plastic end cap will pivot (drop) down
onto the roof. The other end of the bracket will be held in place by the metal pin in the plastic end cap.
6.
Working at one end cap, slide the metal cross bar all the way into the opposite end cap. Now lift up on both the metal cross bar and the end cap
that you are working from. This will cause the end cap and metal cross bar to separate. Make sure that the metal cross bar was slid to one side
before attempting to separate the plastic end cap from the cross bar.
7.
Slide the cross bar out of the other end cap.
8.
Switch plastic end caps from side to side. The end caps are indexed to the shape of the metal cross bar.
9.
Insure that the catch bracket on each plastic cross bar end cap is properly positioned to each end cap and is correctly engaging its respective pivot
pin before proceeding further.
10.
Position the cross bar so that the top edge bead is toward the front of the vehicle. The arrow stamped on the bottom of the metal cross bar should
also point toward the front of the vehicle.