
Grand Cherokee 2WD V8-5.7L VIN 2 (2005)
9.
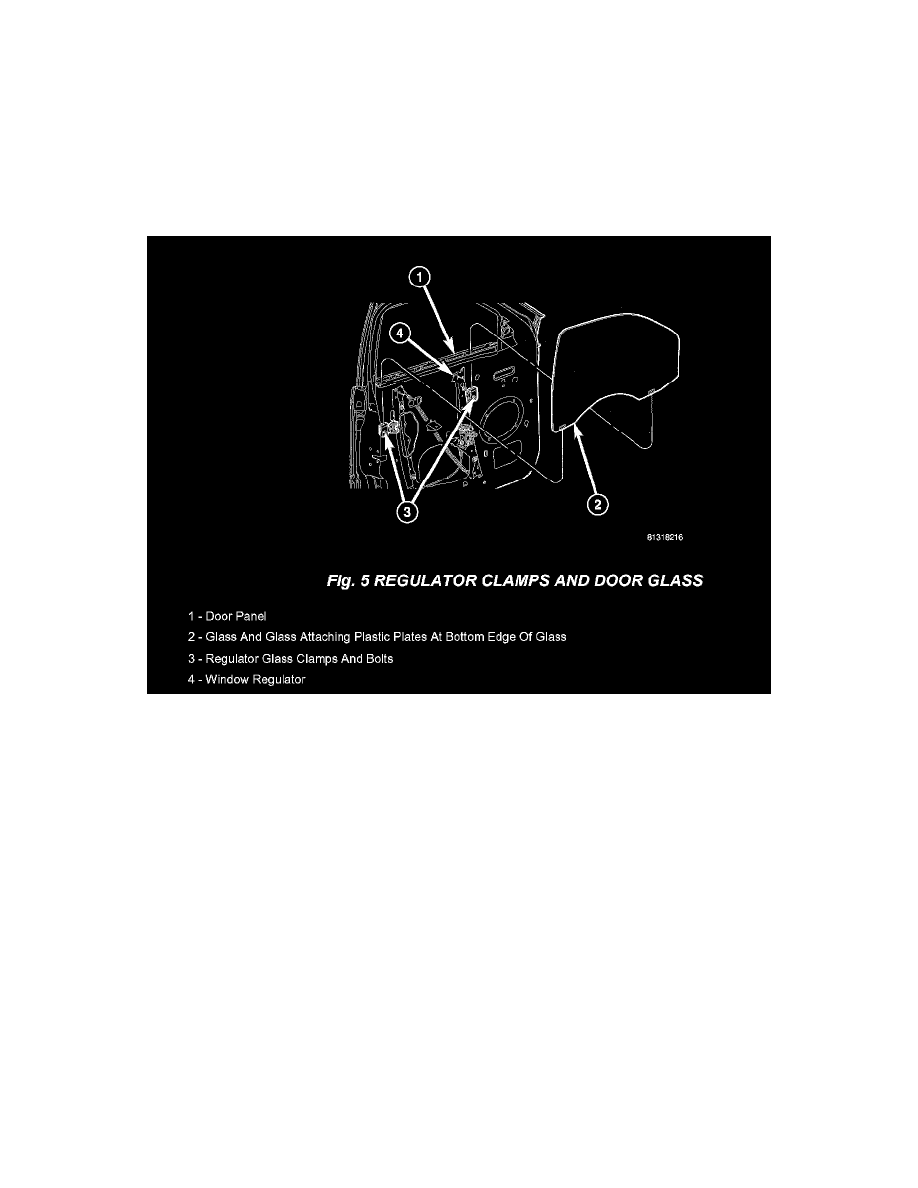
Inspect the window regulator operation, glass, regulator glass clamp and pad, and adjust the glass position.
a.
Temporarily power the window regulator motor.
b.
If the glass is already loose from the window regulator clamps, slide the glass to the full up position and temporarily tape glass in place.
c.
Carefully position (raise) the window regulator for access to the two glass clamp bolts. Loosen the 10 mm bolt at each window regulator
glass clamp. Temporarily tape in the full up position, any glass that was previously attached to the regulator glass clamps.
d.
Position (lower) the window regulator so that two regulator glass clamps can be thoroughly inspected.
e.
Inspect each clamp and verify that the rubber pad between each clamp is installed correctly to the clamp. During a prior installation, the
sides of some pads may have been dislodged and forced into the bottom of the clamp. Adjust the rubber pads as required (Fig. 5).
f.
Remove the temporary tape and carefully lower the glass into the open clamps. Make sure that the plastic plates on the lower edge of the
glass properly engage the clamps. Make certain that the rubber pads have not slipped out of position.
g.
Carefully raise the window regulator until it is almost to its full up position and slide the glass against the B-pillar window channel. Bring
the glass and regulator to the full up position (window closed). Make sure glass is fully seated against B-pillar side of window frame
weatherstrip prior to tightening the glass clamp bolts.
h.
Tighten both glass clamp bolts to 11.8 Nm (105 in.lbs.).
i.
Verify that the door glass and window regulator operate properly.
10.
Install the water shield.
11.
Replace the door trim panel retention clips.
12.
Install door trim panel to the door.
13.
Install the three attaching screws. Tighten the screws to 2 Nm (16 in.lbs.).
14.
Install the negative battery cable to the battery. Set the clock to the correct time.
POLICY:
Reimbursable within the provisions of the warranty.