
Grand Cherokee 2WD Limited V8-4.7L (2002)
Planetary Gears: Service and Repair
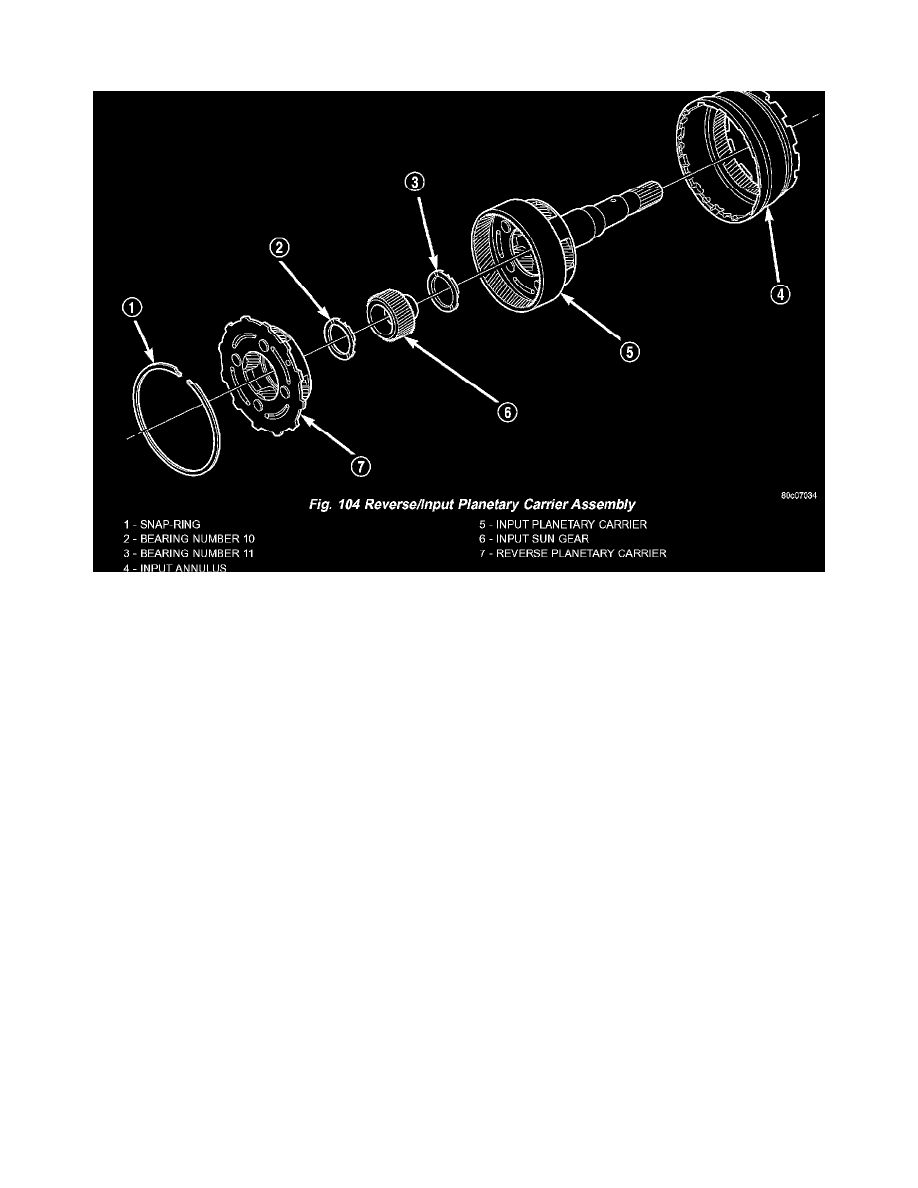
DISASSEMBLY
1. Remove the snap-ring holding the input annulus into the input carrier (Fig. 104).
2. Remove the input annulus from the input carrier (Fig. 104).
3. Remove the number 9 bearing from the reverse planetary carrier. Note that this planetary carrier has four pinion gears.
4. Remove the reverse planetary gear carrier (Fig. 104).
5. Remove the number 10 bearing from the input sun gear (Fig. 104).
6. Remove the input sun gear from the input carrier (Fig. 104).
7. Remove the number 11 bearing from the input carrier (Fig. 104).
CLEANING
Clean the planetary components in solvent and dry them with compressed air.
INSPECTION
Check sun gear and driving shell condition. Replace the gear if damaged or if the bushings are scored or worn. The bushings are not serviceable.
Replace the driving shell if worn, cracked or damaged.
Replace planetary gear sets if gears, pinion pins, or carrier are damaged in any way. Replace the annulus gears and supports if either component is
worn or damaged.
Replace the output shaft if the machined surfaces are scored, pitted, or damaged in any way. Also replace the shaft if the splines are damaged, or
exhibits cracks at any location.
ASSEMBLY
1. Clean and inspect all components. Replace any components, which show evidence of excessive wear or scoring.
2. Install the number 11 bearing into the input planetary carrier so that the inner race will be toward the front of the transmission (Fig. 104).
3. Install the input sun gear into the input carrier (Fig. 104).
4. Install the number 10 bearing onto the rear of the reverse planetary carrier with the inner race toward the carrier (Fig. 104).
5. Install the number 9 bearing onto the front of the reverse planetary carrier with the outer race toward the carrier and the inner race facing upward
(Fig. 104).
6. Install the reverse planetary gear carrier into the input carrier (Fig. 104).
7. Install the input annulus gear into the input carrier (Fig. 104).
8. Install the snap-ring to hold the input annulus gear into the input carrier (Fig. 104).