
Grand Cherokee 4WD L6-242 4.0L VIN S MFI (1993)
3.
Remove the gray fastener from the connector by releasing the tab at the back of the fastener. Discard the fastener.
4.
Use the new tie strap (PN 06015756) to fasten the connector to the back of the instrument panel brace using the same mounting hole.
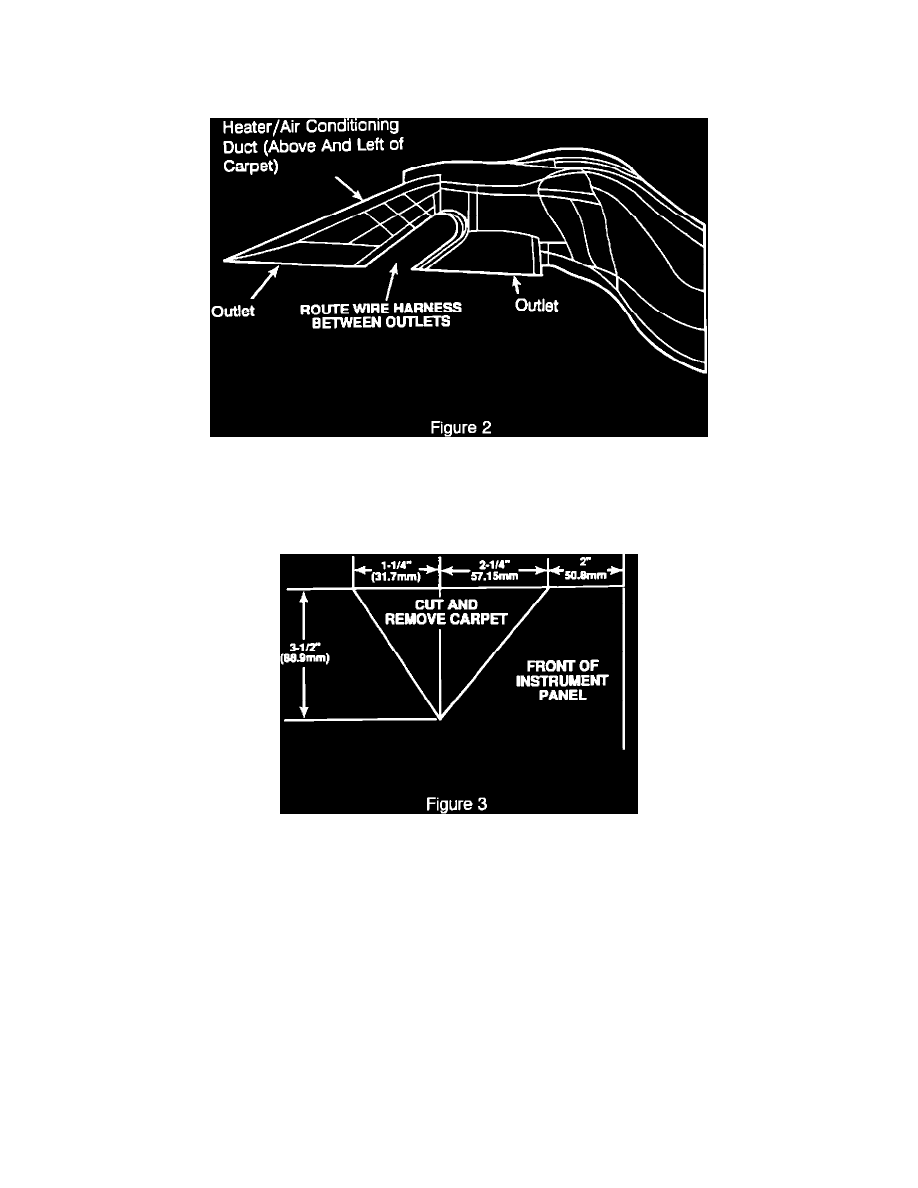
5.
Route the wiring harness through the gap between the floor duct outlets (Fig. 2).
CAUTION:
MAKE SURE THE WIRING DOES NOT INTERFERE WITH THE AUTOMATIC TEMPERATURE CONTROL LINKAGE, THROTTLE CABLE
OR DUCT AIRFLOW.
6.
Trim the carpet as shown to prevent interference with the duct airflow (Fig. 3).
7.
Use 3M Weatherstrip Adhesive (08011) to glue the carpet to the instrument panel brace to prevent interference with the duct airflow.
POLICY:
Reimbursable within the provisions of the warranty.
TIME ALLOWANCE:
Labor Allowance No. 24-65-48-91 ..........................0.2 Hrs.
FAILURE CODE:
85 - Improperly Installed Wiring