Grand Cherokee 4WD L6-242 4.0L VIN S MFI (1993)

Water Pump: Service and Repair
Installation
INSTALLATION
1. If pump is being replaced, install the heater hose fitting to the pump. Use a sealant on the fitting such as Mopar (TM) Thread Sealant With Teflon.
Refer to the directions on the package.
2. Clean the gasket mating surfaces. If the original pump is used, remove any deposits or other foreign material. Inspect the cylinder block and water
pump mating surfaces for erosion or damage from cavitation.
3. Install the gasket and water pump (the gasket is installed dry). Tighten mounting bolts to 30 N.m (22 ft. lbs.) torque. Rotate the shaft by hand to be
sure it turns freely.
4. Connect the radiator and heater hoses to the water pump.
5. Position the fan assembly and fan shroud (together as one unit) to the engine.
6. Position fan shroud to radiator. Be sure the alignment tabs at the lower part of shroud are placed into the slots near lower part of radiator. Install
and tighten the two fan shroud mounting nuts.
7. Install fan assembly to water pump hub. Tighten fan drive mounting nuts to 24 N.m (18 ft. lbs.) torque. Be sure of at least 25 mm (1.0 inches)
between tips of fan blades and fan shroud.
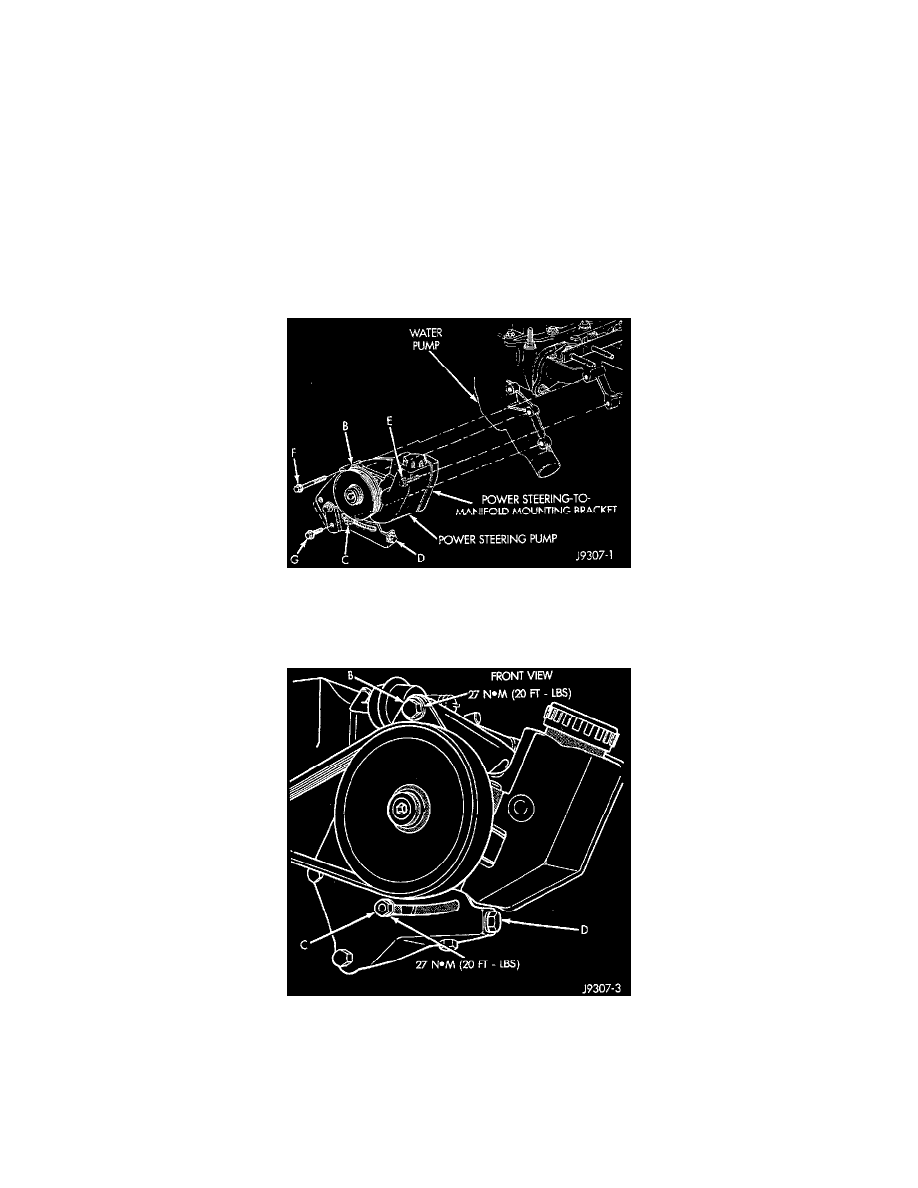
Fig. 6 Bracket Mounting Bolts - 4.0L Engine
8. Position power steering pump bracket to engine. Install bolts E, F and G. Tighten bolts F and G to 38 N.m (28 ft. lbs.) torque. Tighten bolt E to 27
N.m (20 ft. lbs.) torque.
Fig. 5 P.S. Pump Front Mounting Bolt/Locknut - 4.0L Engine
9. Position power steering pump to mounting bracket. Install pivot bolt B finger tight. Install locknut C and adjustment bolt D finger tight.
