
Grand Cherokee 4WD L6-242 4.0L VIN S MFI (1993)
Constant Velocity Joint Boot: Service and Repair
NOTE: The only service procedure to be performed on the axle C/V joint, is the replacement of the joint seal boot. If any failure of internal axle shaft
components is diagnosed during a vehicle road test, the axle shaft must be replaced as an assembly.
REMOVAL
1. Remove axle shaft.
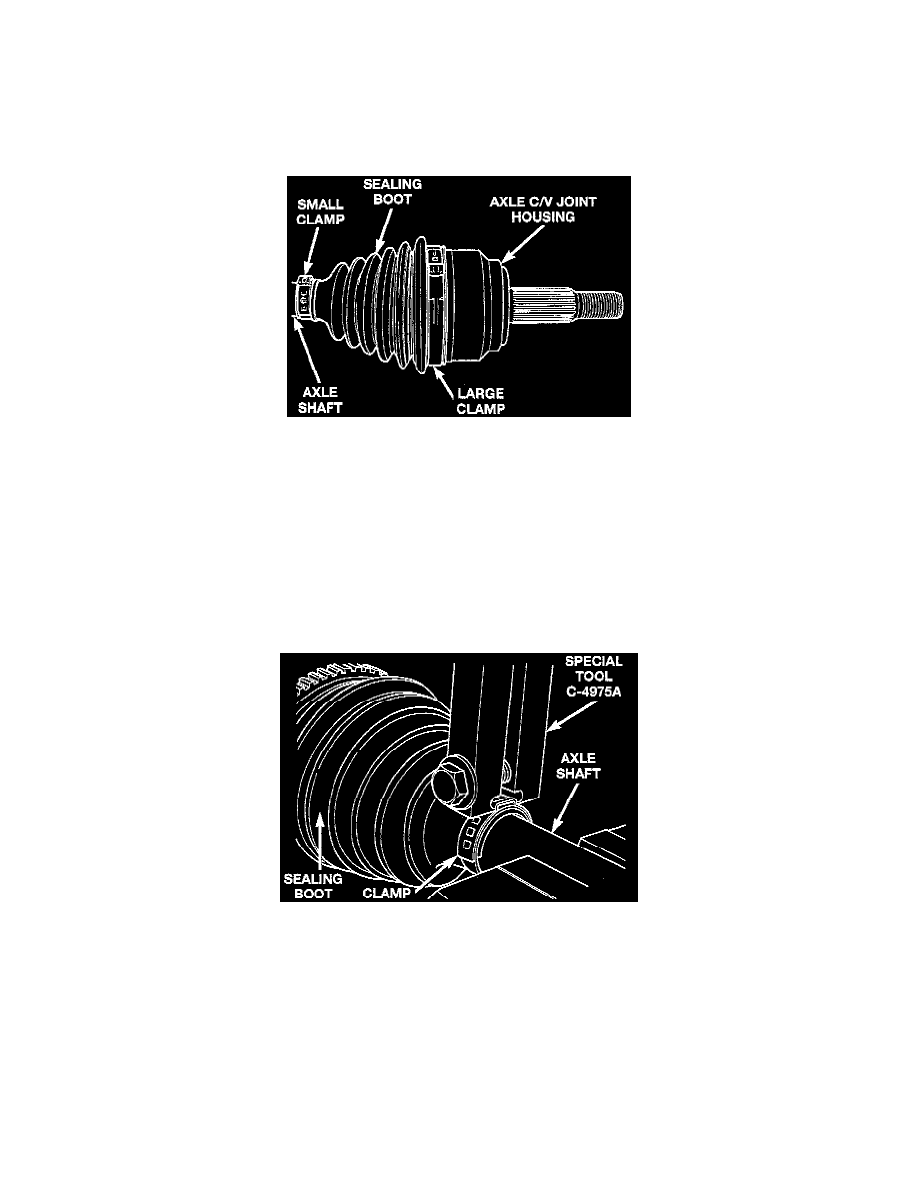
2. Remove large boot clamp retaining C/V joint sealing boot, to C/V joint housing and discard.
3. Remove small clamp that retains outer C/V joint sealing boot to axle shaft and discard.
4. Remove sealing boot from outer C/V joint housing and slide it down and off the axle shaft.
5. Thoroughly clean and inspect axle C/V joint assembly and axle shaft for any signs of excessive wear. If any parts show signs of excessive wear,
the axle shaft assembly will require replacement. Component parts of these axle shaft assemblies are not serviceable.
INSTALLATION
1. Slide new sealing boot large clamp over axle shaft and onto C/V joint.
2. Slide the axle C/V joint sealing boot onto the axle shaft.
3. Distribute 1/2 the amount of grease provided in seal boot service package (DO NOT USE ANY OTHER TYPE OF GREASE) into axle C/V joint
assembly housing. Put the remaining amount into the sealing boot.
4. Install axle C/V joint boot small clamp evenly on sealing boot.
5. Position axle C/V joint boot into retaining groove in axle C/V joint housing. Then, install large retaining clamp evenly on sealing boot.
6. Clamp small sealing boot clamp onto axle shaft using Crimper C-4975-A, or equivalent. Place crimping tool C-4975-A, or equivalent over bridge
of clamp.