Grand Cherokee 4WD V8-4.7L (2003)

Trunk / Liftgate Latch: Adjustments
ADJUSTMENTS
ADJUSTMENT
1. Remove the trim panel.
2. With the liftgate closed, slowly open the liftgate using the outside handle.
3. Determine if one of more of the following occurs:
-
Excessive handle travel is required to unlatch the liftgate.
-
Only one side of the liftgate will unlatch.
-
As one side of the liftgate unlatches, more than 2 mm (0.08 in.) of additional outside handle travel is required to unlatch the other side
(latches are not synchronized/timed).
NOTE: Do not close the liftgate during the adjustment procedure.
4. To adjust the latch cables, open the liftgate.
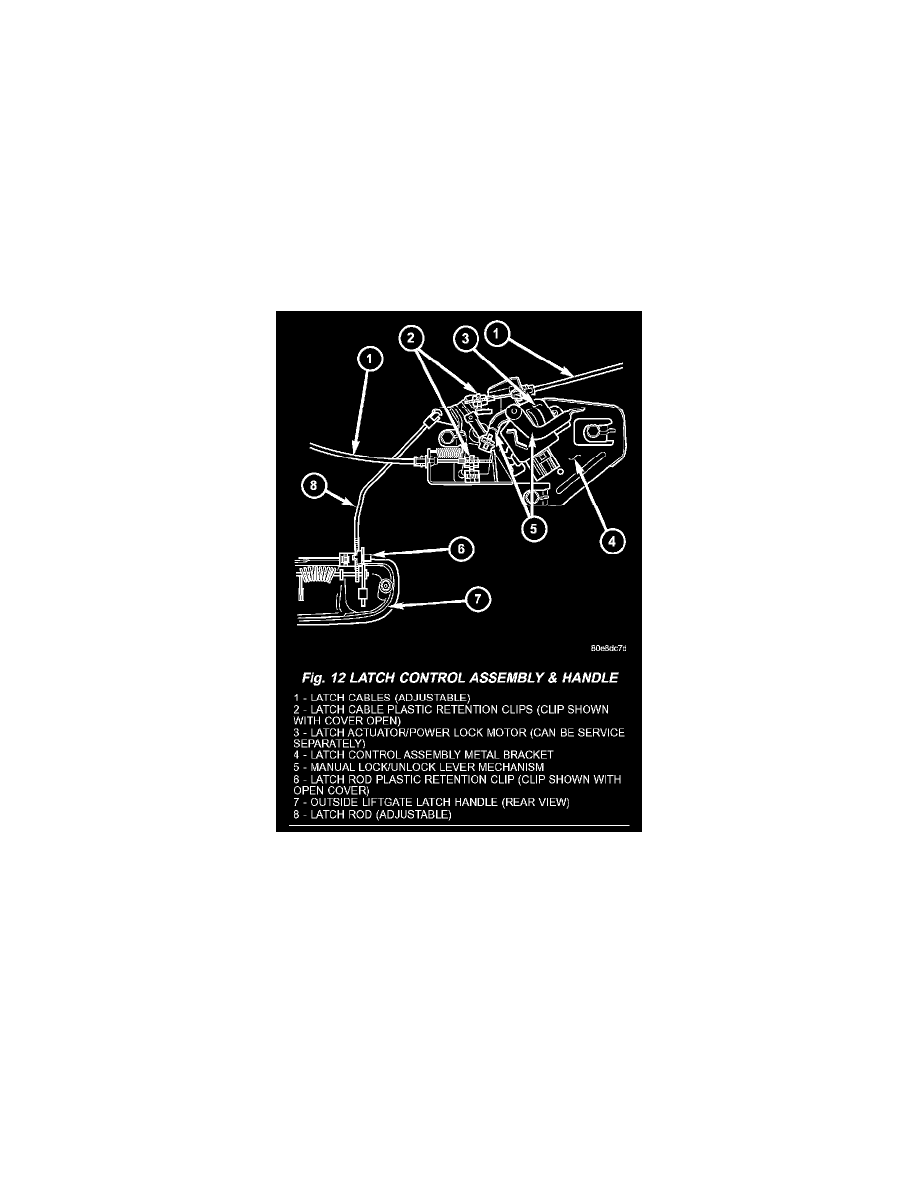
Fig. 12
5. Open the plastic latch rod retention clip on the outside handle and disconnect the latch rod from the outside handle. (Fig. 12)
6. Open both latch cable retention clips and remove the threaded end of the cable from each clip.
7. Verify that the latch control assembly is in its fully returned position.
8. Verify that both latch cables slide smoothly and do not bind.
NOTE: The latches must be in their fully closed position to properly adjust the latch cables. The following step is necessary to remove excess
cable play at the latch end of the cable.
9. Using a suitable tool, fully latch (close) both liftgate latches.
10. Gently pull on the latch cable threaded end to remove any excess play in the cable.
11. Remove the excess play from the other latch cable and seat both cable threaded ends into their respective opened retention clips.
NOTE: Apply a small bead of RTV to both open cable retention clips and threaded cable ends to prevent the threaded ends from rotating within
the retention clips.
