
Grand Cherokee 4WD V8-4.7L (2003)
Receiver Dryer: Service and Repair
REMOVAL
WARNING: REVIEW THE WARNINGS AND CAUTIONS IN THE FRONT OF THIS SECTION BEFORE PERFORMING THE
FOLLOWING OPERATION.
1. Recover the refrigerant from the refrigerant system.
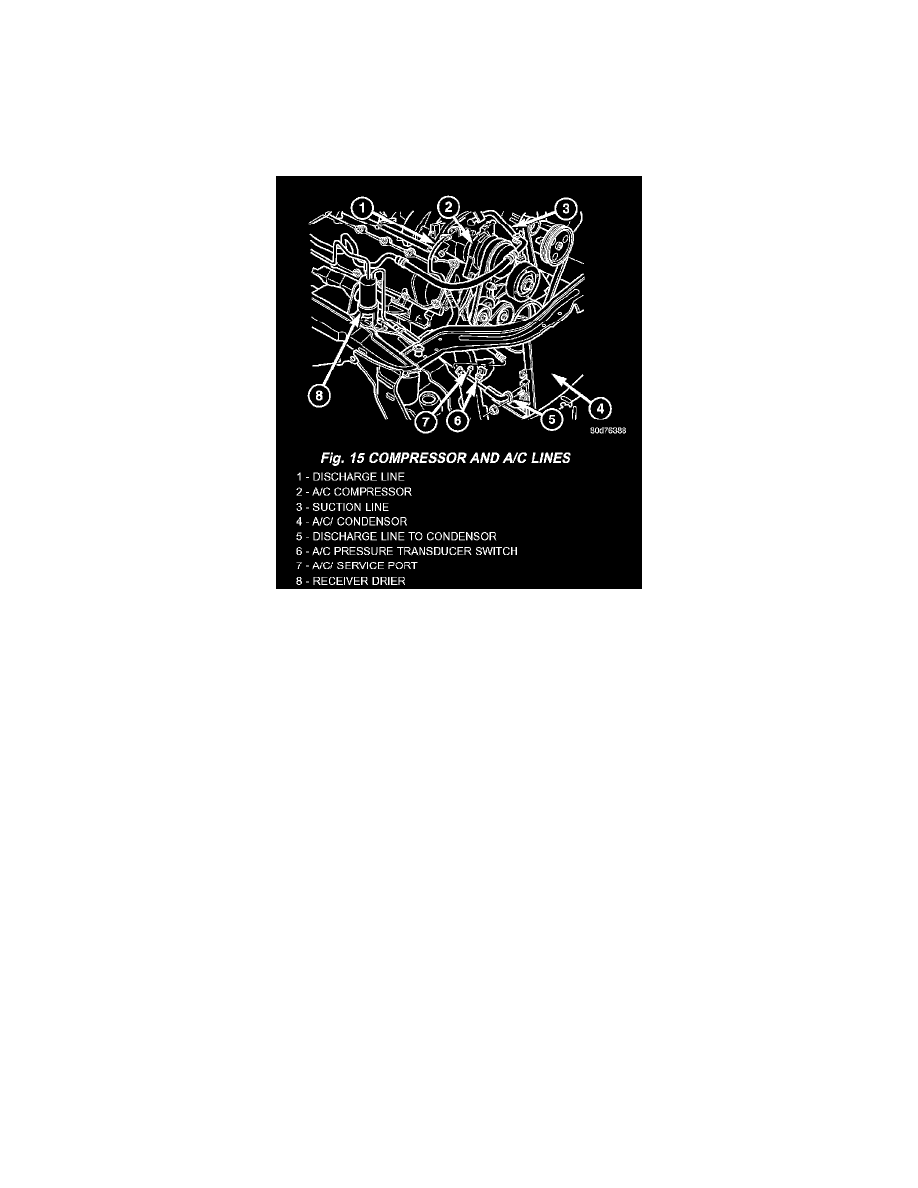
Fig.15 Compressor And A/C Lines - V8
3. Remove the screw from the receiver/drier bracket.
4. Remove the retaining nut from the evaporator connection and then slide the suction line off the stud and liquid line.
5. Remove the receiver/drier bracket from the stud and disconnect the liquid line from the evaporator inlet. Install plugs in or tape over all of the
evaporator connection openings and opened refrigerant line fittings.
6. Disconnect the liquid line from the condenser outlet. Install plugs in, or tape over all of the opened refrigerant line fittings.
7. Remove liquid line assembly
INSTALLATION
WARNING: REVIEW THE WARNINGS AND CAUTIONS IN THE FRONT OF THIS SECTION BEFORE PERFORMING THE
FOLLOWING OPERATION.
Any kinks or sharp bends in the refrigerant plumbing will reduce the capacity of the entire air conditioning system. Kinks and sharp bends reduce the
flow of refrigerant in the system. A good rule for the flexible hose refrigerant lines is to keep the radius of all bends at least ten times the diameter of
the hose. In addition, the flexible hose refrigerant lines should be routed so they are at least 80 millimeters (3 inches) from the exhaust manifold.
High pressures are produced in the refrigerant system when the air conditioning compressor is operating. Extreme care must be exercised to make sure
that each of the refrigerant system connections is pressure-tight and leak free. It is a good practice to inspect all flexible hose refrigerant lines at least
once a year to make sure they are in good condition and properly routed.
1. Remove the tape or plugs from the refrigerant line fittings on the condenser outlet and the condenser end of the liquid line. Connect the liquid line
to the condenser outlet. Tighten the retaining nut to 20.16 Nm (180 in. lbs.).
2. Remove the tape or plugs from the refrigerant line fittings on the evaporator end of the liquid line and the evaporator inlet. Place the receiver/drier
bracket on the stud and connect the liquid line to the evaporator inlet.
3. Remove the tape or plugs from the suction line and evaporator outlet. Slide the suction line connection block on the liquid line on the evaporator
connection stud. Tighten the retaining nut to 20.16 Nm (180 in. lbs.).
4. Insert a screw for the receiver/drier bracket and hand turn three turns. Tighten the screw to 10.64 Nm (95 in. lbs.).
5. Install the battery tray and the battery.
6. Evacuate the refrigerant system.
7. Charge the refrigerant system.