
Grand Cherokee 4WD V8-4.7L (2003)
1. Remove the PDC housing lower cover.
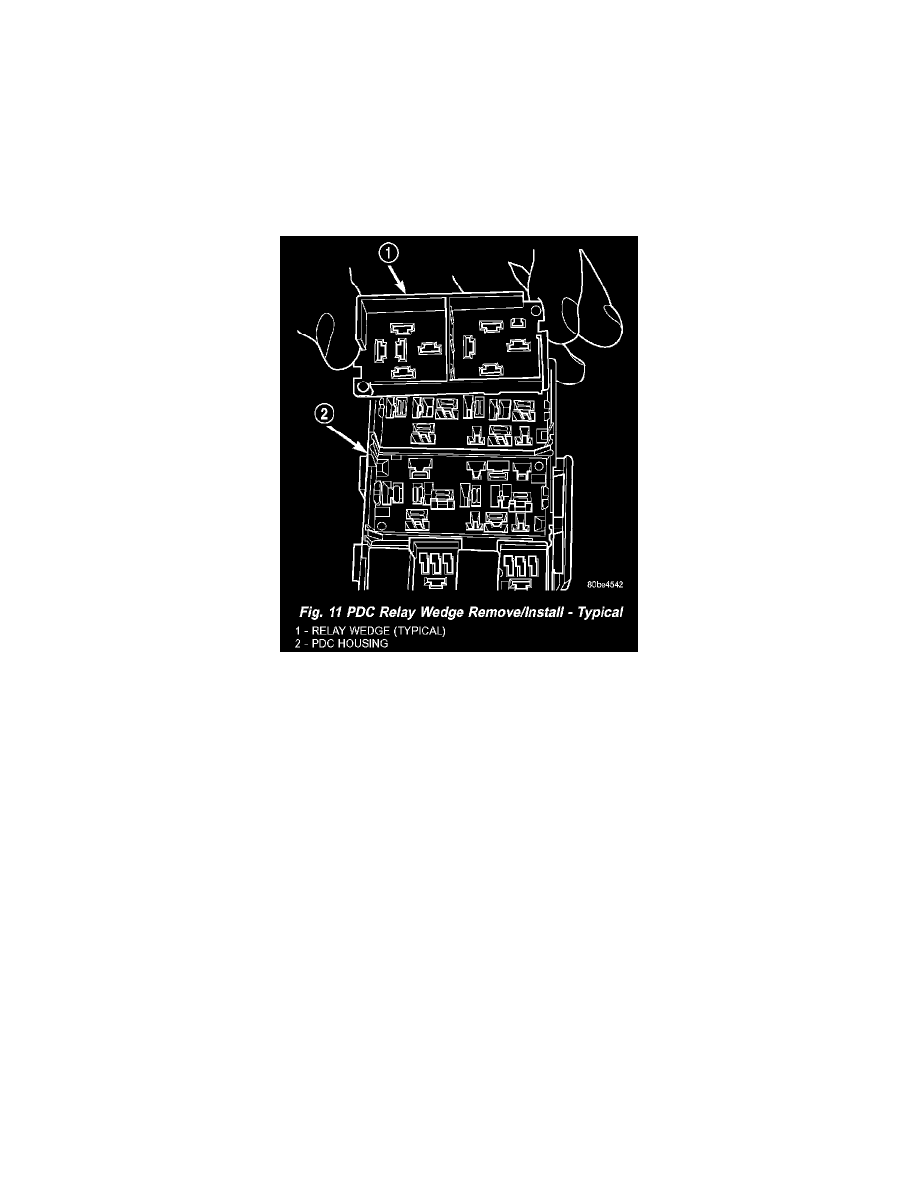
2. Remove each of the relays from the PDC relay wedge to be removed.
3. From the bottom of the PDC housing, use a small screwdriver or a terminal pick tool (Special Tool Kit 6680) to release the two latches (yellow)
that secure the relay wedge to the PDC relay cassette.
RELAY WEDGE INSTALLATION
1. From the top of the PDC housing, align and insert the PDC relay wedge latch arms into the correct cavities in the relay cassette.
2. Gently and evenly press the PDC relay wedge down into the relay cassette until both of the latches are fully engaged.
3. Install each of the removed relays into the proper cavities of the PDC relay wedge.
4. Install the PDC housing lower cover.
Fig. 11 PDC Relay Wedge Remove/Install Typical
4. From the top of the PDC housing, remove the relay wedge from the PDC relay cassette (Fig. 11).
PDC RELAY CASSETTE REMOVAL
The Power Distribution Center (PDC) cover, the PDC housing lower cover, the PDC relay wedges, the PDC relay cassettes and the PDC B(+)
terminal stud module are available for service replacement. The PDC cover can be simply unlatched and removed from the PDC housing without the
PDC being removed or disassembled. Service of the remaining PDC components requires that the PDC be removed from its mounting and
disassembled. Refer to Wiring Repair in Wiring Diagrams for the location of the wiring repair procedures.
1. Remove the relay wedge from the PDC relay cassette to be removed.
NOTE: It may be necessary to remove relay cassettes that are not being serviced from the PDC housing in order to obtain sufficient clearance to
access the faulty relay cassette. The same service procedure is repeated as necessary to remove each of the interfering relay wedges and relay
cassettes from the PDC housing.