
Grand Cherokee 4WD V8-4.7L VIN N (2000)
Oil Pan: Service and Repair
REMOVAL
1. Disconnect negative cable from battery.
2. Raise vehicle on hoist.
3. Remove structural cover. Refer to Drive Belts, Mounts, Brackets and Accessories, Service and Repair for procedure.
4. Remove exhaust system Y-pipe.
5. Remove starter. Refer to Starting and Charging.
6. Drain engine oil.
7. Un-clip transmission lines from support on oil pan stud. Move lines for oil pan clearance.
CAUTION: DO NOT pry on the oil pan gasket when removing the oil pan, The oil pan gasket is mounted to the cylinder block in three locations
and will remain attached to block when lowering oil pan. Gasket can not be removed with oil pan.
8. Remove oil pan bolts and oil pan.
9. Remove oil pump pickup tube.
10. Remove oil pan gasket.
INSTALLATION
1. Clean oil pan and all sealing surfaces. Inspect oil pan gasket and replace as necessary.
2. Install oil pan gasket.
NOTE: When installing oil pan gasket/windage tray, start four pan bolts at each corner before tightening oil pickup tube. This will keep pan
gasket in alignment.
3. Install oil pump pick-up tube using a new O-ring. First tighten bolt at O-ring end of tube to 28 Nm (20 ft. lbs.). Tighten remain tube support
fasteners to 28 Nm (20 ft. lbs.).
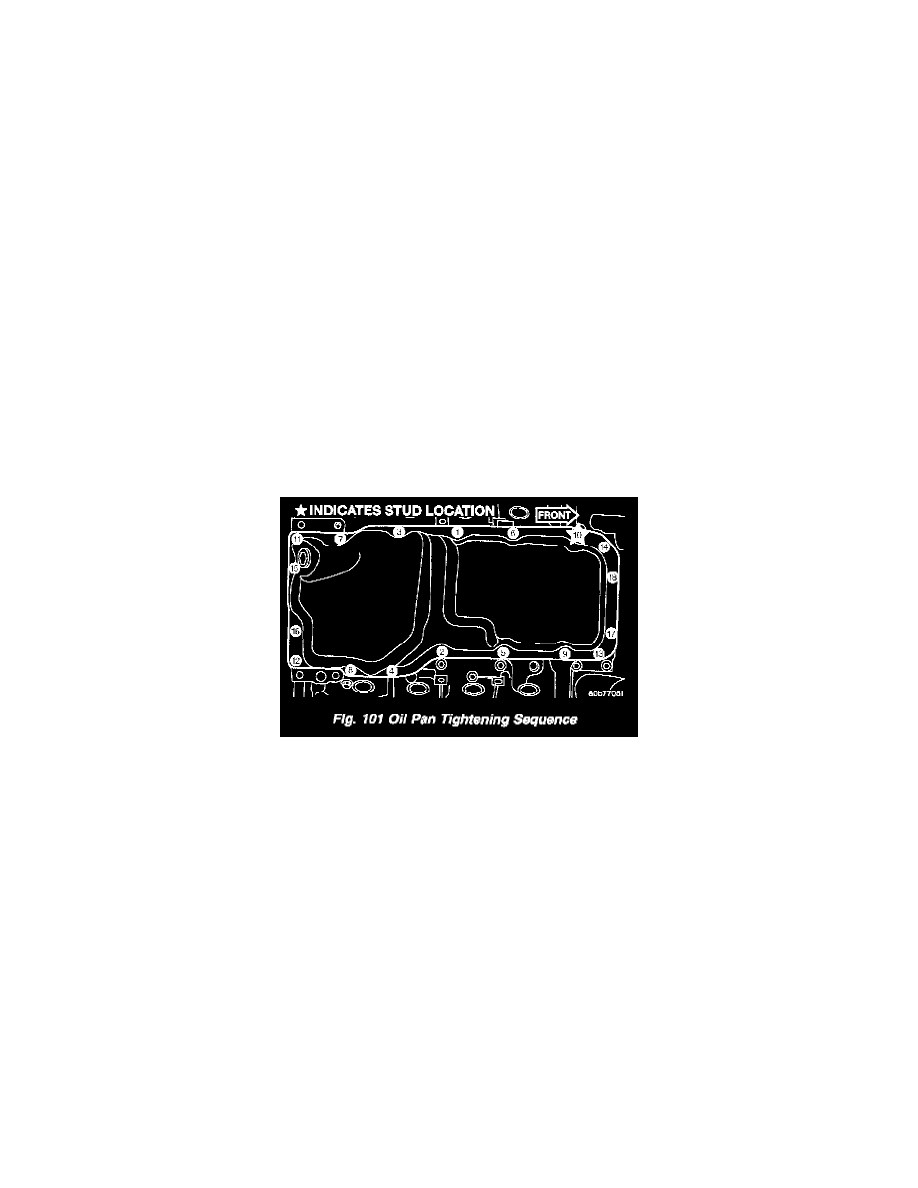
Fig. 101
4. Install oil pan and tighten fasteners to 15 Nm (11 ft. lbs.) (Fig. 101).
a. Reconnect transmission oil cooler lines to oil pan stud bolt.
6. Install starter.
7. Install exhaust system Y-pipe.
8. Install structural cover.
9. Lower vehicle.
10. Fill engine with proper amount of oil.
11. Connect negative cable to battery.