
Grand Cherokee 4WD V8-4.7L VIN N (2000)
6.
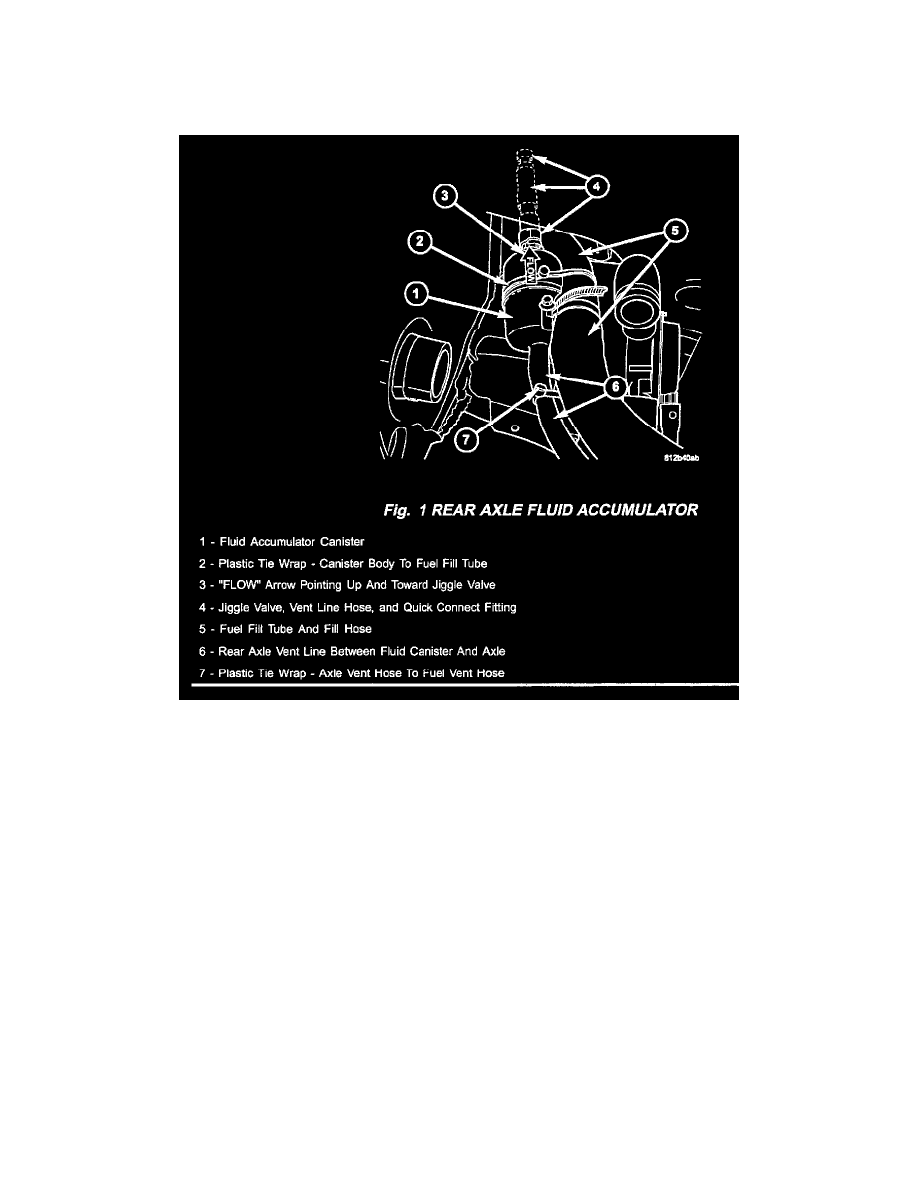
Disconnect the ORVR (evaporative vapor) hose elbow, if equipped, from the top of the canister so that the canister assembly can be positioned out
of the way and to allow access to the rear axle vent line.
7.
Remove the plastic tie wrap used to secure the end of the rear axle vent line to its support bracket.
8.
Measure and mark a distance of 38 mm (1.5 in.) from the end of the rubber rear axle vent line. Do not include the jiggle valve in this measurement
(Fig. 1).
9.
Cut the rear axle vent line hose at the 38 mm (1.5 in.) mark.
10.
Install the jiggle cap with the 38 mm (1.5 in.) length of vent line to the quick connect fitting that is on one the end of the Fluid Accumulator
Canister, p/n 52070409AA.
11.
Install the rear axle vent line from the rear axle to the other end of the Fluid Accumulator Canister.
NOTE:
On the outside of the canister is an arrow marked "FLOW". The arrow must be pointing toward the jiggle cap. When the canister is installed to the
vehicle the arrow must be pointing in the up direction.
12.
Using plastic tie wraps secure the fluid accumulator canister at two locations: to the metal fuel filler tube, and to the fuel vent hose. Make certain
that the accumulator canister is secure and will not rattle against other components when the vehicle is in operation.
13.
Attach the ORVR elbow hose, if equipped, to the top of the evaporative canister.
14.
Install the evaporative canister assembly support bracket and the support bracket brace, if equipped, to the vehicle. Tighten attaching nuts and
bolts to 28 Nm (250 in. lbs.).
15.
Install the splash/stone shield to the vehicle.
16.
Install the rear bumper fascia to the vehicle.