
Grand Cherokee 4WD V8-5.2L VIN Y (1998)
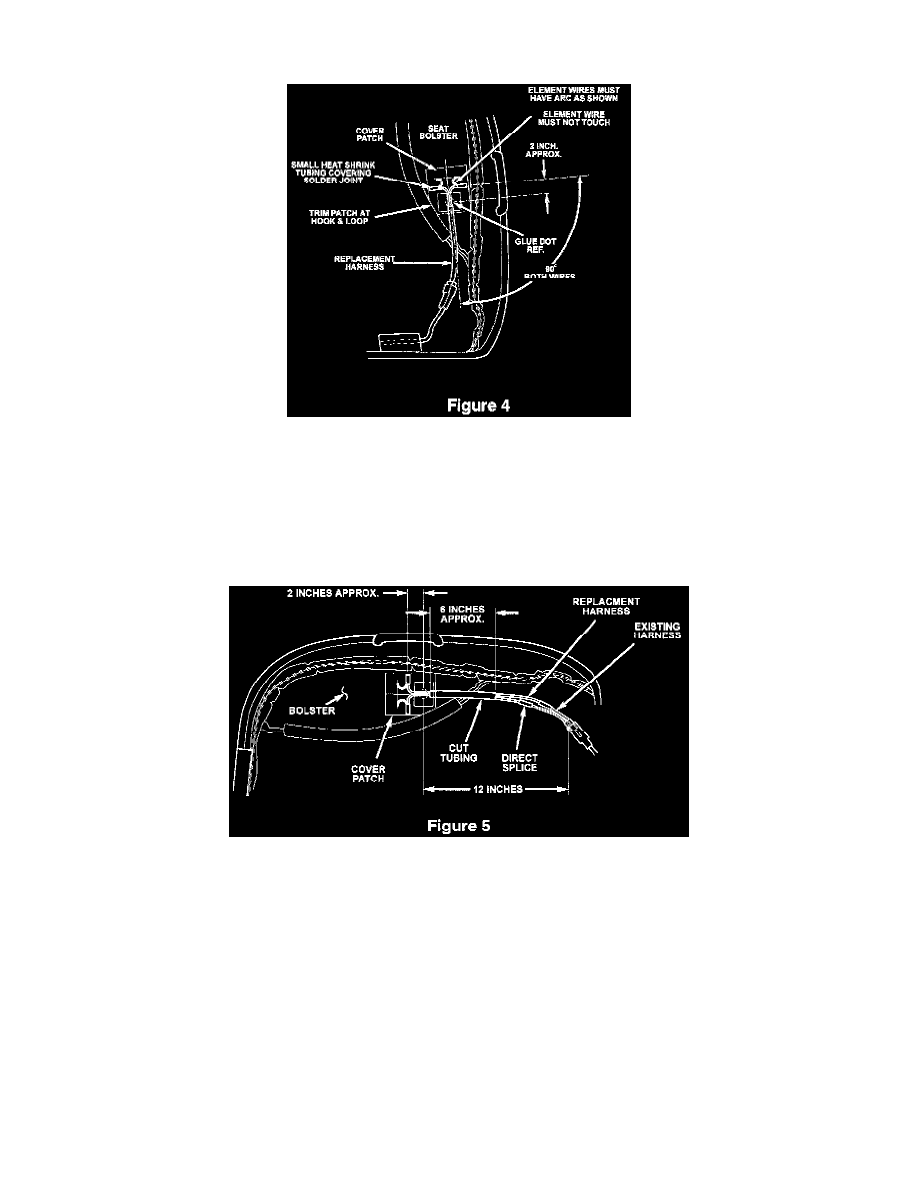
insulation on the wire, carefully strip one inch of the insulation from the element to allow for soldering. Pull the elements away from the cover
enough to clear the foam for soldering. Trim the foam as necessary to provide adequate clearance for soldering.
10.
The soldering procedure requires a technician skilled in soldering fine electrical/electronic wiring. Using a soldering iron and rosin core, solder the
new harness to the heating element as shown in Figure 4. Do not use any soldering equipment utilizing an open flame for this procedure. This
could damage the foam cushion. Make sure utilize the proper soldering procedures and heat the wire hot enough to melt the solder to avoid a cold
solder joint. Cut piece of heat shrink tubing in half and install it on the wire as shown. Shrink the tubing using a heat gun.
11.
Peel of the paper backing from the adhesive patch on the new harness and secure the harness to the cover as shown. The elements require at least
one inch clearance between each other to eliminate the possibility of them shorting together. Make sure to route the wires as shown and install the
cover patch to fully secure the new harness to the cover. Trim the cover patch as necessary to clear the hook and loop fasteners.
12.
The new harness will plug into most of the existing seat harnesses. Some vehicles utilized a red insulator, which is keyed differently than the green
insulator provided on the new harness. If the vehicle utilizes the red connector, it will have to be removed from the original harness and installed
on the new harness using solder and heat shrink tubing as shown in Figure 5. Be sure to stagger the splices as shown.
13.
Check continuity at both of the two wire connectors to assure good solder joint.
14.
Repeat this process for the second heating element.
15.
Install the seat cover to the seat bottom.
16.
Install the seat back.
17.
Install the seat and connect the harness.