
Grand Cherokee 4WD V8-5.2L VIN Y (1998)
Solar Sensor: Service and Repair
REMOVAL AND INSTALLATION
The solar sensor is used only on models with the optional Automatic Temperature Control (ATC) system.
WARNING: ON VEHICLES EQUIPPED WITH AIR-BAGS, REFER TO AIRBAGS SYSTEMS BEFORE ATTEMPTING ANY STEERING
WHEEL, STEERING COLUMN, OR INSTRUMENT PANEL COMPONENT DIAGNOSIS OR SERVICE. FAILURE TO TAKE THE
PROPER PRECAUTIONS COULD RESULT IN ACCIDENTAL AIR-BAG DEPLOYMENT AND POSSIBLE PERSONAL INJURY.
REMOVAL
1. Disconnect and isolate the battery negative cable.
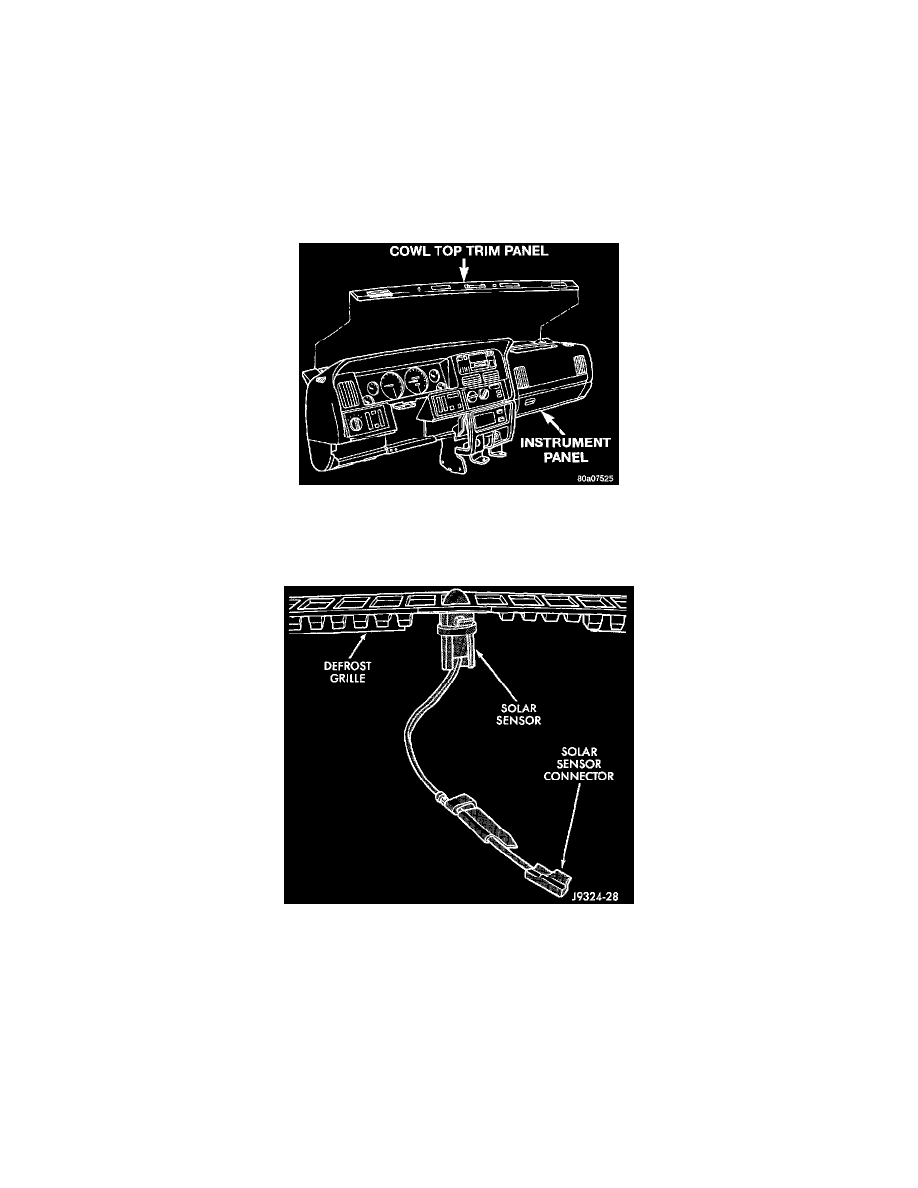
Cowl Top Trim Remove/Install
2. Using a trim stick or another suitable wide flat-bladed tool, gently pry the cowl top trim panel off of the instrument panel top pad.
3. Pull the trim panel up far enough to access the solar sensor, which is located between the passenger side and center defroster outlets.
Solar Sensor
4. Twist the solar sensor to remove it from the receptacle in the cowl top trim panel.
5. Pull the sensor out from the instrument panel far enough to access and unplug the wire harness connector from the instrument panel wire harness.
6. Remove the solar sensor from the instrument panel.
INSTALLATION
1. Plug the solar sensor wire harness connector into the instrument panel wire harness.
2. Insert the solar sensor into the receptacle on the bottom of the cowl top trim panel and twist the sensor to lock it into place.
3. Press the cowl top trim panel down until the snap clip retainers engage in the top of the instrument panel.
4. Connect the battery negative cable.