
Grand Cherokee 4WD V8-5.2L VIN Y (1998)
Heated Glass Element Relay: Service and Repair
REMOVAL AND INSTALLATION
WARNING: ON VEHICLES EQUIPPED WITH AIR-BAGS, REFER TO AIRBAGS SYSTEMS BEFORE ATTEMPTING ANY STEERING
WHEEL, STEERING COLUMN, OR INSTRUMENT PANEL COMPONENT DIAGNOSIS OR SERVICE. FAILURE TO TAKE THE
PROPER PRECAUTIONS COULD RESULT IN ACCIDENTAL AIR-BAG DEPLOYMENT AND POSSIBLE PERSONAL INJURY.
1. Disconnect and isolate the battery negative cable.
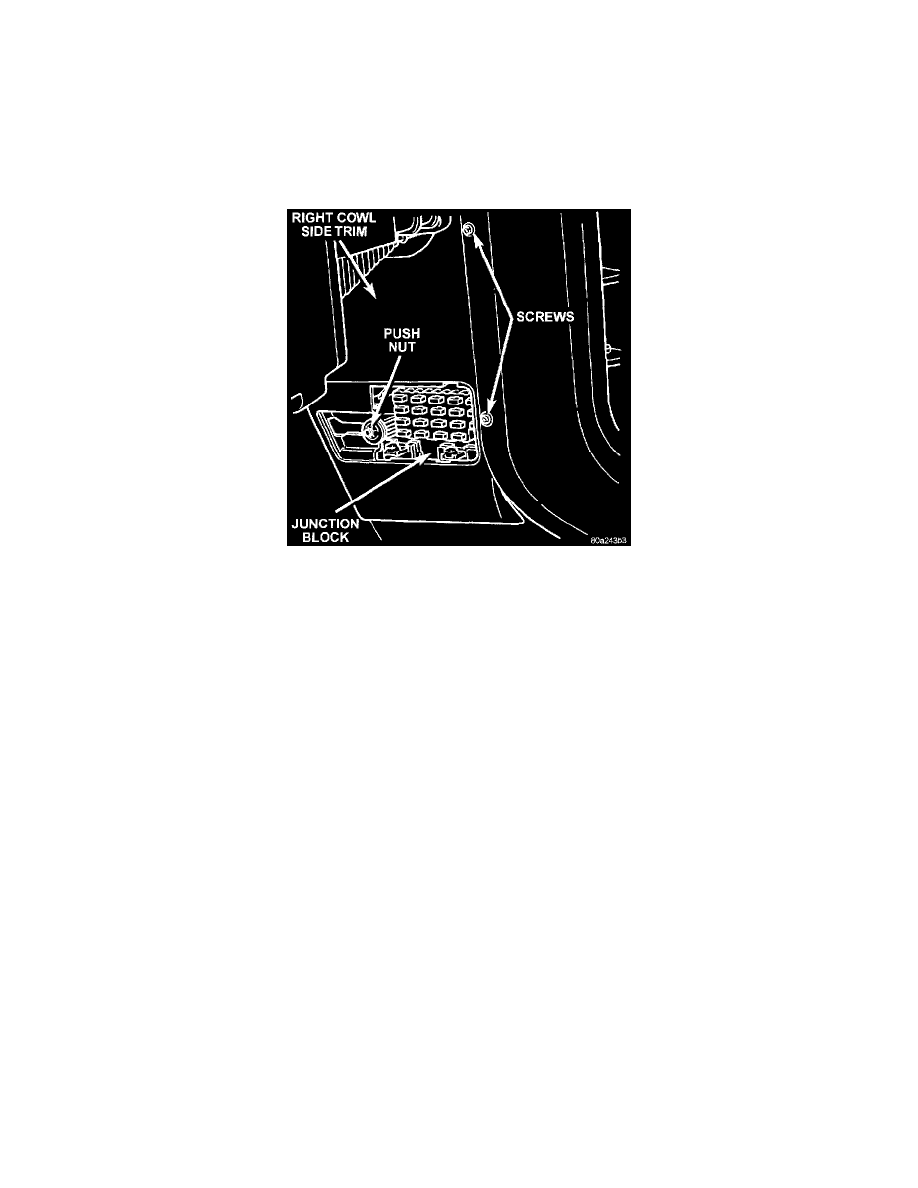
2. Remove the fuse access panel by unsnapping it from the right cowl side trim panel.
Right Cowl Side Trim Panel Remove/Install
3. Remove the push nut that secures the right cowl side trim panel to the junction block stud.
4. Remove the two screws that secure the right cowl side trim panel to the right front door opening trim.
5. Remove the right cowl side trim panel from the right cowl side inner panel.
6. Unplug the defogger relay from the junction block.
7. Install the defogger relay by aligning the relay terminals with the cavities in the junction block and pushing the relay firmly into place.
8. Connect the battery negative cable.
9. Test the relay operation.
10. Install the right cowl side trim panel and the fuse access panel.