
Grand Cherokee 4WD Laredo V8-4.7L (2002)
Console: Service and Repair
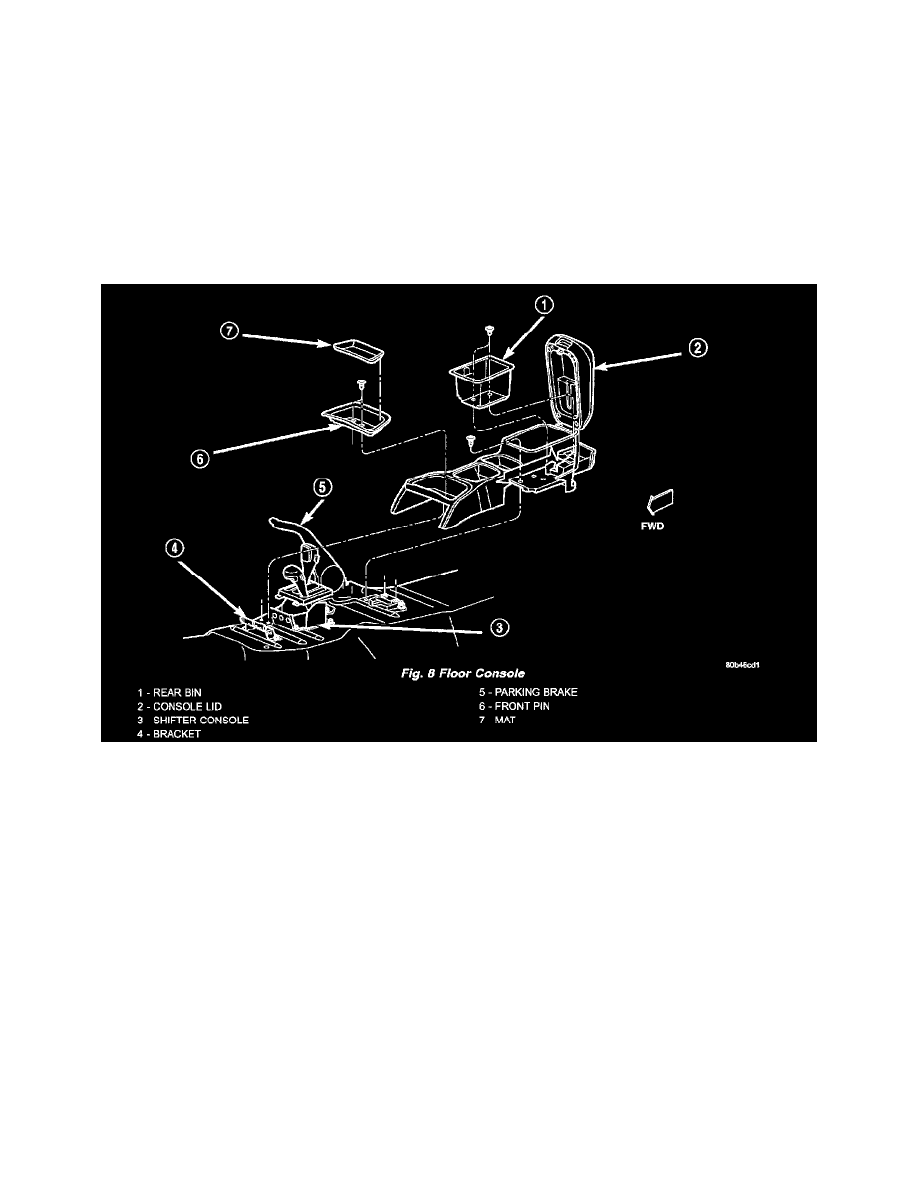
Console
REMOVAL
CAUTION: The ACM should be depowered by disconnecting the negative battery cable in any operation requiring the key to be turned
"ON", while working in the console area. E.G. console, carpet, or seat removal or installation; shifter linkage adjustment or replacement;
parking brake cable replacement or adjustment. Failure to take proper precautions could result in accidental airbag deployment and
possible personal injury.
1. Set park brake.
2. Place transmission shift lever and transfer case lever in full rearward position.
3. Remove mat from front bin and remove screws attaching front of console to floor (Fig. 8).
4. Remove screws attaching rear bin to console.
5. Remove rear bin.
6. Pull rear passenger cup holder outward to access screws.
7. Remove screws attaching rear of console to floor.
8. Lift the console upward and rearward.
9. Remove console from vehicle.
INSTALLATION
CAUTION: The ACM should be depowered by disconnecting the negative battery cable in any operation requiring the key to be turned
"ON", while working in the console area. E.G. console, carpet, or seat removal or installation; shifter linkage adjustment or replacement;
parking brake cable replacement or adjustment. Failure to take proper precautions could result in accidental airbag deployment and
possible personal injury.
1. Position console in vehicle. Ensure rear passenger HVAC duct is engaged.