
Grand Cherokee 4WD SRT-8 V8-6.1L VIN 3 (2006)
2. Install and tighten the four screws (2) that secure the lower switch pod to the center bezel. Tighten the screws to 2 N.m (17 in. lbs.).
3. Reconnect the wire harness connector to the back of the lower switch pod.
4. Reinstall the center bezel onto the instrument panel.
5. Reconnect the battery negative cable.
UPPER
REMOVAL
1. Disconnect and isolate the battery negative cable.
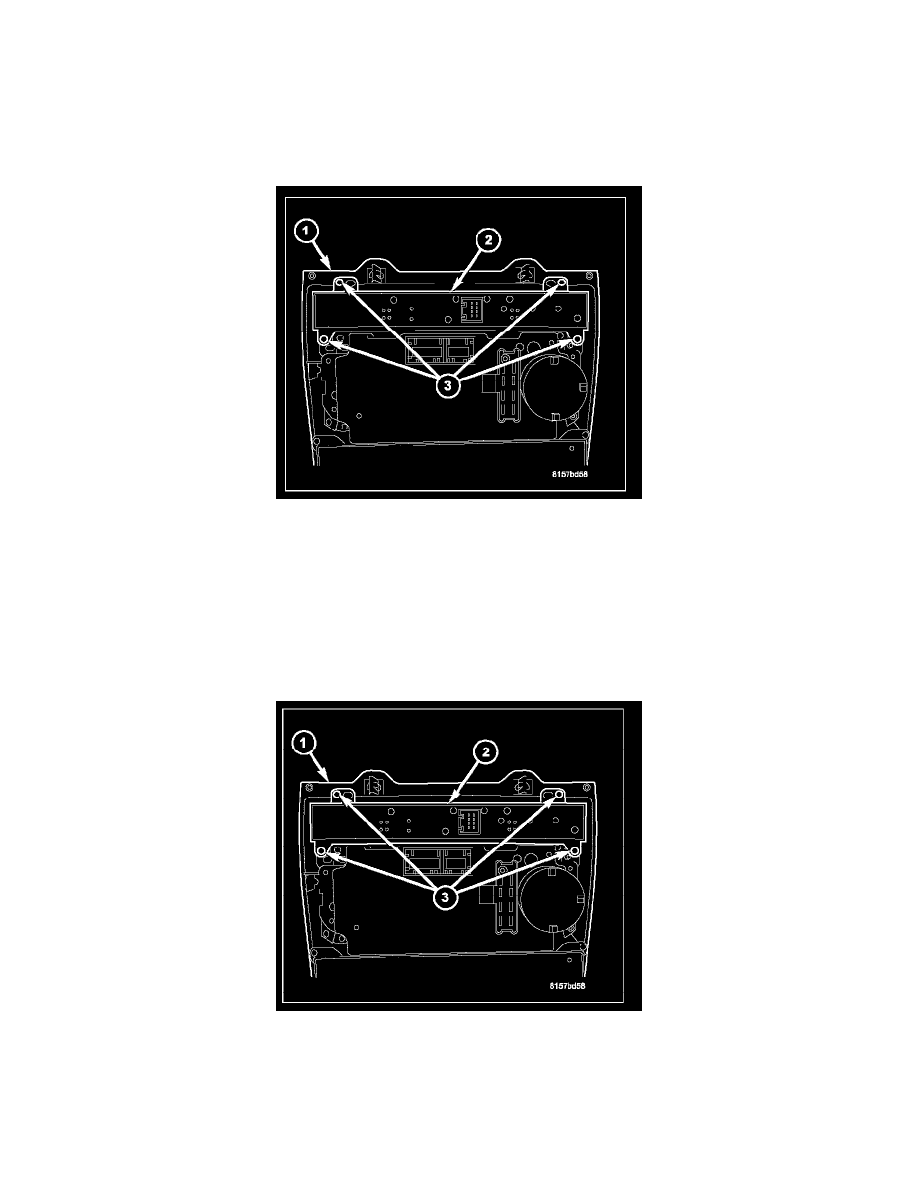
2. Remove the center bezel (1) from the instrument panel.
3. Disconnect the wire harness connector from the back of the upper instrument panel switch pod (2).
4. Remove the four screws (3) that secure the switch pod to the back of the center bezel.
5. Remove the upper switch pod from the center bezel.
INSTALLATION
NOTE: There are several different instrument panel upper switch pods available, depending upon the optional or required equipment content of the
vehicle. Be certain that a replacement upper switch pod matches the optional and required equipment of the vehicle into which it is being installed.
1. Position the upper instrument panel switch pod (2) to the back of the center bezel (1).
2. Install and tighten the four screws (3) that secure the upper switch pod to the center bezel. Tighten the screws to 2 N.m (17 in. lbs.).
3. Install the four upper instrument panel switch pod (3) fasteners.
4. Reconnect the wire harness connector to the back of the upper switch pod.
5. Reinstall the center bezel onto the instrument panel.
6. Reconnect the battery negative cable.