
Grand Wagoneer V8-360 5.9L VIN 7 2-bbl (1989)
Camshaft: Service and Repair
Camshaft Replacement
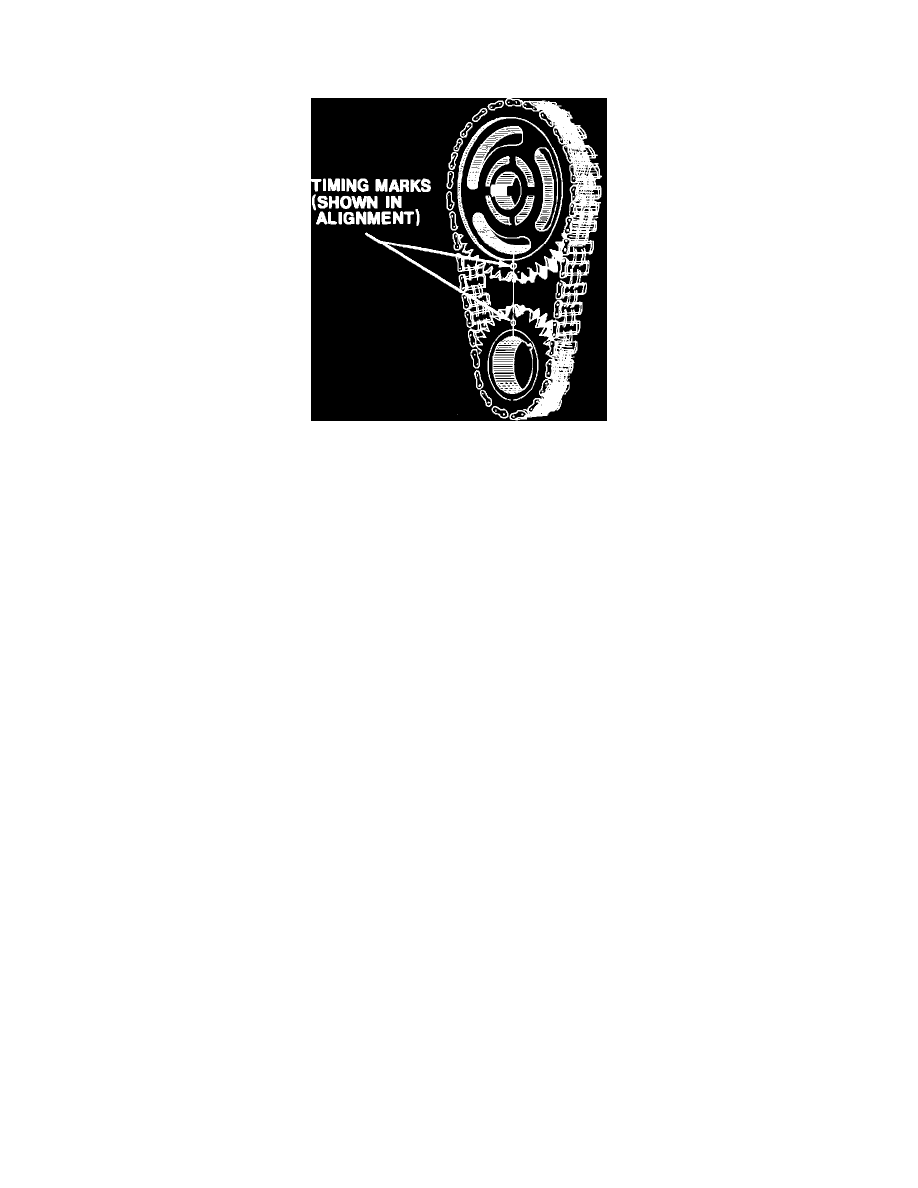
Fig. 5 Valve Timing
1.
Disconnect battery ground cable.
2.
Drain cooling system.
3.
Remove radiator and fan assembly.
4.
On models equipped with air conditioning, remove condenser and receiver assembly and position aside.
5.
On all models, remove cylinder head covers and gaskets.
6.
Remove bridge and pivot assembly, rocker arms and pushrods. During removal of bridge and pivot assembly, alternately loosen capscrews one
turn at a time to avoid damaging bridge.
7.
Remove intake manifold assembly from engine.
8.
Remove valve lifters.
9.
Remove distributor.
10.
Remove damper pulley and vibration damper.
11.
Remove timing case cover.
12.
Rotate crankshaft until timing mark on crankshaft sprocket aligns with timing mark on camshaft sprocket.
13.
Remove camshaft and crankshaft sprocket retaining bolts.
14.
Remove distributor drive gear and fuel pump eccentric from camshaft.
15.
Remove timing chain, camshaft and crankshaft sprockets as an assembly.
16.
Remove hood latch support bracket, front bumper or grille, as required.
17.
Remove camshaft from engine.
18.
Reverse procedure to install. During installation of distributor, rotate crankshaft until No. 1 piston is at TDC of compression stroke. Install
distributor with rotor aligned with No. 1 terminal on distributor cap when distributor is completely seated on engine block. During installation of
timing chain, assemble crankshaft sprocket, camshaft sprocket with timing marks positioned as shown in.