
Liberty 2WD V6-3.7L (2008)
Instrument Panel/Service and Repair/Instrument Panel - Installation.
5. Reconnect the negative battery cable.
6. Initiate the Actuator Calibration function using a scan tool See: Testing and Inspection/Component Tests and General Diagnostics/HVAC System
Test.
Mode Door Actuator - Removal
REMOVAL
WARNING: Disable the airbag system before attempting any steering wheel, steering column, or instrument panel component diagnosis or
service. Disconnect and isolate the negative battery (ground) cable, then wait two minutes for the airbag system capacitor to discharge before
performing further diagnosis or service. This is the only sure way to disable the airbag system. Failure to take the proper precautions could
result in accidental airbag deployment and possible personal injury or death.
NOTE: LHD model shown. RHD model similar.
1. Disconnect and isolate the negative battery cable.
2. If equipped, remove the silencer from below the driver side of the instrument panel See: Body and Frame/Interior Moulding / Trim/Dashboard /
Instrument Panel/Service and Repair/Instrument Panel - Removal.
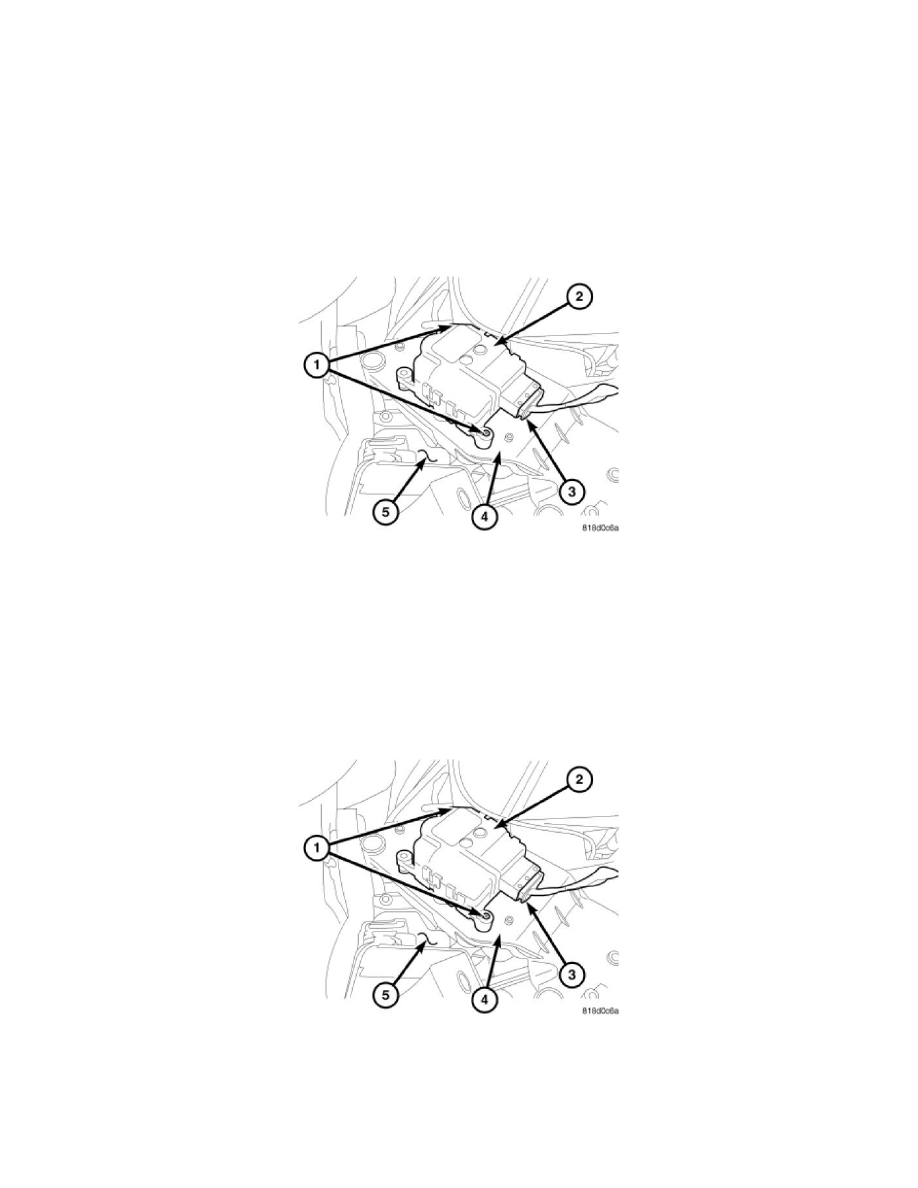
3. Disconnect the wire harness connector (3) from the mode door actuator (2) located on the driver side of the air distribution housing (5).
4. Remove the two screws (1) that secure the mode door actuator to the actuator mounting bracket (4) and remove the actuator.
Mode Door Actuator - Installation
INSTALLATION
NOTE: LHD model shown. RHD model similar.
1. Position the mode door actuator (2) to the actuator mounting bracket (4) located on the driver side of the air distribution housing (5). Make sure
the actuator output shaft is properly aligned to the door linkage. If necessary, rotate the actuator slightly to align the splines on the output shaft
with those in the mode door linkage
2. Install the two screws (1) that secure the mode door actuator to the actuator mounting bracket. Tighten the screws to 1.2 Nm (10 in lbs.).