Liberty 2WD V6-3.7L (2008)

Tail Light Bulb: Service and Repair
Installation
BULB
CAUTION: Always use the correct bulb size and type for replacement. An incorrect bulb size or type may overheat and cause damage to the
lamp, the socket or the lamp wiring.
NOTE: The rear lamp unit may contain up to four bulbs, depending upon the market for which the vehicle was manufactured. The service
procedures for each bulb are the same, only the bulb sizes and types may differ.
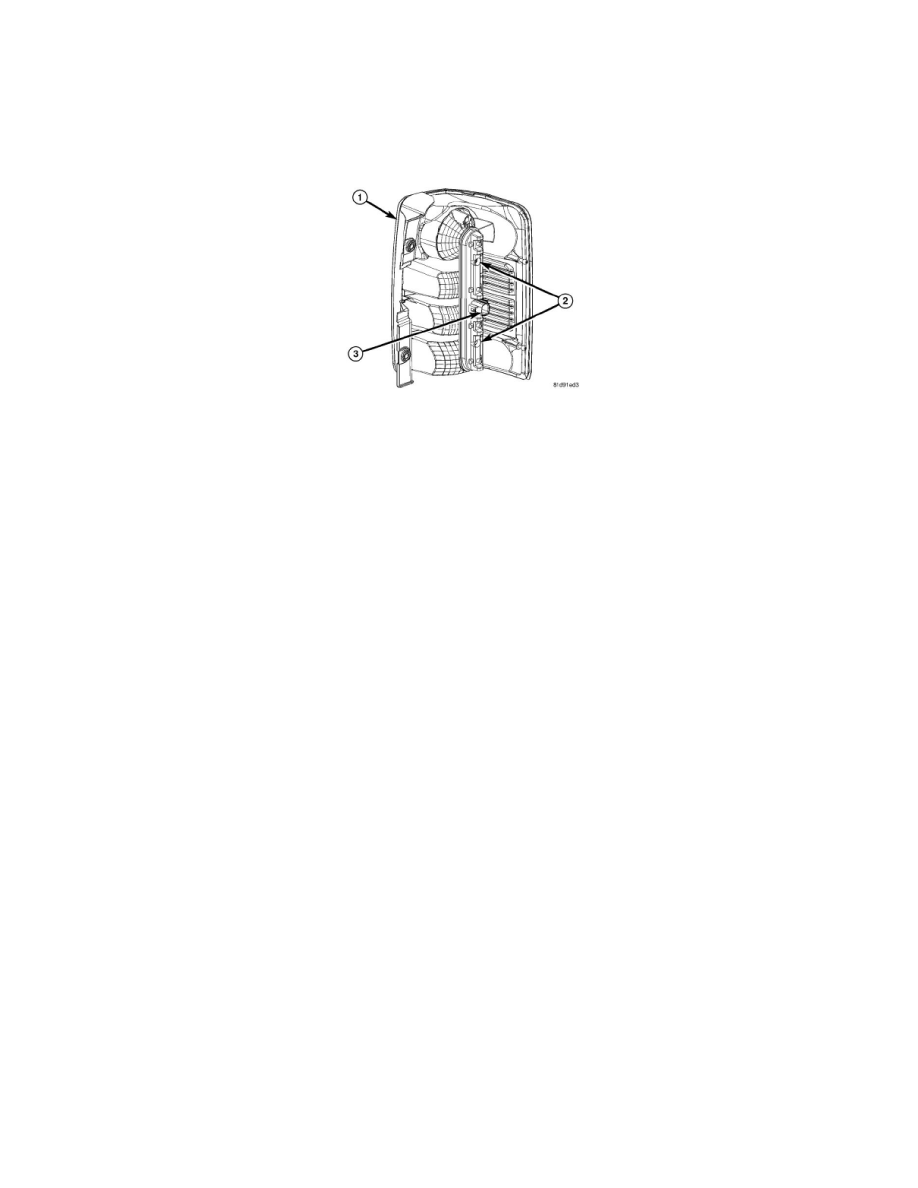
1. Align the base of the bulb with the socket in the rear lamp unit socket plate (3).
2. Push the bulb straight into the socket until the base is firmly seated.
3. Be certain that a rubber sealing washer is properly installed and in good condition around the base of each bulb on the socket plate.
4. Align the bulbs in the socket plate with the openings on the back of the rear lamp unit housing (1).
5. Insert the bulbs straight into the housing until the socket plate is firmly seated against the housing.
6. Install and tighten the two screws (2) that secure the socket plate to the housing. Tighten the screws to 1 Nm (12 in. lbs.).
7. Reinstall the rear lamp unit onto the end of the rear body sheet metal. See: Service and Repair/Removal and Replacement/Rear Lamp Unit -
Installation.
8. Reconnect the battery negative cable.
