
Liberty 2WD V6-3.7L (2008)
Rain Sensor: Service and Repair
REMOVAL
1. Disconnect and isolate the battery negative cable.
2. Remove the inside rear view mirror from the mounting button on the inside of the windshield glass.
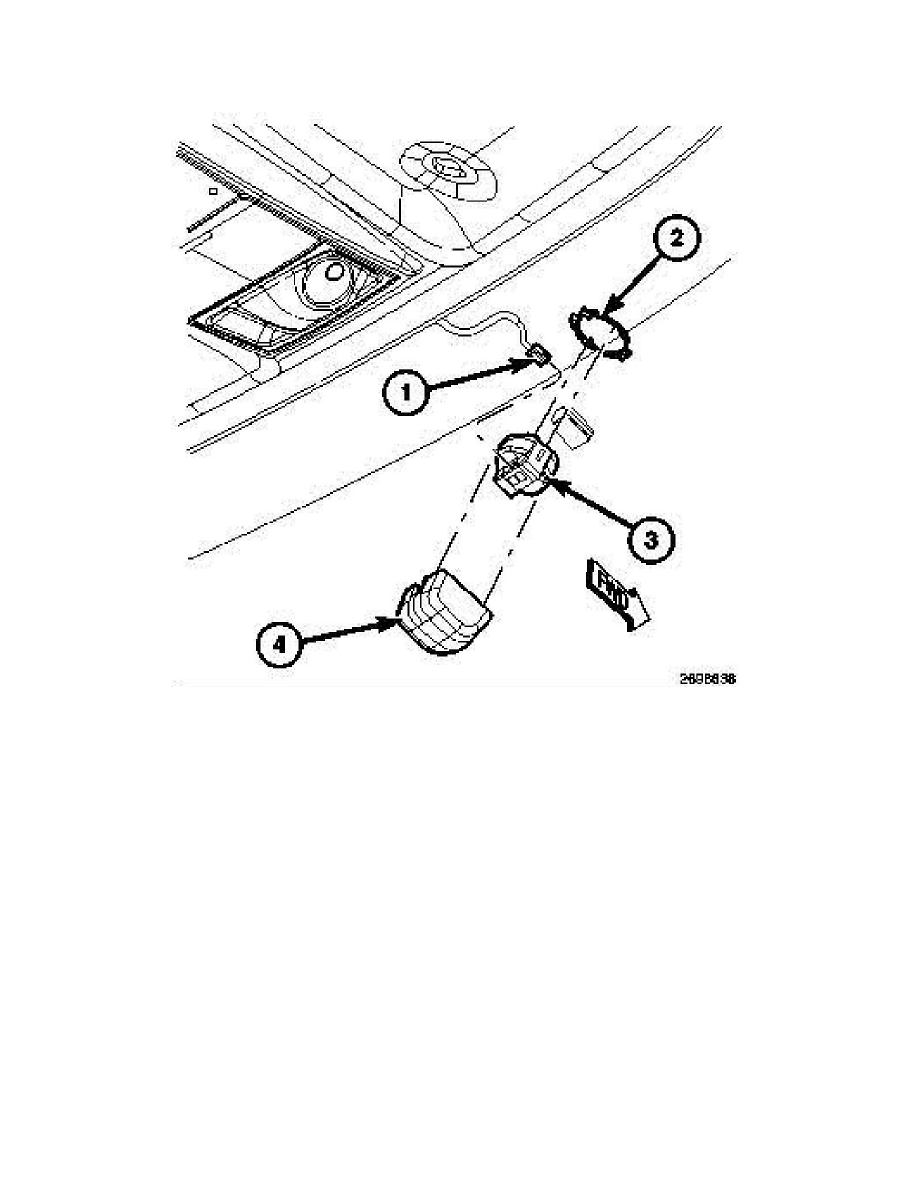
3. To remove the trim cover (4) from over the Light Rain Sensor Module (LRSM) mounting bracket (2) on the inside ofthe windshield near the inside
rear view mirror, place a thumb over the top of the cover on each side of the wiring clearance notch and hook both index fingers on the lower end of
the cover. Push firmly and evenly downward with your thumbs while simultaneously pulling the bottom of the cover away from the glass with your
fingers.
4. Disconnect the wire harness connector (1) from the LRSM (3).
5. Depress one side of the spring steel retaining strap on the LRSM towards the windshield while lightly prying the end of the strap closest to the glass
away from the tab of the mounting bracket on the windshield. Now rotate the loose side of the LRSM away from the glass far enough to disengage
the other side of the strap from the mounting bracket tabs.
6. Remove the LRSM from the mounting bracket.
INSTALLATION
CAUTION: During installation be certain not to touch or contaminate the optical lenses of the Light Rain Sensor Module (LRSM) or the glass through
which the LRSM optics are focused. Contaminated optics will negatively impact LRSM performance.
1. Position the Light Rain Sensor Module (LRSM) (3) to the center of the mounting bracket (2) on the inside of the windshield near the inside rear view
mirror.
2. Depress both sides of the spring steel retaining strap on the LRSM simultaneously until the hooks of the strap engage the tabs of the mounting