
Liberty 2WD V6-3.7L (2008)
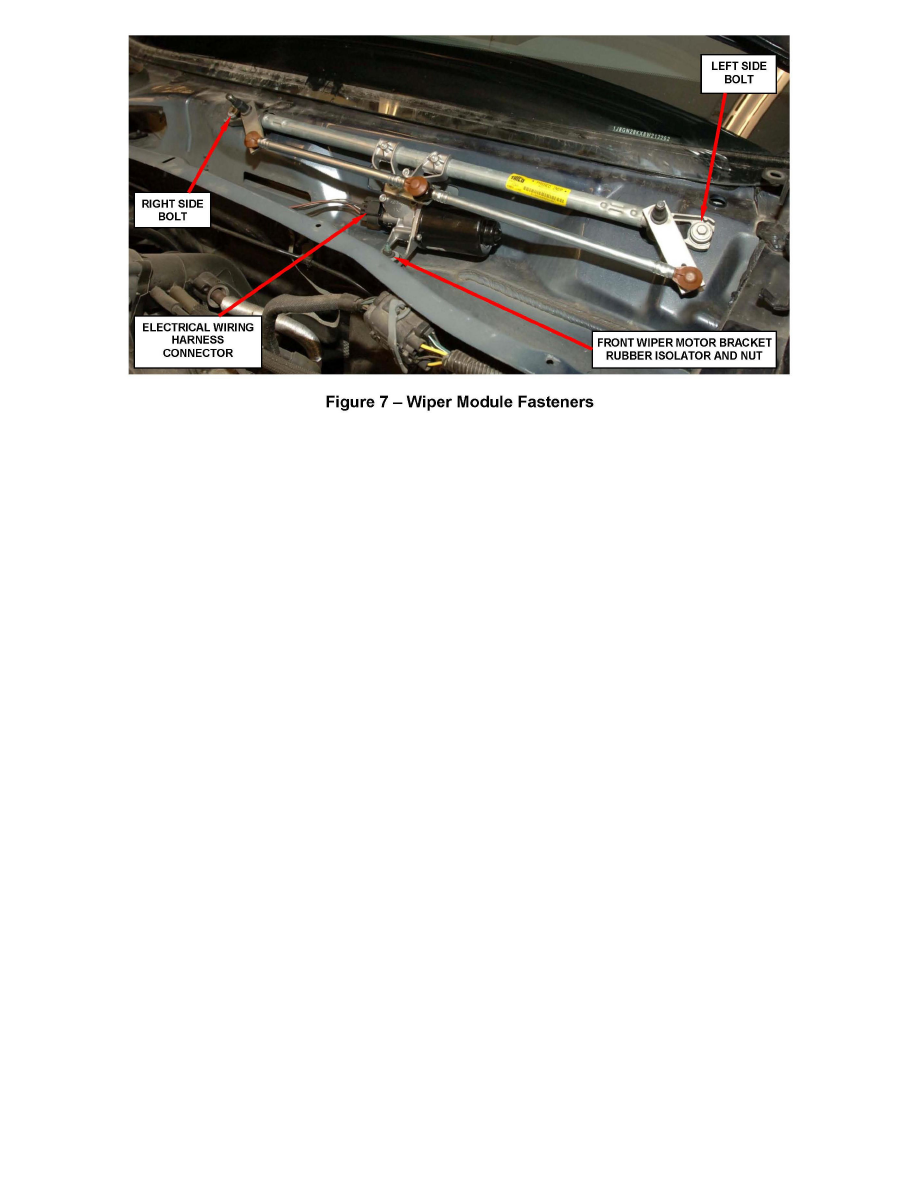
14. Position the front wiper motor in the cowl (Figure 7).
CAUTION:
Be sure that the mounting bracket rubber insulator is over the weld stud located on the bottom of the cowl plenum (Figure 7).
15. Loosely install the two bolts that secure the ends of the front wiper module bracket to the cowl plenum (Figure 7). Tighten the outboard (left side)
screw, followed by the inboard (right side) screw (Figure 7). Tighten the screws to 72 in. lbs. (8 N.m).
16. Install and tighten the nut that secures the front wiper motor bracket rubber insulator to the weld stud on the bottom of the cowl plenum (Figure 7).
Tighten the nut to 67 in. lbs. (7.5 N.m).
17. Connect the electrical wire harness connector for the wiper motor to the motor connector receptacle (Figure 7).
18. Reconnect the battery negative cable.
19. Turn the ignition switch to the "RUN" position, then turn the front wiper switch ON and OFF to cycle the new wiper motor and linkage to their
natural park position.
20. Install the plastic cowl plenum cover/grille panel over the cowl plenum.
21. Install the six (6) plastic cowl plenum cover/grille panel push pins.
22. Install the rubber cowl seal (Figure 2).
23. Install the wiper arms from the wiper pivot shafts. Be sure that the wiper blades are even with the edge of the windshield black-out.
NOTE:
The right and left wiper arms are interchangeable on left hand drive vehicles. Right hand drive vehicles have unique arms for the right and left
side.
24. Install the wiper arm-to-pivot retaining nuts. Tighten the nuts to 18 ft. lbs. (24 N.m).
25. Install wiper arm-to-pivot retaining nut plastic covers (Figure 1).
26. Verify proper wiper operation.