
Liberty 4WD V6-3.7L (2009)
Hose/Line HVAC: Service and Repair
A/C Liquid Line - Removal
LHD MODEL
WARNING: Refer to the applicable warnings and cautions for this system before performing the following operation See: Service
Precautions/Warning and See: Service Precautions/Caution . Failure to follow these instructions may result in possible serious or
fatal injury.
1. Disconnect and isolate the negative battery cable.
2. Recover the refrigerant from the refrigerant systemSee: Service and Repair/Refrigerant System Recovery.
3. Remove the air cleaner housing .See: Engine, Cooling and Exhaust/Engine/Tune-up and Engine Performance Checks/Air Cleaner Housing/Air
Filter Element/Service and Repair/Air Cleaner - Removal
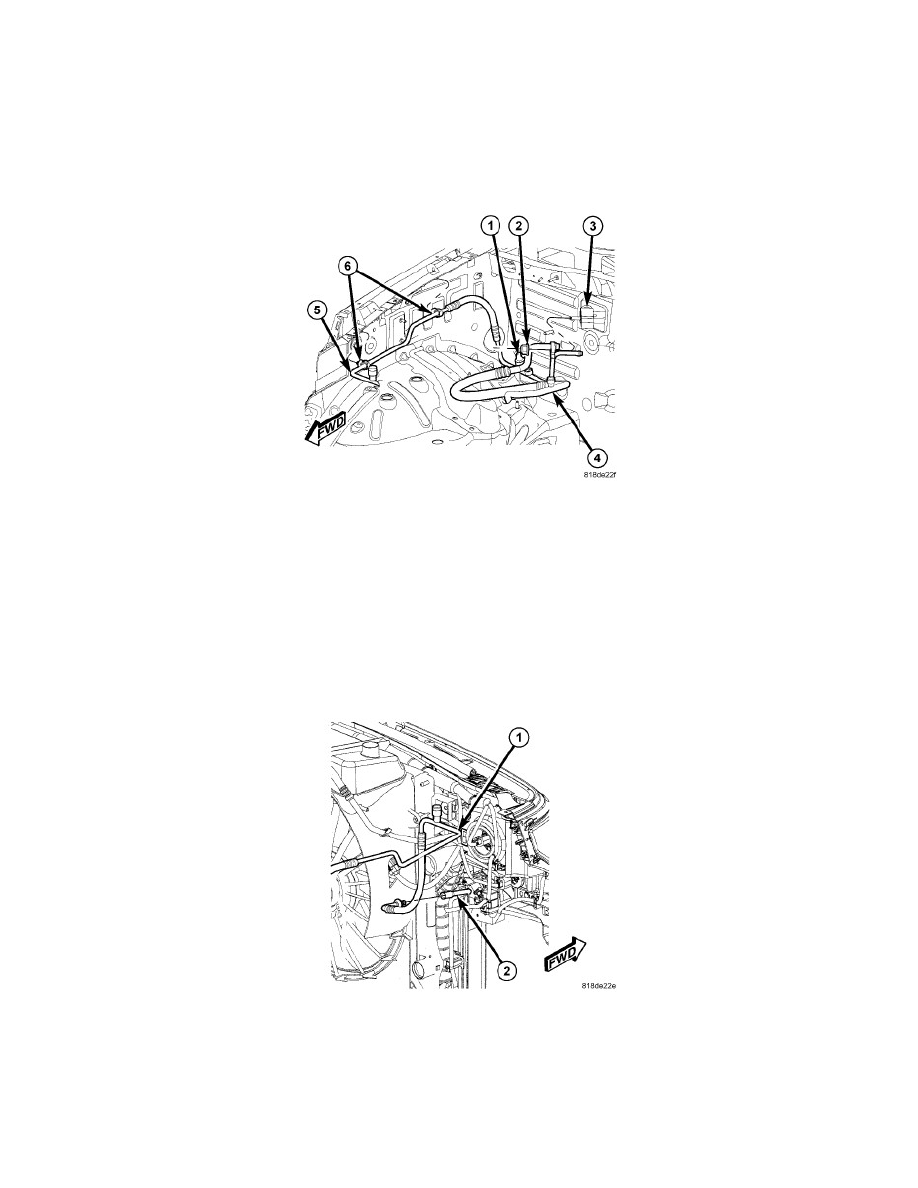
4. Disconnect the wire harness connector from the A/C pressure transducer (1) located on the A/C liquid line (5) near the A/C expansion valve (3)
and if required, remove the A/C pressure transducer from the A/C liquid lineSee: Refrigerant Pressure Sensor / Switch/Service and Repair/A/C
Pressure Transducer - Removal.
5. Remove the nut (2) that secures the A/C suction line (1) and the A/C liquid line (4) to the A/C expansion valve (3) and disconnect the lines from
the valve.
6. Separate the A/C liquid line from the A/C suction line and disengage the A/C liquid line from the two retaining clips (6) located on the right inner
fender.
7. Remove the secondary retaining clip and using the proper A/C line disconnect tool (Special Tool Kit 7193 or equivalent), disconnect the A/C
liquid line (1) from the condenser tube (2) See: Coupler HVAC/Service and Repair/Refrigerant Line Coupler - Removal.
8. Remove the A/C liquid line from the engine compartment and remove and discard the O-ring seals and install plugs in, or tape over the opened
refrigerant line fittings and the condenser and expansion valve ports.