Liberty 4WD V6-3.7L (2009)

Headlamp Switch: Service and Repair
Left Multifunction Switch - Installation
INSTALLATION
WARNING: Disable the Supplemental Restraint System (SRS) before attempting any steering wheel, steering column, airbag, Occupant
Classification System (OCS), seat belt tensioner, impact sensor or instrument panel component diagnosis or service. Disconnect
and isolate the negative battery (ground) cable, then wait two minutes for the airbag system capacitor to discharge before
performing further diagnosis or service. This is the only sure way to disable the SRS. Failure to follow these instructions may
result in accidental airbag deployment and possible serious or fatal injury.
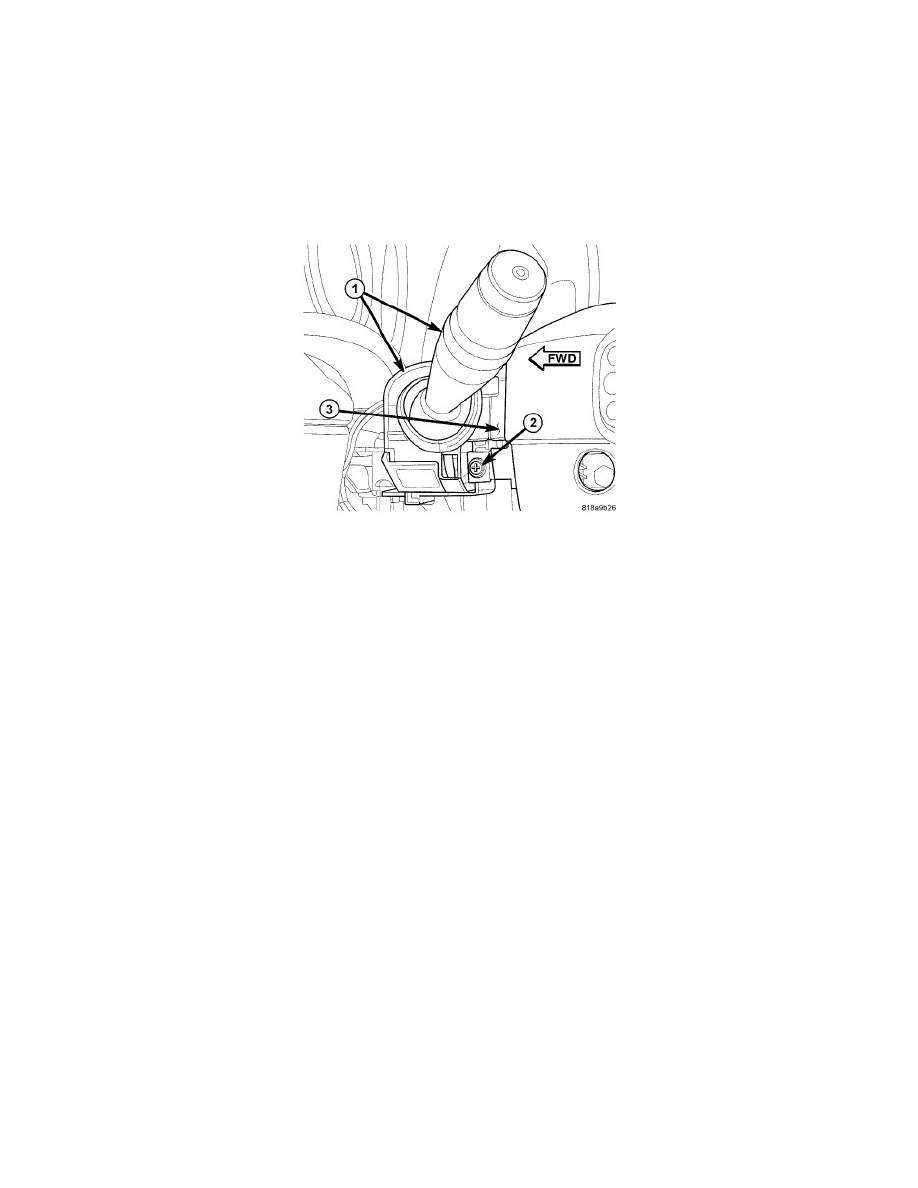
1. Position the left multi-function switch (1) close enough to the mounting bracket (3) integral to the left side of the clockspring to reconnect the
jumper wire harness connector to the connector receptacle on the inboard side of the switch housing.
2. Align the slide tabs on the switch housing with the channel formations integral to the clockspring mounting bracket, then slide the switch into the
bracket until it is firmly seated.
3. Install and tighten the screw (2) that secures the mounting tab on the front of the left multi-function switch to the mounting bracket on the
clockspring. Tighten the screw to 1 Nm (10 in. lbs.).
4. Reconnect the instrument panel wire harness connector to the connector receptacle on the back of the switch housing.
5. Reinstall the upper and lower shrouds onto the steering column. See: Steering and Suspension/Steering/Steering Column/Service and
Repair/Steering Column - Installation.
6. Reconnect the battery negative cable.
