
Liberty Sport 2WD L4-2.4L VIN 1 (2002)
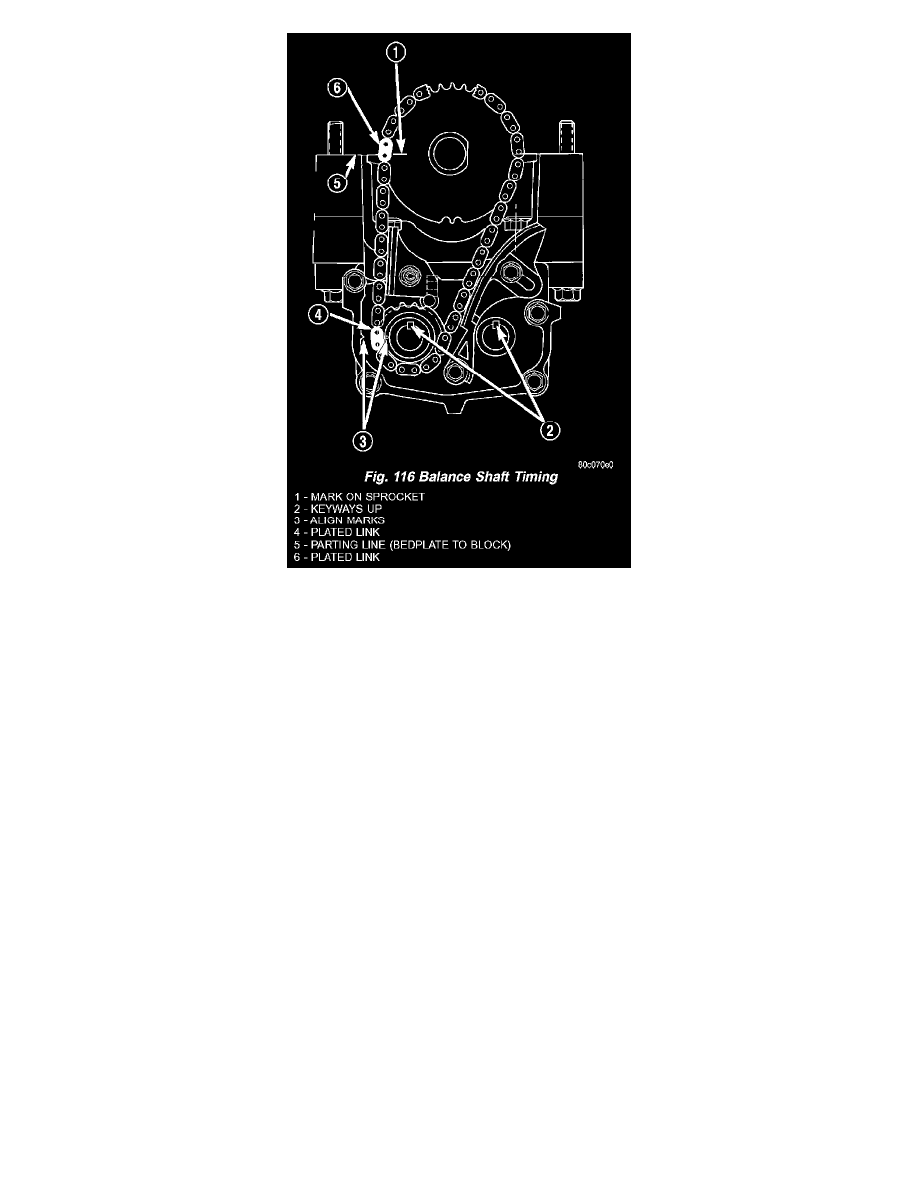
Fig. 116 Balance Shaft Timing
6. Turn crankshaft until number 1 cylinder is at top dead center (TDC). The timing marks on the chain sprocket should line up with the parting line
on the left side of number one main bearing cap. (Fig. 116).
7. Place chain over crankshaft sprocket so that the plated link of the chain is over the number 1 cylinder timing mark on the balance shaft crankshaft
sprocket (Fig. 116).
8. Place balance shaft sprocket into the timing chain (Fig. 116) and align the timing mark on the sprocket (dot) with the (lower) plated link on the
chain.
NOTE: The lower plated link is 8 links from the upper link.
9. With balance shaft keyways pointing up (12 o'clock) slide the balance shaft sprocket onto the nose of the balance shaft. The balance shaft may
have to be pushed in slightly to allow for clearance
NOTE: THE TIMING MARK ON THE SPROCKET, THE (LOWER) NICKEL PLATED LINK, AND THE ARROW ON THE SIDE OF THE
GEAR COVER SHOULD LINE UP WHEN THE BALANCE SHAFTS ARE TIMED CORRECTLY.
10. If the sprockets are timed correctly, install the balance shaft bolts and tighten to 28 Nm (250 in. lbs.). A wood block placed between crankcase and
crankshaft counterbalance will prevent crankshaft and gear rotation.
11. CHAIN TENSIONING:
a. Install chain tensioner loosely assembled.
b. Position guide on double ended stud making sure tab on the guide fits into slot on the gear cover. Install and tighten nut/washer assembly to 12
Nm (105 in. lbs.).
c. Place a shim 1 mm (0.039 in.) thick x 70 mm (2.75 in.) long or between tensioner and chain. Push tensioner and shim up against the chain.