
Liberty Sport 2WD L4-2.4L VIN 1 (2002)
Catalytic Converter: Service and Repair
CATALYTIC CONVERTER
REMOVAL
WARNING: IF TORCHES ARE USED WHEN WORKING ON THE EXHAUST SYSTEM, DO NOT ALLOW THE FLAME NEAR THE
FUEL LINES.
1. Raise and support the vehicle.
2. Saturate the bolts and nuts with heat valve lubricant. Allow 5 minutes for penetration.
3. Remove the bolts from the crossover pipe to the catalytic converter connection.
4. Disconnect oxygen sensor wiring.
5. Loosen and remove the nuts from the clamp that hold the catalytic converter to the exhaust pipe flange connection.
6. Disconnect the oxygen sensors.
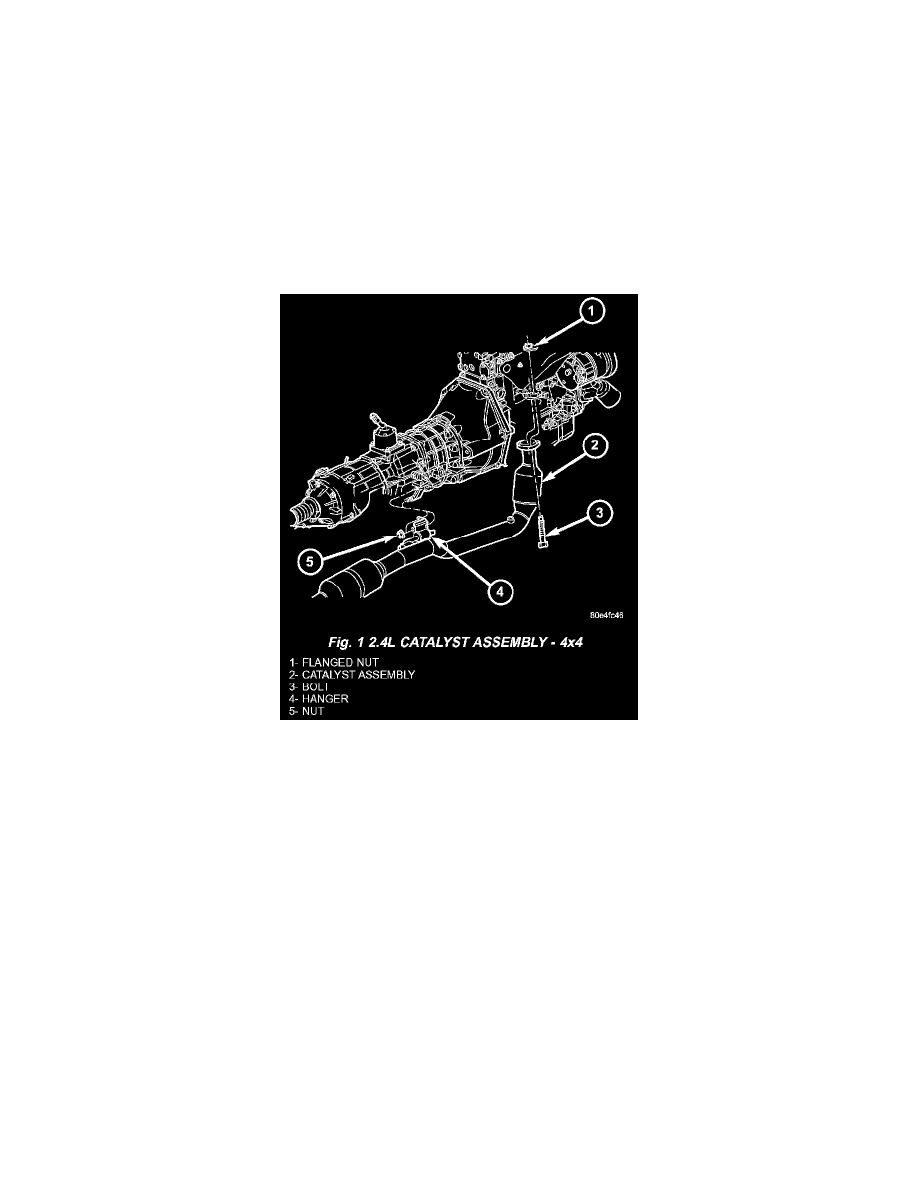
Fig. 1 2.4L Catalyst Assembly - 4x4
7. Remove the two bolts and flanged nuts at the manifold.
8. Lower the catalyst assembly and slide out of the mount at the transmission (if equipped).
9. Remove the catalyst assembly from the vehicle.
INSPECTION
Look at the stainless steel body of the converter, inspect for bulging or other distortion that could be a result of overheating. If the converter has a heat
shield attached make sure it is not bent or loose.
If you suspect internal damage to the catalyst, tapping the bottom of the catalyst with a rubber mallet may indicate a damaged core.
INSTALLATION
1. Position the front pipe onto the exhaust manifold flange connection. Tighten the clamp to 10 Nm (95 in. lbs.) torque.
2. Install the bolts at the muffler and front pipe connection. Tighten the clamp nuts to 27 Nm (19 ft. lbs.) torque.
3. Connect oxygen sensor wiring.
4. Lower the vehicle.
5. Start the engine and inspect for exhaust leaks and exhaust system contact with the body panels. Adjust the alignment, if needed.