
Liberty Sport 4WD L4-2.4L VIN 1 (2002)
Console: Procedures
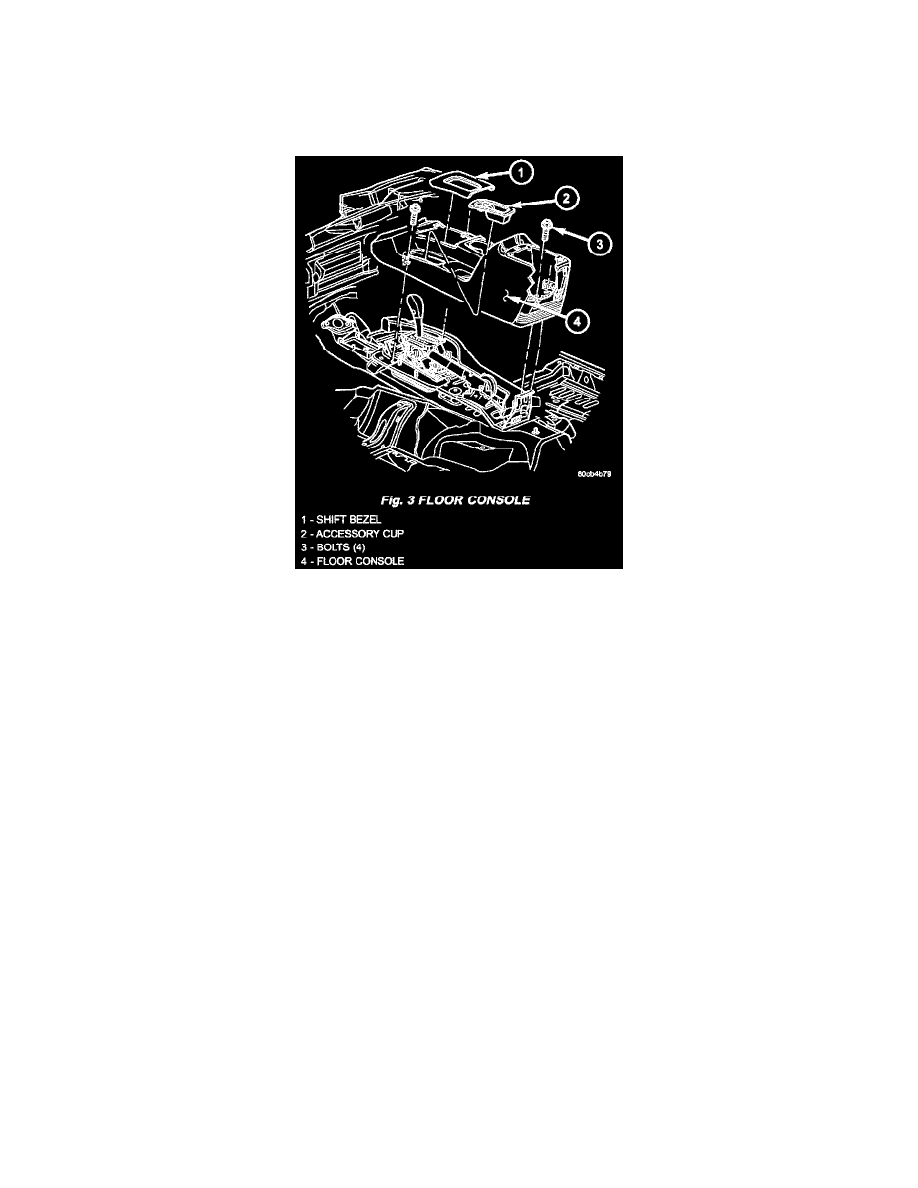
Floor Console
REMOVAL
(1) Remove the shift bezel, if equipped. See: Shift Bezel
(2) Set park brake lever in the up position.
(3) Using a trim stick C-4755 or equivalent, disconnect the manual trans shifter boot, if equipped.
(4) Using a trim stick C-4755 or equivalent, disconnect the transfer case shifter boot, if equipped.
(5) Remove the four bolts. (Fig. 3)
(6) Lift the console at the back and remove.
INSTALLATION
(1) Position the front of the console and lower the rear over the shifter and brake levers.
(2) Install the bolts.
(3) Install the shift boots and seat the retainer clips.
(4) Install the shift bezel.
OverHead Console
REMOVAL
1. Disconnect and isolate the negative battery cable.
2. Remove the overhead console retaining screw, located in the front of console near the windshield.
3. Using your fingertips, grasp the sides of the overhead console and pull straight down evenly to disengage the two snap clips at the rear of the unit.
4. Lower the overhead console far enough to access the wire harness connectors.
5. Disconnect the control module, courtesy lamps and power sunroof switch electrical connectors, if equipped.
6. Remove the overhead console assembly from the vehicle.
INSTALLATION
1. Position the overhead console in the vehicle and connect the wire harness connectors.
2. Connect the control module, courtesy lamps and power sunroof switch electrical connectors, if equipped.
3. Grasp the sides of the overhead console and push straight up evenly to engage the two snap clips at the rear of the unit.
4. Install the overhead console retaining screw, located in the front of console near the windshield. Torque the screw to 1.2 Nm (10 in. lbs.).
5. Connect the negative battery cable.
Shift Bezel
REMOVAL