
Liberty Sport 4WD L4-2.4L VIN 1 (2002)
Condenser HVAC: Service and Repair
REMOVAL
WARNING: REVIEW THE WARNINGS AND CAUTIONS IN THE FRONT OF THIS SECTION BEFORE PERFORMING THE
FOLLOWING OPERATION.
1. Disconnect and isolate the battery negative cable.
2. Recover the refrigerant from the refrigerant system.
3. Disconnect the discharge line refrigerant line fitting at the condenser inlet. Install plugs in, or tape over all of the opened refrigerant line fittings.
4. Disconnect the liquid line (Left-Hand Drive) or liquid line jumper (Right-Hand Drive) refrigerant line fitting at the condenser outlet. Install plugs
in, or tape over all of the opened refrigerant line fittings.
5. Remove the radiator and the condenser from the vehicle as a unit. Refer to Cooling for the procedures.
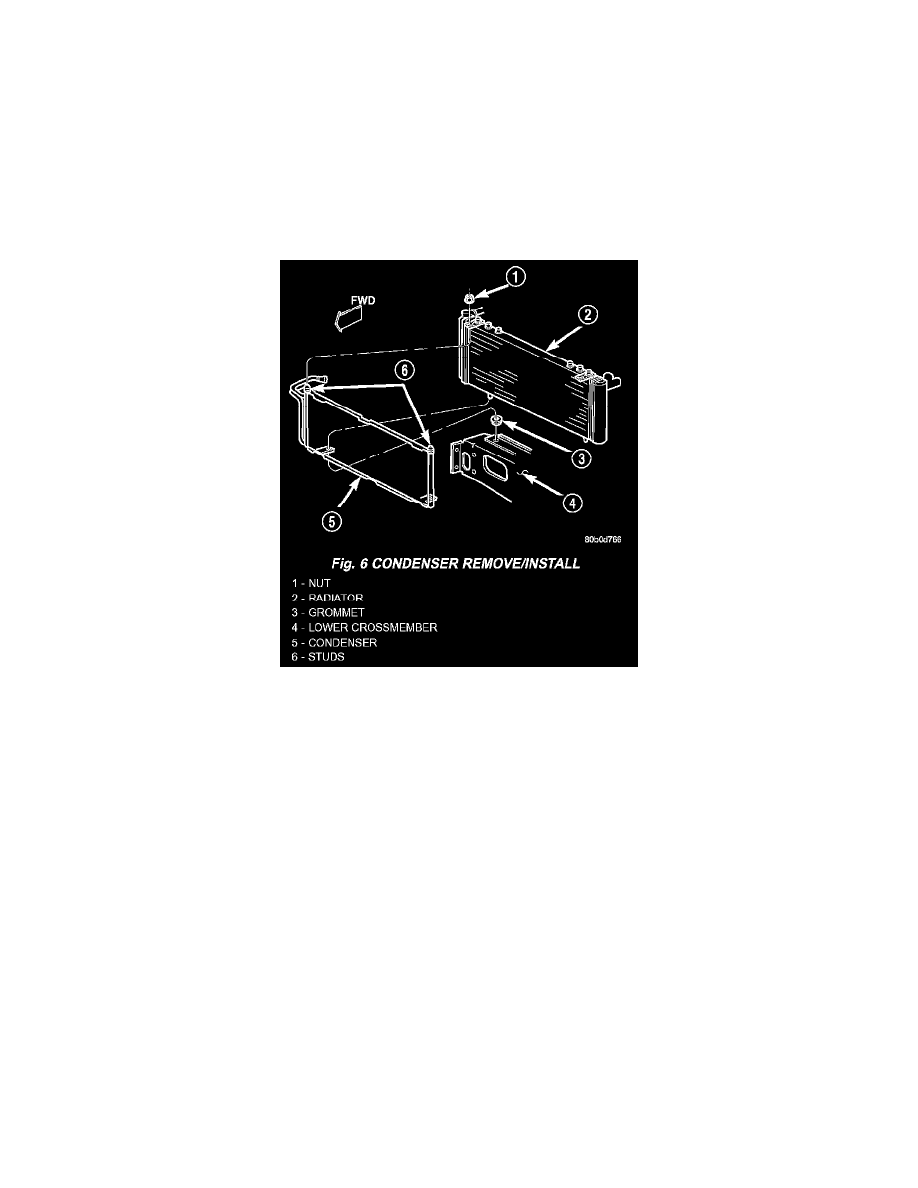
Fig.6 Condenser Remove/Install
6. Remove the two nuts that secure the condenser studs to the upper brackets of the radiator.
7. Slide the condenser down from the radiator far enough for the condenser studs to clear the upper radiator bracket holes, and for the lower
condenser bracket holes to clear the dowel pins on the bottom of the radiator.
8. Remove the condenser from the radiator.
INSTALLATION
WARNING: REVIEW THE WARNINGS AND CAUTIONS IN THE FRONT OF THIS SECTION BEFORE PERFORMING THE
FOLLOWING OPERATION.
1. Install the holes of the condenser lower brackets over the dowel pins on the bottom of the radiator.
2. Slide the condenser upwards until both of the condenser studs are installed through the holes in the radiator upper brackets. Tighten the mounting
nuts to 5.3 Nm (47 in. lbs.).
3. Reinstall the radiator and condenser unit in the vehicle.
4. Remove the tape or plugs from the refrigerant line fittings on the condenser outlet and the liquid line (Left-Hand Drive) or the liquid line jumper
(Right-Hand Drive). Install the liquid line or the liquid line jumper to the condenser outlet.
5. Remove the tape or plugs from the refrigerant line fittings on the condenser inlet and the discharge line. Connect the discharge line to the
condenser inlet.
6. Connect the battery negative cable.
7. Evacuate the refrigerant system.
8. Charge the refrigerant system.
NOTE: If the condenser is replaced, add 30 milliliters (1 fluid ounce) of refrigerant oil to the refrigerant system. Use only refrigerant oil of the
type recommended for the compressor in the vehicle.