
Patriot 2WD L4-2.0L (2008)
6. Remove the instrument panel top coverSee: Body and Frame/Interior Moulding / Trim/Dashboard / Instrument Panel/Service and
Repair/Instrument Panel Cover - Removal.
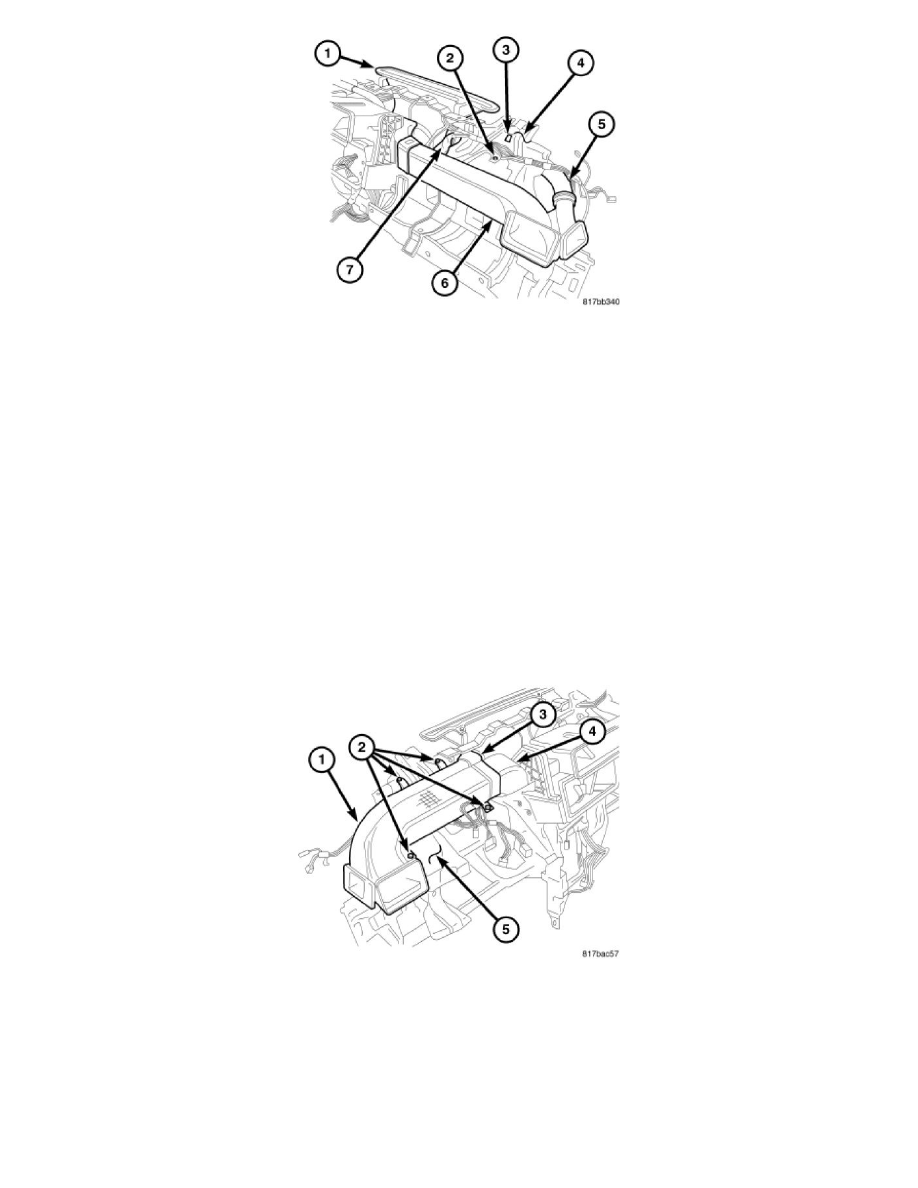
7. Remove the defroster duct (1) See: Defroster Ducts - Removal.
8. Remove the passenger side demister hose (7).
9. Remove the passenger side instrument panel duct (6)See: Instrument Panel Ducts - Removal.
10. Disengage the push-pin type fastener (2) that secures the passenger side demister duct (5) to the instrument panel support (4).
11. Disengage the demister duct retaining tab (3) from the instrument panel support and remove the passenger side demister duct through the defroster
duct opening.
Instrument Panel Demister Ducts - Installation
INSTALLATION
NOTE: Illustrations shown with instrument panel removed from vehicle for clarity.
NOTE: LHD model shown in illustrations. RHD model similar.
DRIVER SIDE DUCT
NOTE: The driver side demister duct is serviced only as an assembly with the driver side instrument panel duct.
1. Position the driver side instrument panel duct and demister duct assembly (1) onto the top of the instrument panel support (5).
2. Connect the driver side instrument panel duct to the center duct (4). Make sure the ducts are fully engaged to each other.
3. Connect the driver side demister hose (3) to the demister duct. Make sure the hose is fully engaged to the defroster and demister duct.
4. Install the four screws (2) that secure driver side instrument panel duct and demister duct assembly to the instrument panel support. Tighten the
screws to 2.2 Nm (20 in. lbs.).
5. Install the instrument panel top cover See: Body and Frame/Interior Moulding / Trim/Dashboard / Instrument Panel/Service and Repair/Instrument
Panel Cover - Installation.
PASSENGER SIDE DUCT