Patriot 2WD L4-2.4L (2009)

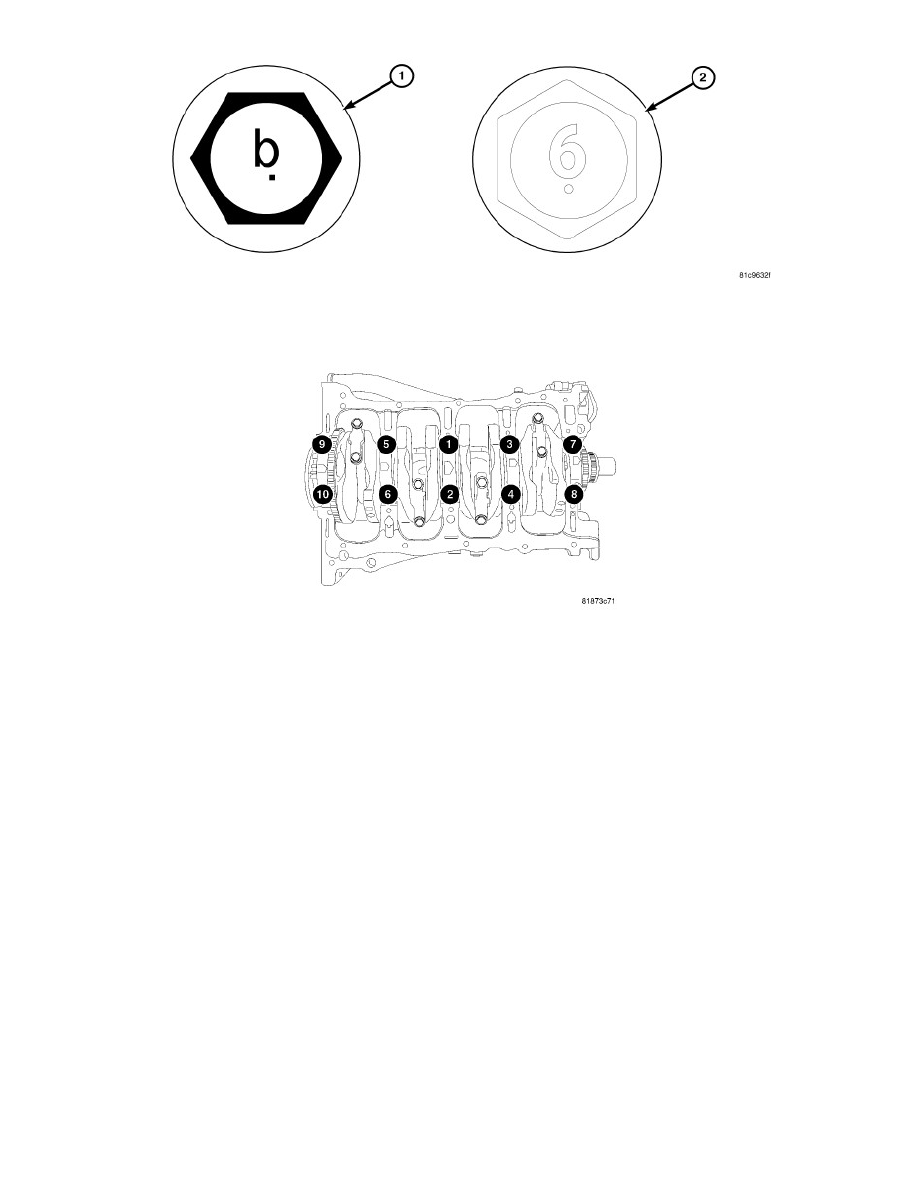
14. If your bolt heads look like this (1,2), go to step 15. If your bolt heads do not look like this (1,2), go to step 16.
CAUTION: Before tightening bolts, you must identify the bolt head to obtain the correct torque value. Failure to identify the bolts correctly,
could result in improperly tightened bolts which could result in engine damage.
15. Tighten bolts using a three step method, in the sequence shown.
-
Tighten bolts to 15 Nm (11 ft. lbs.)
-
Tighten bolts to 27 Nm (20 ft. lbs.)
-
Rotate an additional 45°.
16. Tighten bolts using a three step method, in the sequence shown.
-
Tighten bolts to 15 Nm (11 ft. lbs.)
-
Tighten bolts to 45 Nm (33 ft. lbs.)
-
Rotate an additional 45°.
17. Remove wedge tool used to hold crankshaft.
18. Check the crankshaft turning torque, it should not exceed 5.6 Nm (50 in. lbs.).
19. Check crankshaft end play See: Procedures.
20. Install connecting rod bearings and caps. Do Not Reuse Connecting Rod Bolts. Tighten connecting rod bolts to 20 Nm + 90° (15 ft. lbs.) + 90°
See: Connecting Rod/Service and Repair/Removal and Replacement/Piston and Connecting Rod - Installation.
21. Install the ladder frame assemblySee: Service and Repair/Removal and Replacement/Ladder Frame - Installation.
22. Install the balance shaft module See: Engine Lubrication/Oil Pump/Service and Repair/Removal and Replacement
