
Patriot 4WD L4-2.4L (2009)
Hose/Line HVAC: Service and Repair
A/C Discharge Line - Removal
REMOVAL
WARNING: Review safety precautions and warnings before performing this procedure See: Heating and Air Conditioning/Service
Precautions/Warning and See: Heating and Air Conditioning/Service Precautions/Caution . Failure to follow these instructions may
result in possible serious or fatal injury.
CAUTION: If replacing the A/C discharge line, be sure to use the discharge line designed for the A/C compressor in the vehicle. If replacing
the 6SEU16 compressor, be sure to use the latest level of A/C discharge line during replacement. Failure to use the correct A/C
discharge line could result in possible discharge line and/or compressor damage.
NOTE: It is not necessary to completely remove the front fascia for A/C discharge line service.
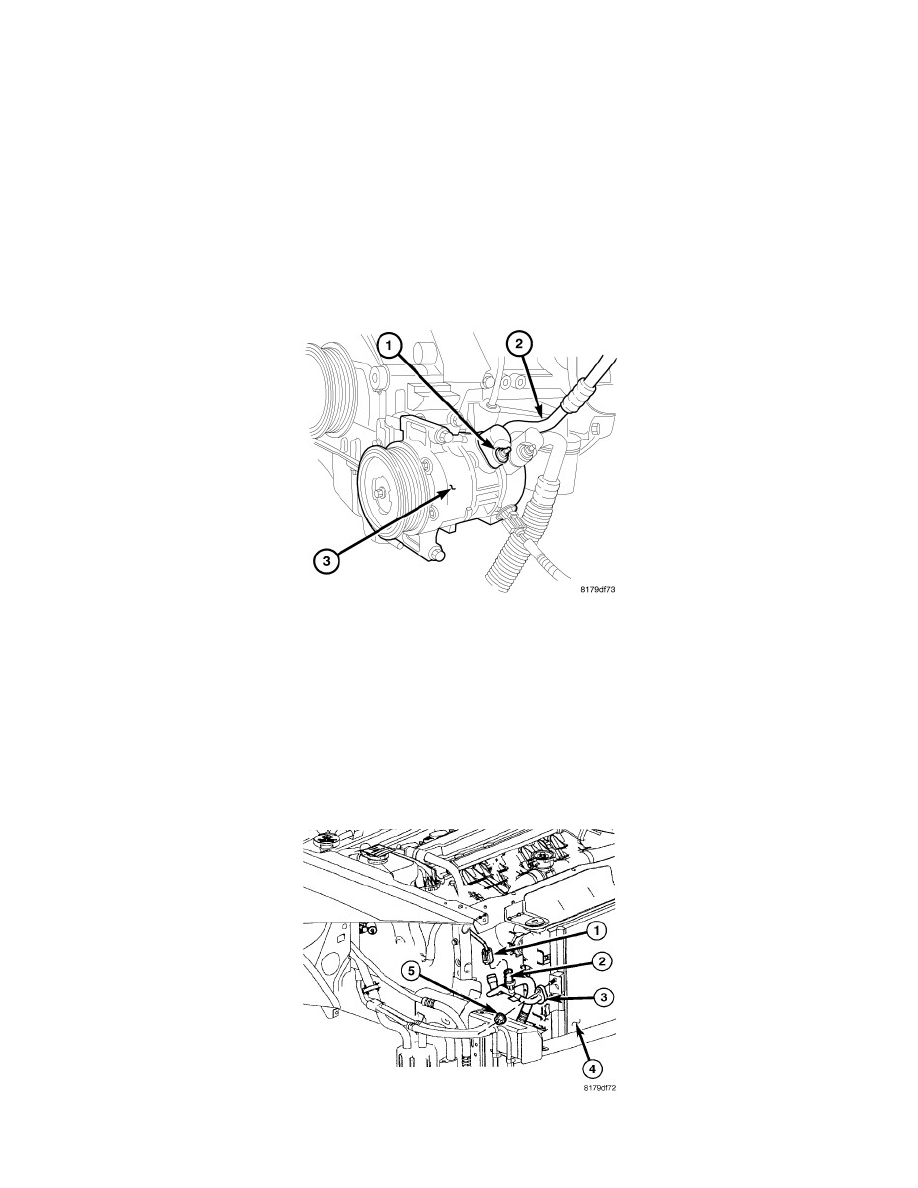
NOTE: 5SE12 A/C compressor shown. 6SEU16 compressor similar.
1. Disconnect and isolate the negative battery cable.
2. Recover the refrigerant from the refrigerant system See: Heating and Air Conditioning/Service and Repair/Refrigerant System Recovery.
3. Raise and support the vehicle.
4. Remove the splash shield from the right side frame rail See: Body and Frame/Fender/Front Fender/Front Fender Liner/Service and Repair/Splash
Shield - Removal.
5. Remove the nut (1) that secures the A/C discharge line (2) to the A/C compressor (3).
6. Disconnect the A/C discharge line from the A/C compressor and remove and discard the O-ring seal and gasket.
7. Install plugs in, or tape over the opened discharge line fitting and the compressor port.
8. Lower the vehicle.
9. Remove the upper radiator closure panel and carefully pull the top of the fascia forward to gain access to the A/C discharge line (3) See: Body and