
Patriot 4WD L4-2.4L (2009)
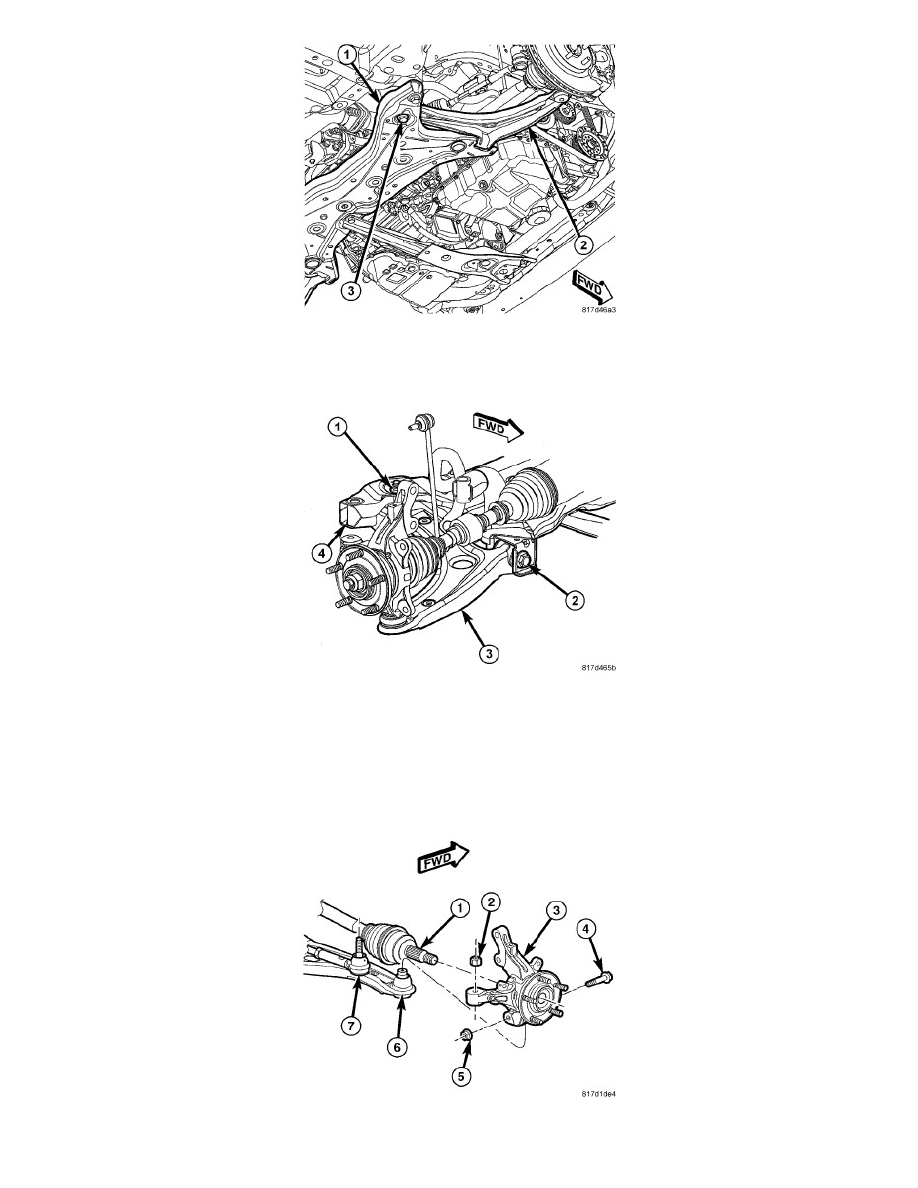
1. Place the lower control arm (2) into the front suspension crossmember (1).
2. Insert the rear bolt (3) up through the crossmember (1) and lower control arm (2).
3. Install, but do not fully tighten, the nut (1) on the rear bolt attaching the lower control arm (3) to the crossmember (4).
4. Install, but do not fully tighten, the front bolt (2) attaching the lower control arm to the crossmember.
5. With no weight or obstruction on the lower control arm, tighten the lower control arm rear mounting bolt nut (1) to 183 Nm (135 ft. lbs.).
6. With no weight or obstruction on the lower control arm, tighten the lower control arm front pivot bolt (2) to the following:
-
135 Nm (100 ft. lbs.) (Vehicles built up to 8/1/08)
-
160 Nm (118 ft. lbs.) (Vehicles built after 8/1/08)
7. Install the ball joint (6) stud into the knuckle (3), aligning the bolt hole in the knuckle boss with the groove formed in the side of the ball joint stud.