
Patriot 4WD L4-2.4L (2009)
Disassembly
DISASSEMBLY
NOTE: The shock assembly must be removed from the vehicle for it to be disassembled and assembled. See: Removal and Replacement/Rear
Shock Absorber/Rear Shock Absorber, Coil-Over - Removal
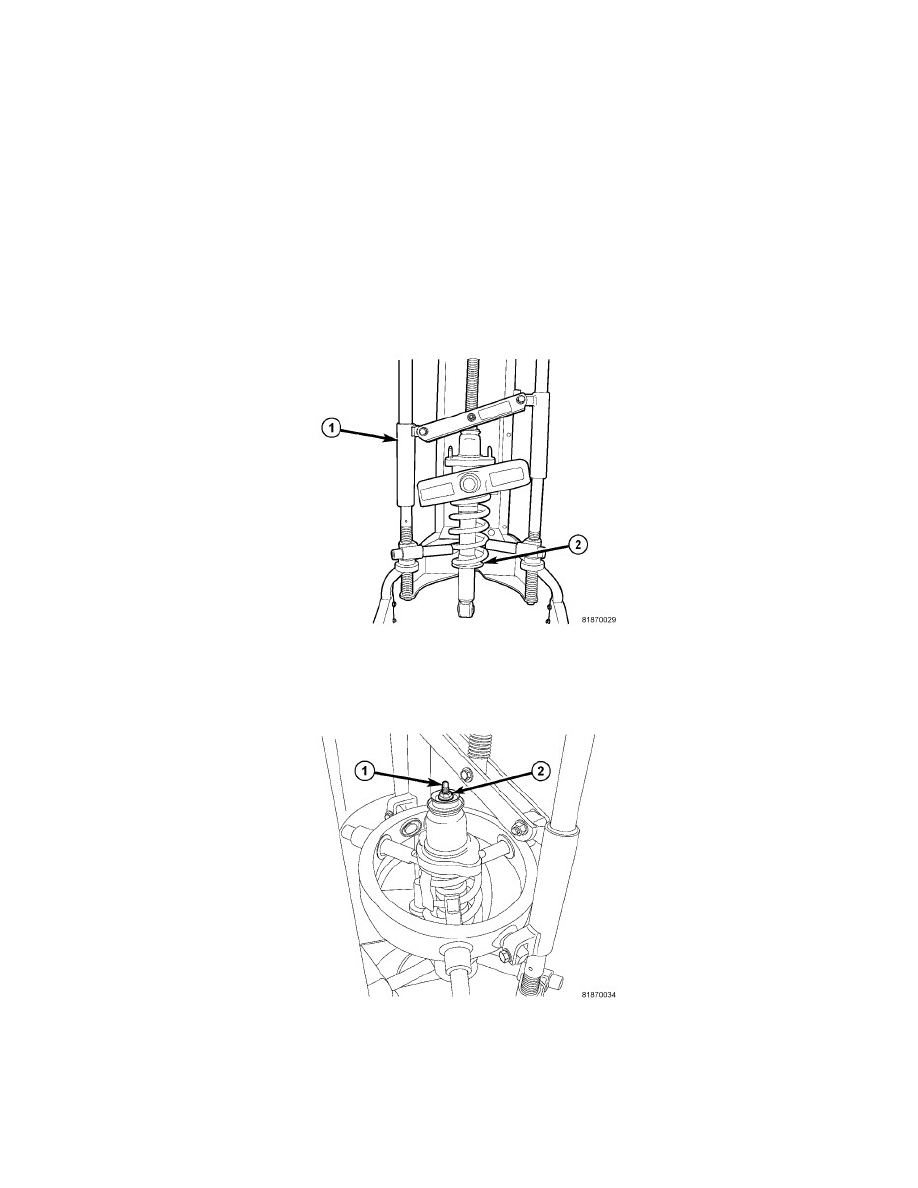
For the disassembly and assembly of the shock assembly, use Strut Spring Compressor, team PSE tool 223-7400, or the equivalent, to compress the coil
spring. Follow the manufacturer's instructions closely.
WARNING: Do not remove the shock rod nut before the coil spring is properly compressed. The coil spring is held under pressure. The coil
spring must be compressed, removing spring tension from the upper mounting bracket, before the shock rod nut is removed.
1. If both shocks are being serviced at the same time, mark both the coil spring and shock assembly according to which side of the vehicle the shock
is being removed from.
2. If equipped, remove the noise abatement cap from top of the shock assembly.
3. Position the shock assembly (2) in the strut spring compressor (1) following the manufacturer's instructions and set the lower and upper hooks of
the compressor on the coil spring.
4. Compress the coil spring until all spring tension is removed from the upper mounting bracket and bushings.
CAUTION: Never use impact or high speed tools to remove the shock rod nut. Damage to the shock internal bearings can occur.
5. Once the spring is sufficiently compressed, install Snap-On(R) Shock Absorber Socket A139, or equivalent, on the end of the shock rod (1). While
holding the shock rod from turning, remove the nut (2) using a wrench. Remove the washer below the nut.